Ashen
GameCube Révolutionary
So yea, I've had a ton of people asking me if I plan on making a worklog for my portables. I didn't really intend to until they were done but meh. I'm bored at the moment so I might as well.
These are my first portables. I have however been lurking here and there >.> a LONG time. Long enough that I remember the OLD Benheck forums and when the master himself published his worklogs of the first VCSp's. So yea, I have pretty much been planing a portable unit for over 10 years now. The Gamecube for over 3 ( check my post history on Benheck and you will see that in early 2008 I made my first post. Asking if it was possible to replace the GC's DD :/ ).
Just so everyone is aware, I hate, hate, hate the "portable naming" thing, I think its SUPER CHEESY (but to each their own). Gamecube Fusion is just to good to pass up though. Firstly because it's a tribute to Metroid (MAKO!!), which is awesome in itself. Secondly because the units will contain Wiikey Fusions for loading games, a project which I was/am (as most people probably already know) heavily involved in and which I am quite proud of because up until this point countless people have tried but been unsuccessful in replacing the GC's DD. Thirdly, I just think it sounds awesome.
Anyway, I plan to produce 2 units to start with. One for myself and one for Emu_kidid. After the first 2 are done another 2 units will be produced using the same design but will contain Wii DVD drive's. I will be putting these up for sale. After that, we'll see how it goes
Gamecube Fusion Features:
5" 4 Screens ( these: http://forums.benheck.com/viewtopic.php?f=8&t=38307 )
Built in non removable memcard for slot A
Built in SD Gecko in slot B for loading homebrew/emulators
Switchable TV out
Wiikey Fusion DD replacement
Four Controller ports w/switchable player 1 between built in and external controllers
Built in rumble via iPhone buzzer motor @ 1.9v
Custom Vacuum Formed Cases
5000mah "hailraizer" Lipo Batterys (still a toss up between 11.1v and 7.4v)
Superslimmed GC motherboards
Modified "0 heat" GC heatsinks. (I say 0 heat because the design of the units is so that the fan intake air is blown directly down the heatsink and out of the unit. No hot air from the fan/heatsink will be blown inside the case)
I'll add more as I think of them, I know thats not everything >
PICS!:
Slimmed Mobo's

Wired up and working:

Slimmed heatsink/fan (its about 3/8" thick), teeny tiny rumble motor beside it:

Prototype Cases:
Front:

Back:
The shoulder buttons will be the only parts of the case frankencased in.

Vac Former Table I Built for around 5$:


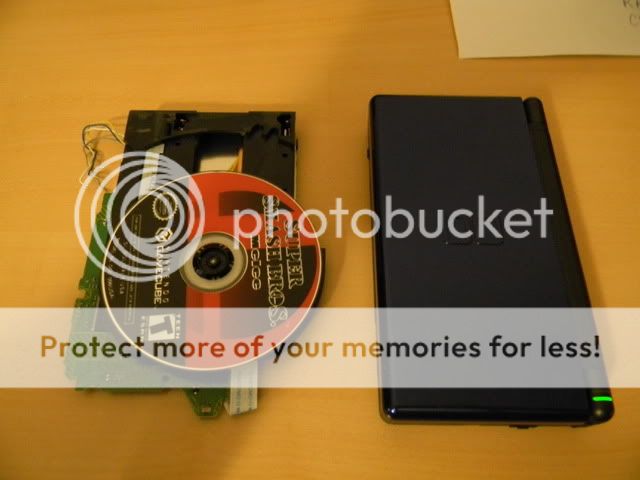
Not part of these units but here is a Slimmed Wii Drive:

Thats really all I have for now, I'm working heavily on getting the cases perfected at this point. I'll keep this first post updated when I have more.
These are my first portables. I have however been lurking here and there >.> a LONG time. Long enough that I remember the OLD Benheck forums and when the master himself published his worklogs of the first VCSp's. So yea, I have pretty much been planing a portable unit for over 10 years now. The Gamecube for over 3 ( check my post history on Benheck and you will see that in early 2008 I made my first post. Asking if it was possible to replace the GC's DD :/ ).
Just so everyone is aware, I hate, hate, hate the "portable naming" thing, I think its SUPER CHEESY (but to each their own). Gamecube Fusion is just to good to pass up though. Firstly because it's a tribute to Metroid (MAKO!!), which is awesome in itself. Secondly because the units will contain Wiikey Fusions for loading games, a project which I was/am (as most people probably already know) heavily involved in and which I am quite proud of because up until this point countless people have tried but been unsuccessful in replacing the GC's DD. Thirdly, I just think it sounds awesome.
Anyway, I plan to produce 2 units to start with. One for myself and one for Emu_kidid. After the first 2 are done another 2 units will be produced using the same design but will contain Wii DVD drive's. I will be putting these up for sale. After that, we'll see how it goes
Gamecube Fusion Features:
5" 4
Built in non removable memcard for slot A
Built in SD Gecko in slot B for loading homebrew/emulators
Switchable TV out
Wiikey Fusion DD replacement
Four Controller ports w/switchable player 1 between built in and external controllers
Built in rumble via iPhone buzzer motor @ 1.9v
Custom Vacuum Formed Cases
5000mah "hailraizer" Lipo Batterys (still a toss up between 11.1v and 7.4v)
Superslimmed GC motherboards
Modified "0 heat" GC heatsinks. (I say 0 heat because the design of the units is so that the fan intake air is blown directly down the heatsink and out of the unit. No hot air from the fan/heatsink will be blown inside the case)
I'll add more as I think of them, I know thats not everything >
PICS!:
Slimmed Mobo's

Wired up and working:

Slimmed heatsink/fan (its about 3/8" thick), teeny tiny rumble motor beside it:

Prototype Cases:
Front:

Back:
The shoulder buttons will be the only parts of the case frankencased in.

Vac Former Table I Built for around 5$:


Not part of these units but here is a Slimmed Wii Drive:

Thats really all I have for now, I'm working heavily on getting the cases perfected at this point. I'll keep this first post updated when I have more.


