My 3rd n64 portable WIP

gman

Well-Known Member
I'm just about to finish my 2nd n64p but I'm so excited that I couldn't wait any longer to start this one. I'm going for a small portable this time. I'm debating whether I should go for the world's smallest or a good but smaller n64p.

I have been planning this for a while now but I just started this today. All I did was cut the board up and rewire everything. I'm going to be doing ashen's alternative to rcp wiring technique. Once I do the technique, the dimensions of my board will be about 5 x 3.75 inches. Although, I'm going to try to get the height down to 3.5 inches, which shouldn't be difficult at all. I'm planning on using a 3.5 inch screen.

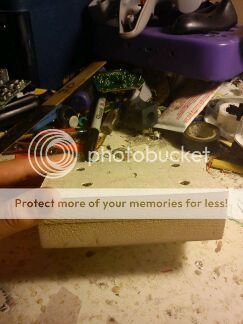
Here's my board with all the ports wired to it.
IMG_20120726_202600.jpg


IMG_20120726_202615.jpg


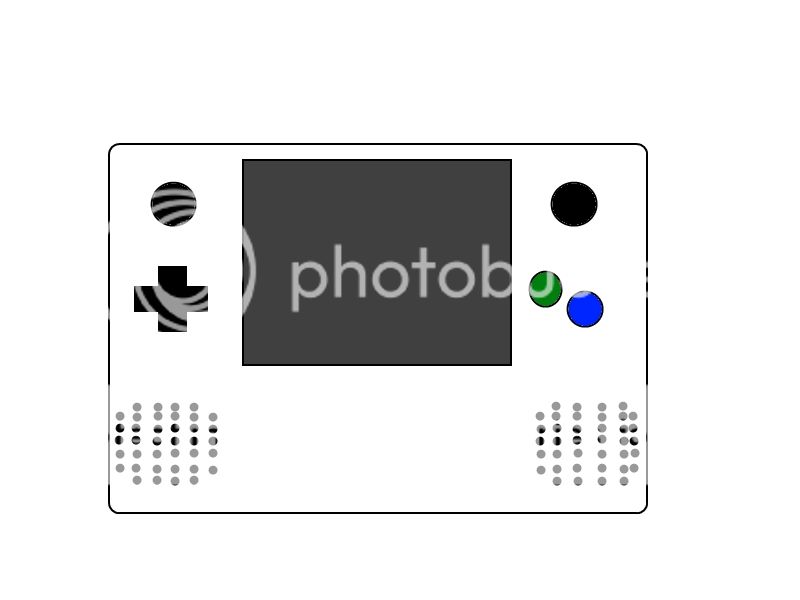
Plans for the case- The case below is 3.75 inches in height, but I'm hoping I'll change it to 3.5 inches. The cartridge slot will stick out the back at a 90 degree angle (I might change this). I will be using 4-6 2600 mah cylindrical batteries from battery space. I know I can fit 6, but it might make it too heavy, but it would have a good battery life with about 8 amps. The thickness will be around 1.5 inches. I'm going to be using 3ds sliders for the analog stick. I was working on a mod that made the psp analog stick digital and it would work with the c stick, but it wasn't working like I wanted it to. I wired it up to four leds for each direction, and sometimes it would work, but sometimes more than 1 led would shine when only 1 was suppose to and other complications like that. The stick has a nice feel, but if can't get it to work flawless, than I'll use either a 4 way tact with a psp nub for the cap, or the 3ds abxy buttons. I'm planning on using a gameboy color dpad and a b buttons.
Front:
n64mini.jpg

Back:
n64miniback.jpg
 
Others have tried to replace the c buttons, and all prefer the original.
 
ProgMetalMan said:
Others have tried to replace the c buttons, prefer the original.
True. But I'm open to trying new options. I'm leaning towards using the 3ds buttons over a 4 way tact.
 
I'm going to be using a new method for casemaking because my vacuum former has trouble forming over corners. I'm going to be making the case using styrene and using a heat gun to bend a strip of plastic around a block of wood and that will be the sides of the case. I will then fiberglass a top and bottom to the sides that were bent by the heat gun and voila, a case! I've decided to use ds abxy buttons for the c buttons. I'll buy a ds case housing from dx and frankencase it into my case.

I was going for the worlds smallest when designing this portable, but I don't think it will be small enough, my dimensions will be just a tiny bit bigger than the current record, but it will still be a very small portable no doubt.

Just for a proof of concept, I used the heat gun to bend a piece of styrene around a block of wood. Heating the plastic was a lot easier than I thought, it only took about 5-10 seconds to heat the plastic enough to bend it and I don't even have a good heat gun!
IMG_20120727_231630.jpg
 
bud said:
That's a familiar looking trim ;) Looks good! :)
The video looks really washed out. I'm thinking I need some sort of filtering cap. I've never wired one before. Do you wire it with the positive side of the cap to the video, and the negative to ground?
 
You need a resistor on the video line. I don't remeber the value, and I think it might change per revision. On the top right corner of the N64 board is a bunch of caps and resistors on all of the output lines, you need a resistor on the video line with a tiny capasitor branching off to ground. I just took the piece I cut off and rewired it.
 
It's really an "experiment on your own" type deal. I've only needed to tinker with the video once or twice and I think I did something different each time.
 
I made my for the case. The is about the same thickness as the case will be so I got to get a good feel of the case. The mold can even fit in my pocket! The dimensions will be 5.5 x 3.75 inches and about 1.5 inches thick.
IMG_20120729_224835.jpg


I'm thinking about relocating the expansion port. I tried it out on a dead board just so I will know that I have the soldering skills to get it done. I wired 15 wires to it to prove to myself that I could do it for real. When I took off the expansion port, I pretty much just ripped it out with pliers because I don't really care about that board. When I do it for real, what should I use to remove the port? I'm thinking a soldering braid should do the trick, but I've never used that before also. What is the shortest I can make the wires? I need them to be long enough so that way it can sit flat ontop of the ram heat sink. I'm using a rev 4 board so it has 2 ram chips.
IMG_20120729_224912.jpg


EDIT: Can I cut where the red line is? I imagine yes since those traces are already cut and there is nothing on the back. I'm asking because I don't want to kill a board for nothing.
cut.jpg
 
I fried my board most likely today :( It stinks because I worked on it almost all day. I bent the board by the cartridge pins, I re-did the cart slot with longer wires, and I relocated the jumper pak. I know it fried when I relocated the jumper pak since I tested it right before I removed the port. I don't think I'm going to be relocating that port for a while now or until I'm confident with my soldering skills again. I don't know where it went wrong because I don't see any shorts or bridged pins. The soldering job looks pretty good. My wires were 2 cm. Oh well.... time to buy me another n64!

IMG_20120731_002338.jpg

IMG_20120731_002356.jpg
 
I'm fighting the same thing, 2 cm may be too much. From what I've read, the wire length could be a problem when it comes to relocating a jumper pack. My wiring was about the same length as yours. And mine was also working perfectly fine up until I started messing with the jumper pack. I'm re-soldering, and shortening them now, if it works I'll let you know..
 
Sorry If I've misread something, but why are you even bothering with a jumper pack relocation? Since the jumper pack can be slimmed down so much, it's way easier to leave it on and plan space for it where is stick up. Also, are you going to ramswap to be able to play expansion pack games?
 
FierceDeity said:
Sorry If I've misread something, but why are you even bothering with a pack ? Since the jumper pack can be slimmed down so much, it's way easier to leave it on and plan space for it where is stick up. Also, are you going to ramswap to be able to play expansion pack games?
I want the cartridge slot to stick out at a 90 degree angle instead of sticking out the back. I want to put the cartridge slot where the expansion slot goes. I think on my next board, I'm going to do a 180 degree bend and have the cartridge slot above the bended pins. I would have done that on this board, but the back of the slot would touch the rcp and a little bit of the front would stick out the case. Now that I don't feel confident with relocating the expansion slot, I'd rather have it stick out the case a tiny bit than kill another board.

I'm not going to ram swap. You can play 90% of the n64 games with just a jumper pak and frankly, I don't even own a game that requires the expansion pak.
 
-pervert said:
Don't consider this board dead. Try redo the expansion relocation and see if =)
dude.. I just re-did the wires and it booted. I swear it did. It isn't booting any more now. Maybe I'll re wire it one more time. 3rd times the charm!
 
Actually, 4th time is the charm! WOO HOO! I shortened the wires a tiny bit and now it boots every time! I plugged in a controller and I tested the gameplay and it didn't crash too. I'm soo excited!

Now I'm going to butter these pins in epoxy before wires start falling off.
IMG_20120801_010135.jpg
 
Back
Top