shingfunger
Newb
My little sister asked for a Nintendo 64 for Christmas. I decided just giving her my old one was no fun; so I wanted to build it into a toaster, repackage it in the toaster box, and trick her into thinking she was getting a kitchen appliance. A little bit of research later, I found vomitsaw’s super nintoaster, and this closely mimics that.
The pictures are small for the forum and you can click on the links for larger versions.
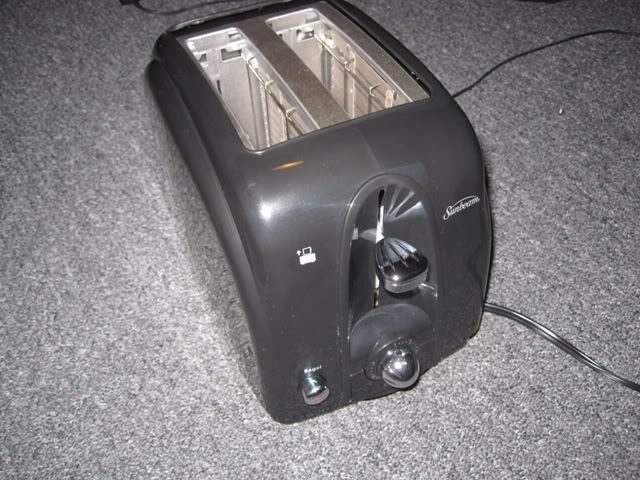
This is the toaster I’m using.
http://i45.photobucket.com/albums/f92/shingfunger/nintoaster64/1.jpg
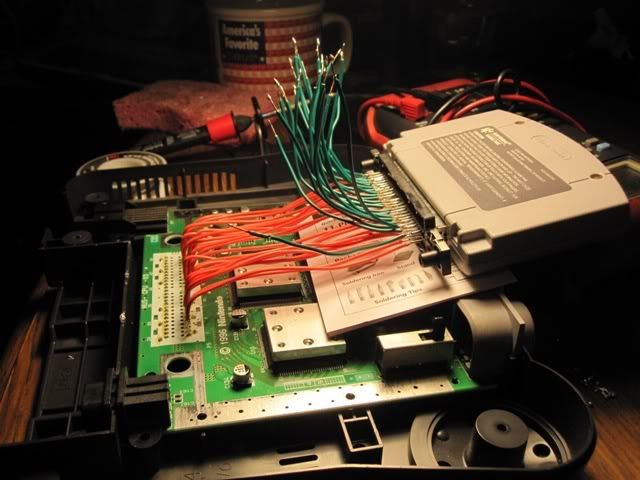
This is my second attempt at relocating the cartridge slot. Something went wrong the first time, but it gave me a junk motherboard to use.
http://i45.photobucket.com/albums/f92/shingfunger/nintoaster64/2.jpg
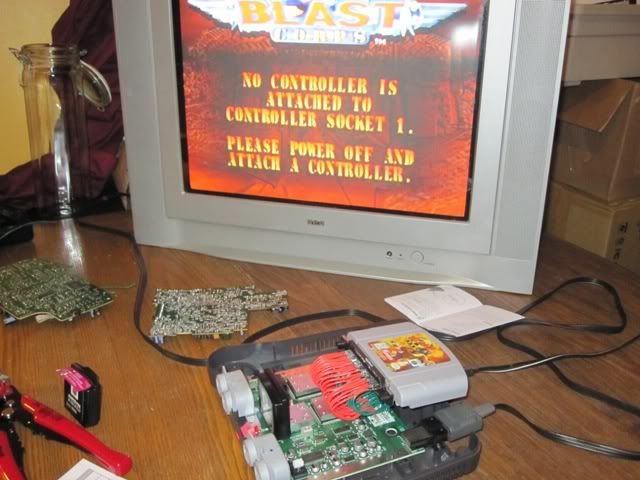
I was very happy when it worked.
http://i45.photobucket.com/albums/f92/shingfunger/nintoaster64/3.jpg
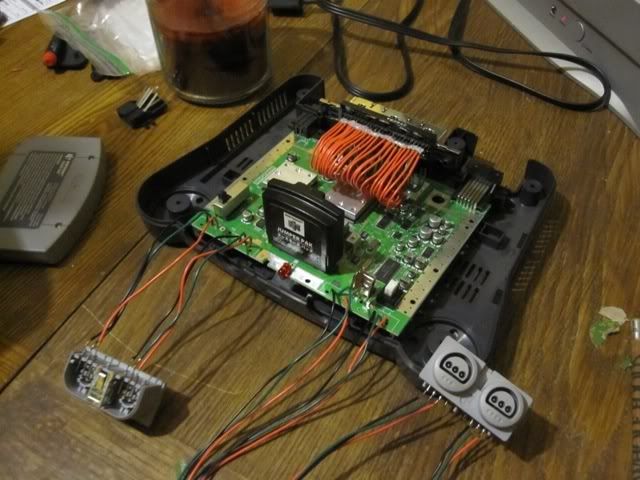
I relocated the controller ports. The wires for player 1/2 are much shorter than 3/4 because of where they need to run through the toaster.
http://i45.photobucket.com/albums/f92/shingfunger/nintoaster64/4.jpg
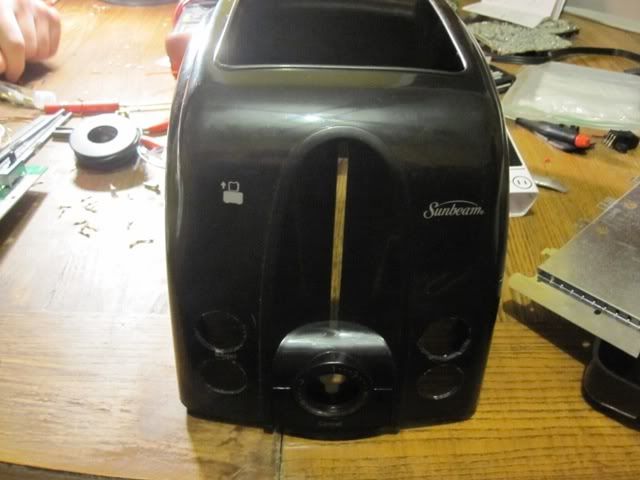
This is the front of the toaster where I cut holes for the controller ports.
http://i45.photobucket.com/albums/f92/shingfunger/nintoaster64/5.jpg
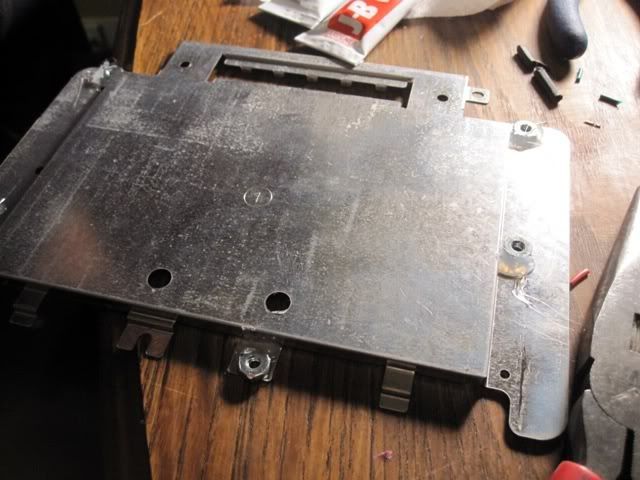
This metal piece was under the mobo in the n64 case. I’m going to use it for mounting. I had to hot glue then cold steel some nuts on the bottom so that I could bolt the motherboard down.
http://i45.photobucket.com/albums/f92/shingfunger/nintoaster64/6.jpg
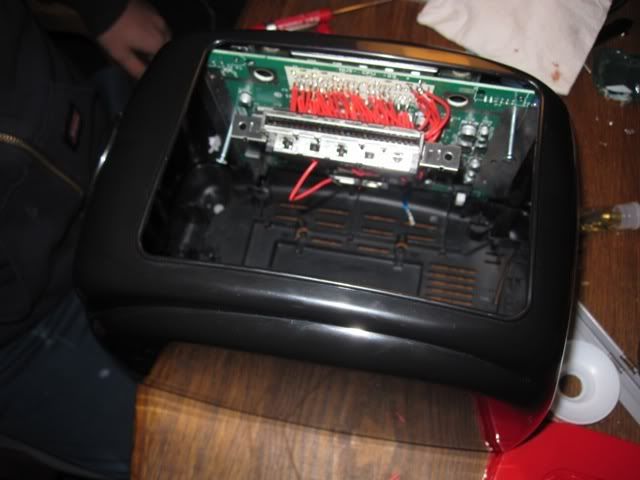
After epoxying that metal piece to the toaster, I attached my junk motherboard to give an idea of it will fit inside. For the record I didn’t need to trim the motherboard at all to fit inside this, and the toaster is not a large one.
http://i45.photobucket.com/albums/f92/shingfunger/nintoaster64/7.jpg
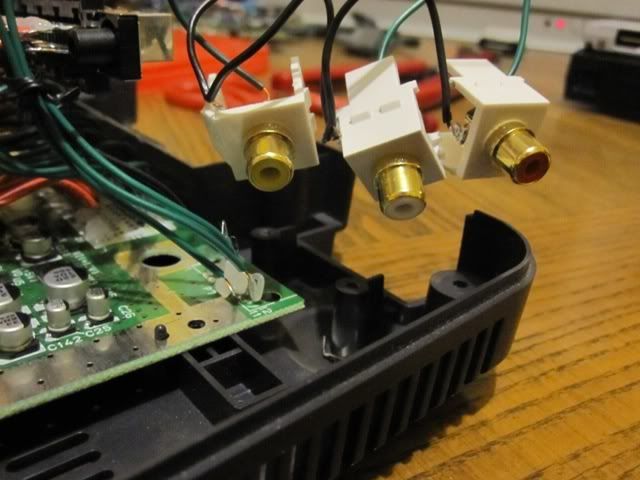
I will be using RCA ports instead of the stock Nintendo a/v cables.
http://i45.photobucket.com/albums/f92/shingfunger/nintoaster64/9.jpg
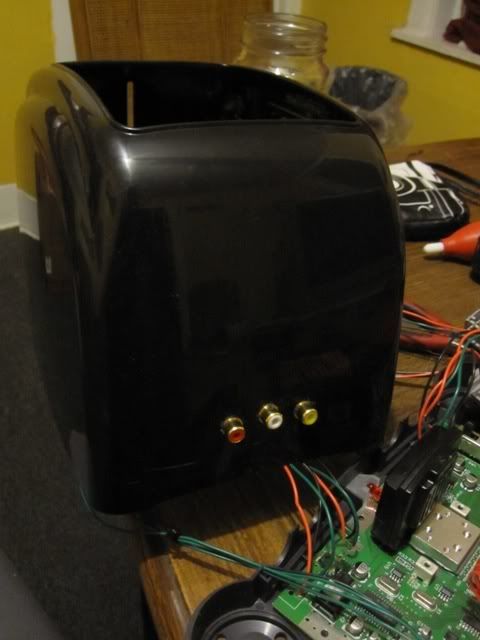
This is the back of the toaster and the mounted RCA ports.
http://i45.photobucket.com/albums/f92/shingfunger/nintoaster64/8.jpg
Things left to do:
Figure out how to make the toaster’s lever turn on the system.
Figure out how to mount everything.
Add in those LEDs like vomitsaw’s toasters. They’re such a nice touch.
The pictures are small for the forum and you can click on the links for larger versions.

This is the toaster I’m using.
http://i45.photobucket.com/albums/f92/shingfunger/nintoaster64/1.jpg

This is my second attempt at relocating the cartridge slot. Something went wrong the first time, but it gave me a junk motherboard to use.
http://i45.photobucket.com/albums/f92/shingfunger/nintoaster64/2.jpg

I was very happy when it worked.
http://i45.photobucket.com/albums/f92/shingfunger/nintoaster64/3.jpg

I relocated the controller ports. The wires for player 1/2 are much shorter than 3/4 because of where they need to run through the toaster.
http://i45.photobucket.com/albums/f92/shingfunger/nintoaster64/4.jpg

This is the front of the toaster where I cut holes for the controller ports.
http://i45.photobucket.com/albums/f92/shingfunger/nintoaster64/5.jpg

This metal piece was under the mobo in the n64 case. I’m going to use it for mounting. I had to hot glue then cold steel some nuts on the bottom so that I could bolt the motherboard down.
http://i45.photobucket.com/albums/f92/shingfunger/nintoaster64/6.jpg

After epoxying that metal piece to the toaster, I attached my junk motherboard to give an idea of it will fit inside. For the record I didn’t need to trim the motherboard at all to fit inside this, and the toaster is not a large one.
http://i45.photobucket.com/albums/f92/shingfunger/nintoaster64/7.jpg

I will be using RCA ports instead of the stock Nintendo a/v cables.
http://i45.photobucket.com/albums/f92/shingfunger/nintoaster64/9.jpg

This is the back of the toaster and the mounted RCA ports.
http://i45.photobucket.com/albums/f92/shingfunger/nintoaster64/8.jpg
Things left to do:
Figure out how to make the toaster’s lever turn on the system.
Figure out how to mount everything.
Add in those LEDs like vomitsaw’s toasters. They’re such a nice touch.

