Yeah, I wondered how to do this a while back. And now I has a guide to do this yourself! 
First of all, I know what you're thinking: "Why?" Well, some of us want a cool testing monitor for our systems like Thursty, that don't involve our (or out parent's) expensive TVs. Easy solution! If you own one of those Xbox/PS2 Zenith screens, you can have an easy testing monitor without having to even take it apart!
If you bought the Xbox/PS2 version, it came with a cable that you plug into the AV port on your system, an xbox and a ps2 av cord. Depending on which cable you use, the color of your wires will be different.
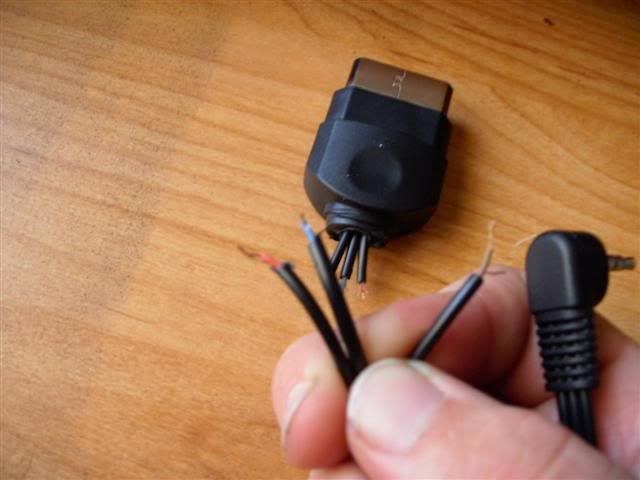
Step 1. Cut the console end of your cable off. Seperate the three thick wires, and strip them down like so. Remeber to twist all those tiny strands of wire together. This cord is the Xbox version. If you are using a PS2 AV cable, the colors will be yellow, red and white.
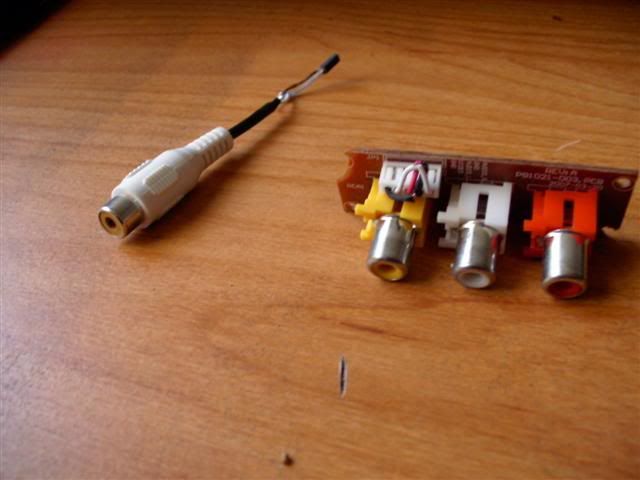
Step 2. You will now need some type of rca jacks. Pictured are some RCA jacks that have been laid out on a pcb (which was scavenged from a broken lcd) and the standard cable version. Either way, prepare your jacks by stripping their wires back and tinning their spots. Also, tin the xbox or ps2 av cable wires.
Step 3. You will now solder your Xbox cable to your RCA jacks. Make sure you don't mix them up, or else it obviously won't work. This is the diagram to follow. If for some reason the pic ever goes away, it's like this: Tan is for composite video, red is for right audio, and blue is for left audio.
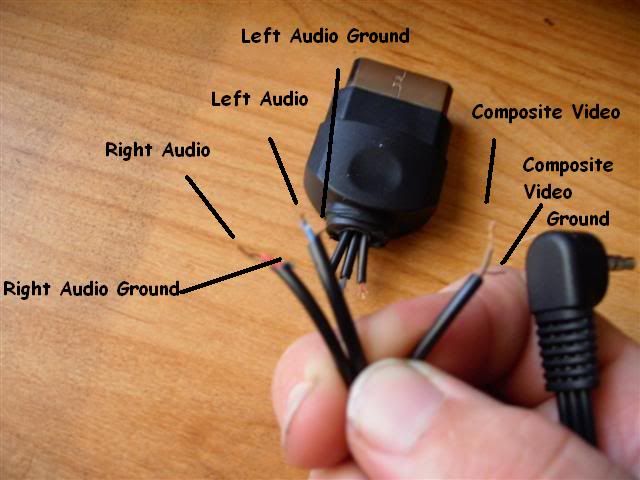
If you are using the PS2 cable, you will have Yellow, Red and White wires instead. You will wire yellow to composite video, red to right audio, and white to left audio. When soldering this, remember to solder the ground wires (all those tiny ones that you twisted together earlier) to the ground wires on the rca jacks.
Step 4. You should have a cable that looks like this:
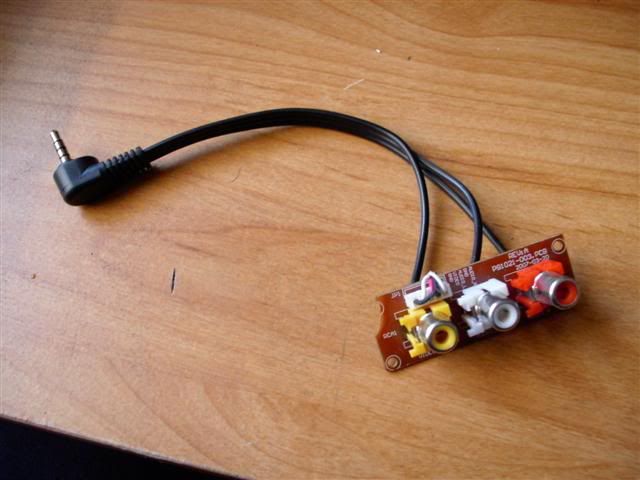
Or like this one if you used rca cords, just with an extra one for video:

Remember to insulate your wires (I use hot glue). If you want to take it a step further, you can buy a cheapie project box at ratshack. Before you glue anything down or close anything up though, try testing it with a system.
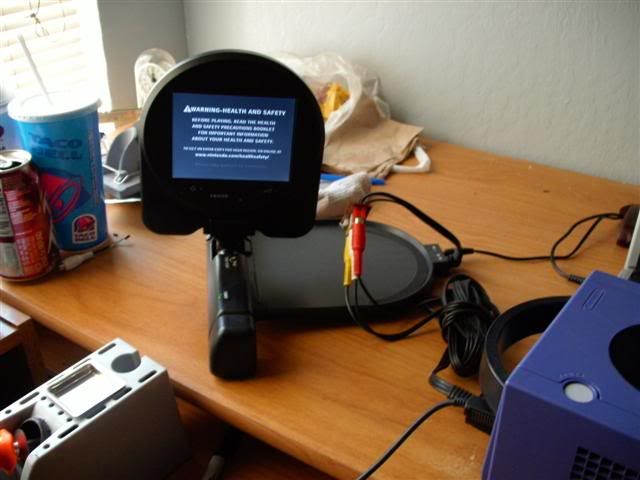
There you have it! If you want a small, easy to use testing monitor without ripping anything expensive apart, easy peasy. Don't bother buying a cable, most don't work. And if you happen to buy one then that is weaksauce because this is such an easy mod.
First of all, I know what you're thinking: "Why?" Well, some of us want a cool testing monitor for our systems like Thursty, that don't involve our (or out parent's) expensive TVs. Easy solution! If you own one of those Xbox/PS2 Zenith screens, you can have an easy testing monitor without having to even take it apart!
If you bought the Xbox/PS2 version, it came with a cable that you plug into the AV port on your system, an xbox and a ps2 av cord. Depending on which cable you use, the color of your wires will be different.
Step 1. Cut the console end of your cable off. Seperate the three thick wires, and strip them down like so. Remeber to twist all those tiny strands of wire together. This cord is the Xbox version. If you are using a PS2 AV cable, the colors will be yellow, red and white.

Step 2. You will now need some type of rca jacks. Pictured are some RCA jacks that have been laid out on a pcb (which was scavenged from a broken lcd) and the standard cable version. Either way, prepare your jacks by stripping their wires back and tinning their spots. Also, tin the xbox or ps2 av cable wires.

Step 3. You will now solder your Xbox cable to your RCA jacks. Make sure you don't mix them up, or else it obviously won't work. This is the diagram to follow. If for some reason the pic ever goes away, it's like this: Tan is for composite video, red is for right audio, and blue is for left audio.

If you are using the PS2 cable, you will have Yellow, Red and White wires instead. You will wire yellow to composite video, red to right audio, and white to left audio. When soldering this, remember to solder the ground wires (all those tiny ones that you twisted together earlier) to the ground wires on the rca jacks.
Step 4. You should have a cable that looks like this:

Or like this one if you used rca cords, just with an extra one for video:

Remember to insulate your wires (I use hot glue). If you want to take it a step further, you can buy a cheapie project box at ratshack. Before you glue anything down or close anything up though, try testing it with a system.

There you have it! If you want a small, easy to use testing monitor without ripping anything expensive apart, easy peasy. Don't bother buying a cable, most don't work. And if you happen to buy one then that is weaksauce because this is such an easy mod.
