Koji-Kendo
Newb
I have had many people asking about how to do this mod using the kitsch-bent, CGB front-lighting panel and have yet to produce a proper tutorial.
However, they are back in stock again (as of this writing) and so I feel obligated to share this knowledge with the rest of you, at least in a simple form, in case you are not already aware.
Setting the panel into the shell and soldering are pretty simple and covered in the product tutorial, so for now, I'll just cover the light panel / lcd bonding, which is the hardest part.
[I am using a stripped down light panel that I had from my older experiments so it is missing the led strip with wires.
Same steps apply. ---> On your new one, the led strip with wires and front, reflective tape will stay in place.]
- - - - - - - - - - - - - - - - - - - -
Items used:
- 1x cgb lcd screen
- 1x kitsch-bent cgb light panel
- 1x tube of loca (liquid optical clear adhesive)(the higher quality the better, right now I prefer "Osaka" brand)
- UV curing lamp (or equivalent, large UV curing bulb, etc)(I'm using a UV nail curing lamp (china, ebay) direct sunlight also works)
- - - - - - - - - - - - - - - - - - - -
Basic steps to properly bonding the light panel to the lcd screen.
1.) Remove the foam layer off the back of the lcd (to relieve pressure to the screen when reassembling cgb)
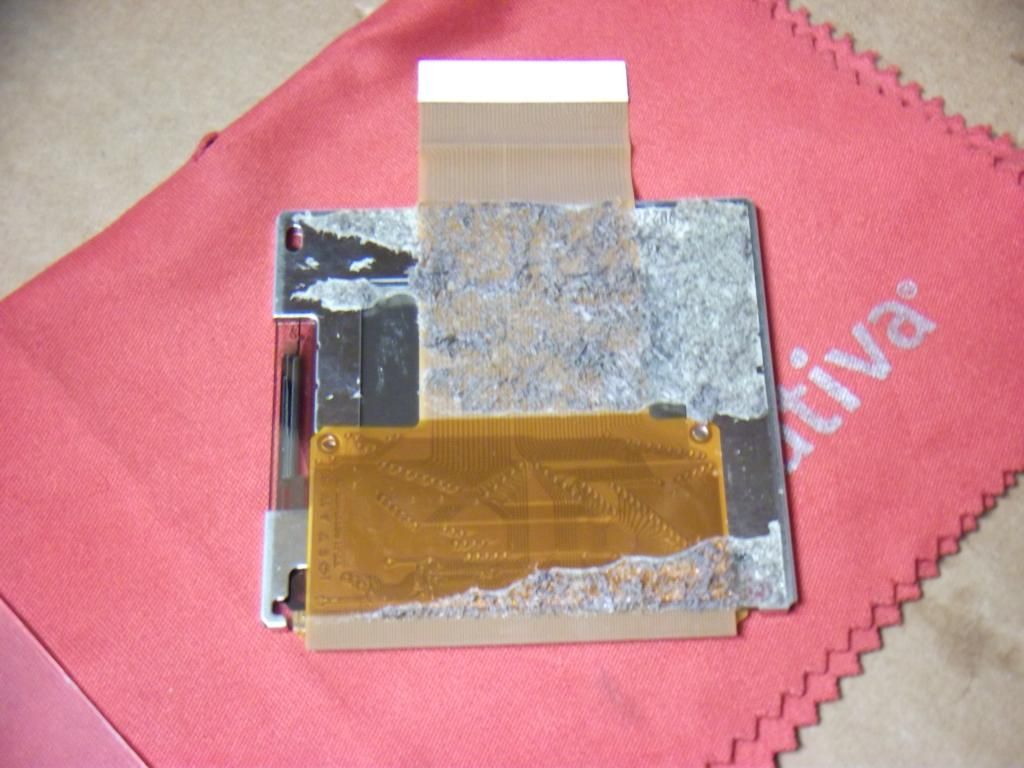
2.) Remove the clear, protective layers from both sides and the reflective strip of tape from the back (smooth) side of the light panel. (to have a nice, flush bond with the lcd screen)(the front of the light panel has the bumps on it. that side goes facing out from the lcd screen to face the user as the game boy is being played)
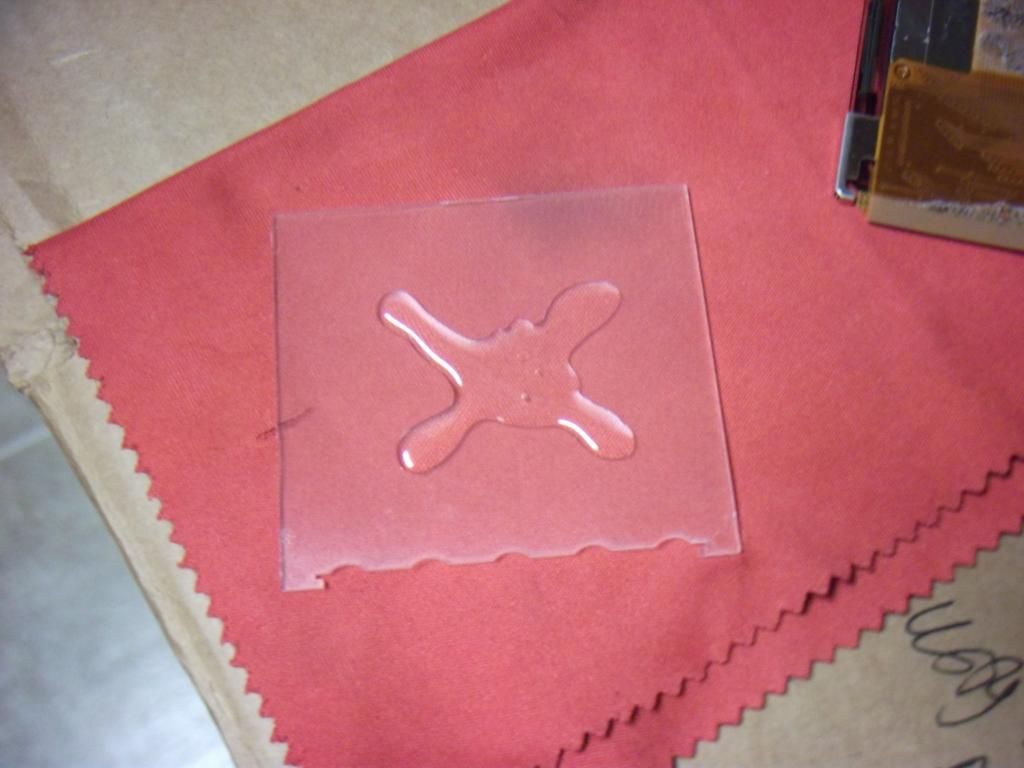
3.) Apply the loca to the back side (again, the smooth side) while laying the panel face down. This may take a little practice. I have screwed it up a handful of times, better to not be enough than too much since the light panel can be pulled off and reset with more loca.
Apply similarly to the photos, in that general amount (maybe just a tiny pinch less).
Place the lcd screen onto the loca'd light panel, slowly and gently, then apply some pressure to spread it a little.
Lift the entire thing together so you can see all the little details like all those wonderful little air bubbles (you will get them every time).
Not a problem my friend! As the kitsch-bent light panel is very resilient in it's ability to be cleaned again and again of fingerprints or dirt and debris.
Just don't get any loca on it, especially if you don't have any loca remover. (who needs it anyway if you're careful enough?)
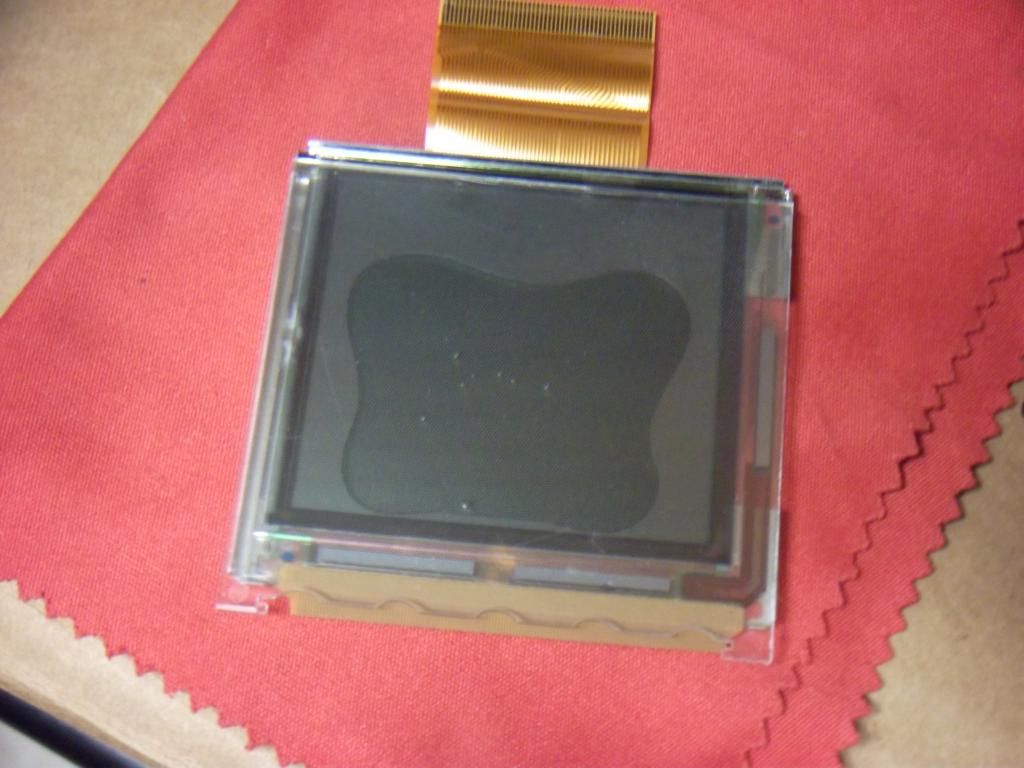
Now that you can see every single air bubble, simply apply some pressure to them directly to force them off and out the edge.
Do this while spreading the loca as evenly as possible, covering all the hard to reach spots like the corners.
Take your time and start in the middle, working your way to the edges.
They are generally compliant but sometimes you'll get a toughy or two, try working those a little more.
The idea is to get the bubbles out without making a big loca mess.
Use a rag you don't care about to clean up any small leakage you may have (if any, maybe you're pretty slick). Again, avoid getting loca on the light panel itself as it will leave darker spots on the panel when it lights up.
Now that the bubbles are taken care of, set the light panel to align properly with the lcd screen for a proper seating into the shell case.
May be hard to see in the pics but basically, the top of the light panel should be aligned with (or as close as you can get it to) the darker edge of the lcd screen. The dark boarder that surrounds the main area of the screen.
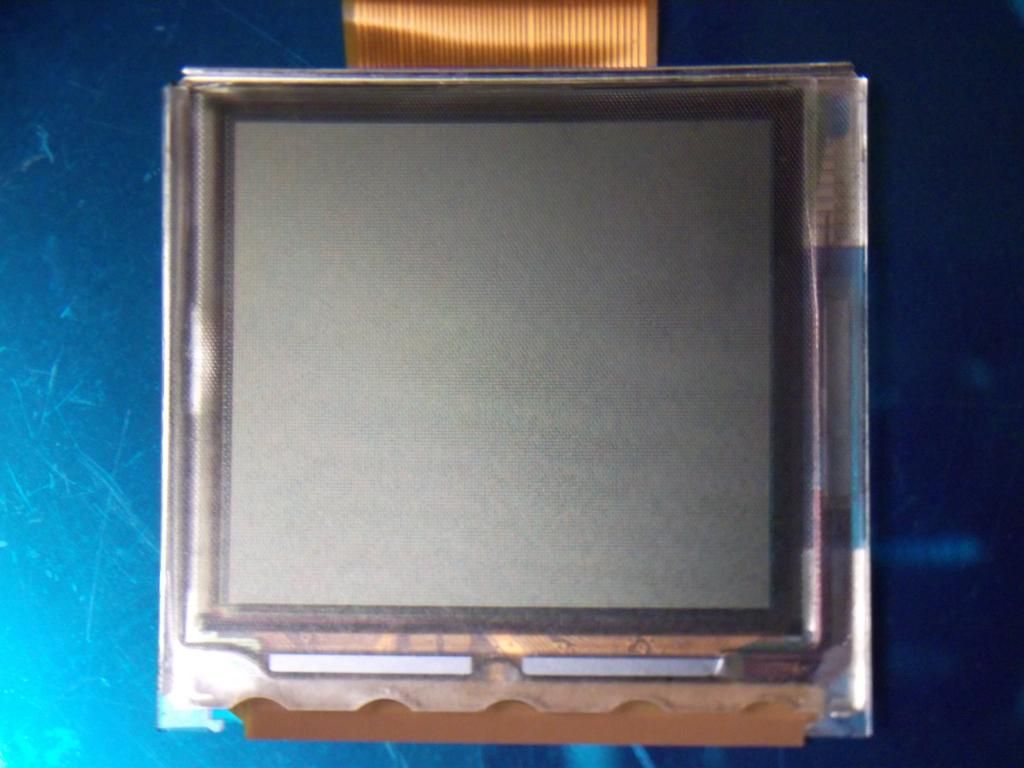
Clean up the light panel face with some screen cleaner or rubbing alcohol and a micro-fiber cloth to ensure there are no traces of loca.
4.) Find a way to keep the ribbon cable flat so when you place the lcd screen on a flat surface to cure so the cable won't push the lcd screen up at an angle, making the light panel slide around (don't be a wise guy and bend the cable back, I screwed that up too. use something like a pair of pliers to lay on the ribbon cable when curing so the whole thing stays flat, your call)
5.) Cure (bond) the loca to the lcd using a proper UV curing method (like I said above, direct sunlight or a decent UV curing lamp work the best (no heat lamps! they just make the loca all runny and messy)
Be sure to check and make sure the light panel is still set where you placed it and hasn't skewed off.
The internet info I found said 3 minutes would do to cure the Osaka loca and it was correct. (time may vary depending on the type of loca used. do your research if not sure)
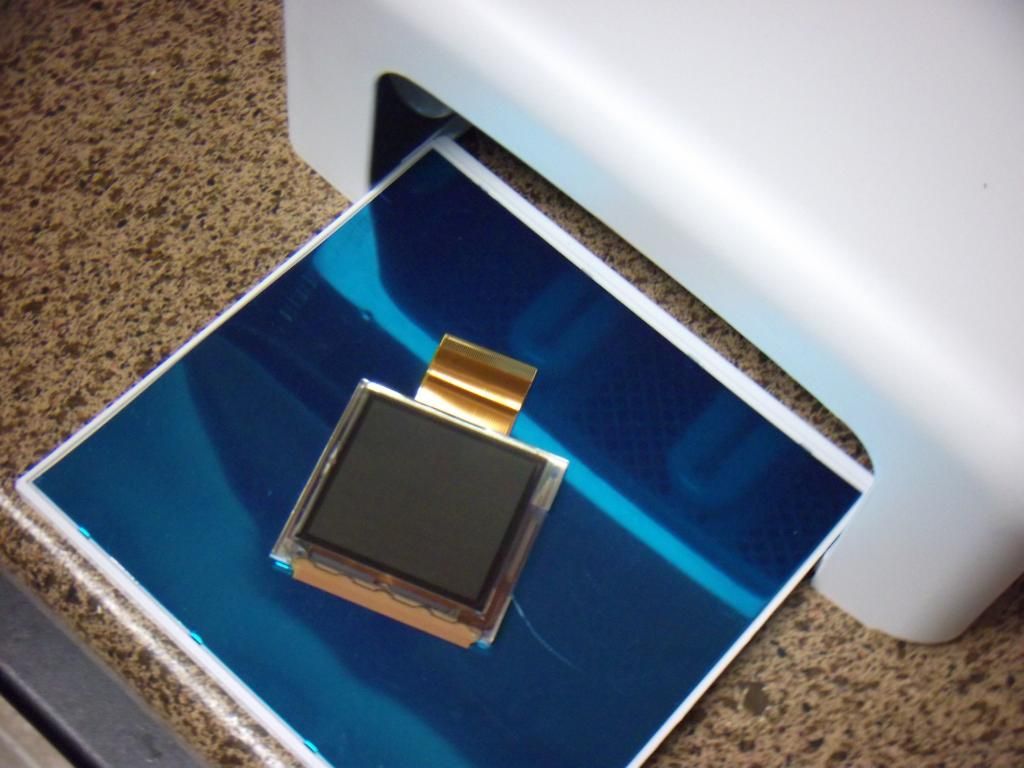
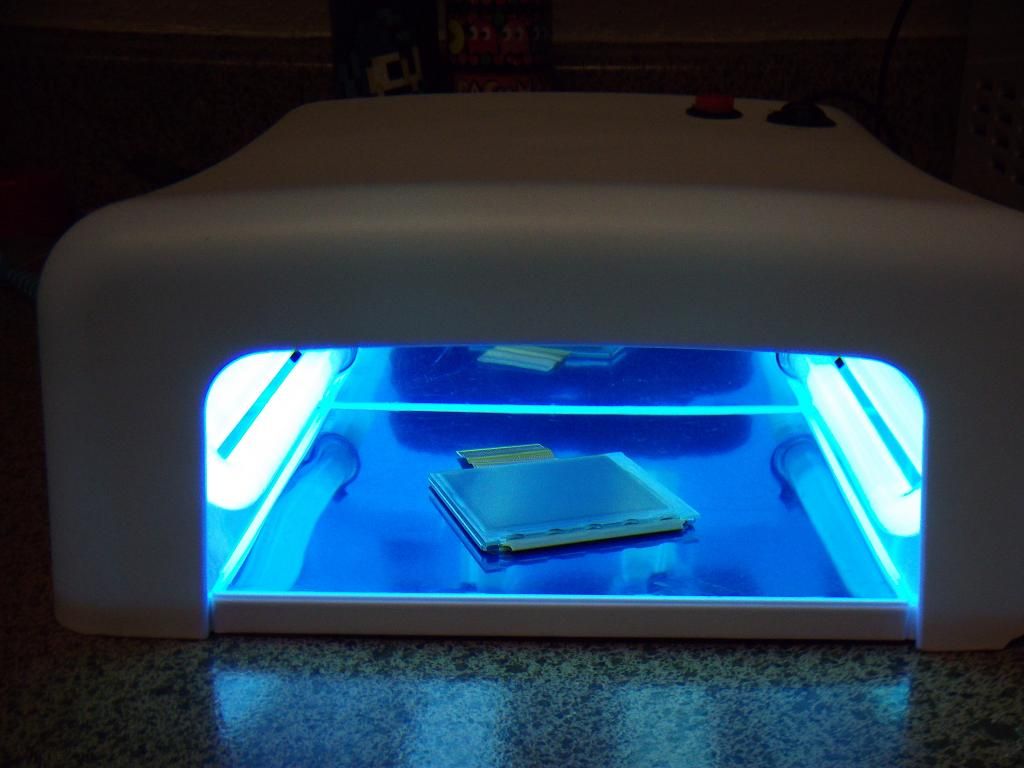
That's basically it.
After that, it's smooth sailing.
Just cut your slots in the lcd housing for the wires, place your lcd, solder the wires, reassemble and fire her up!
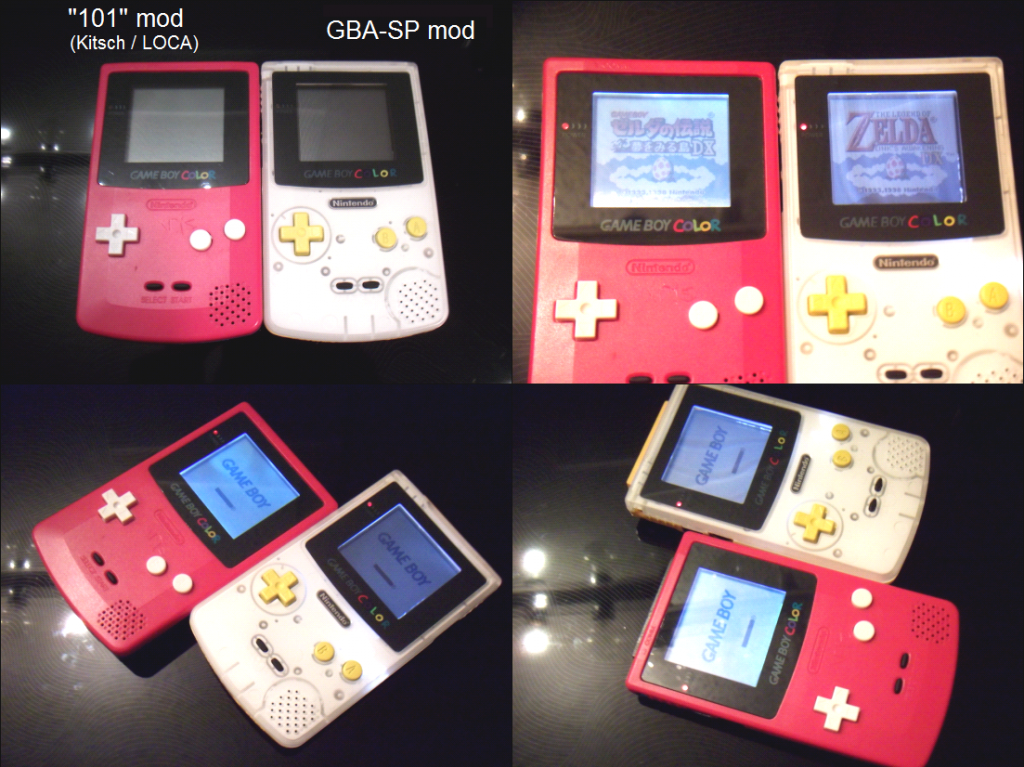
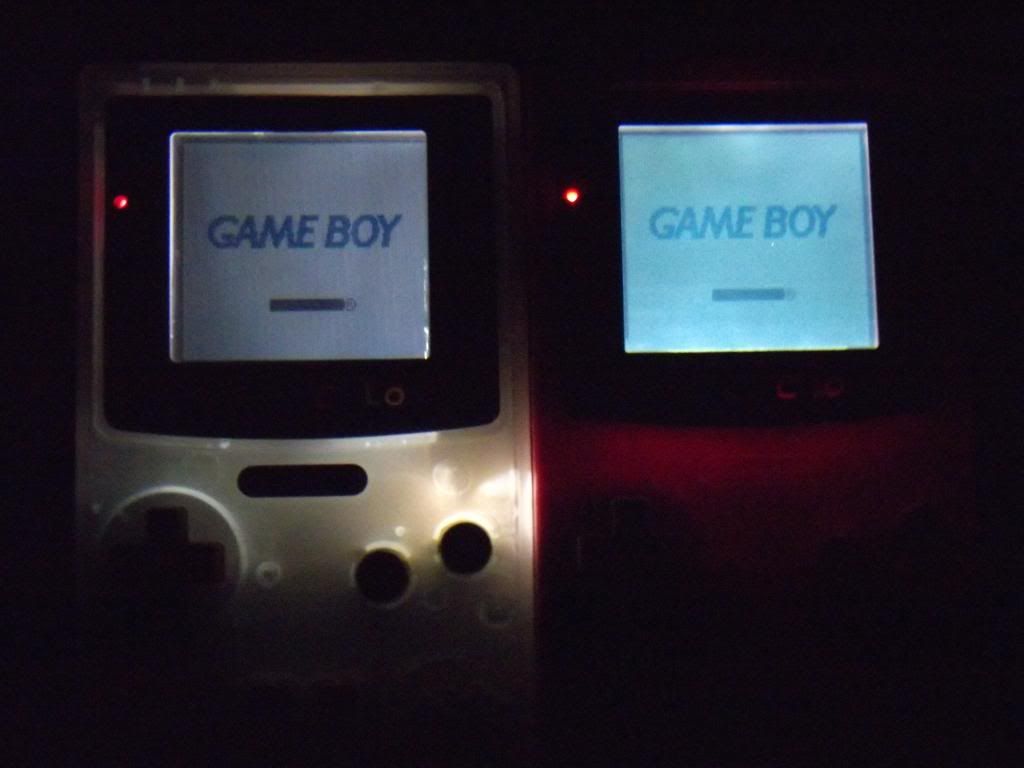
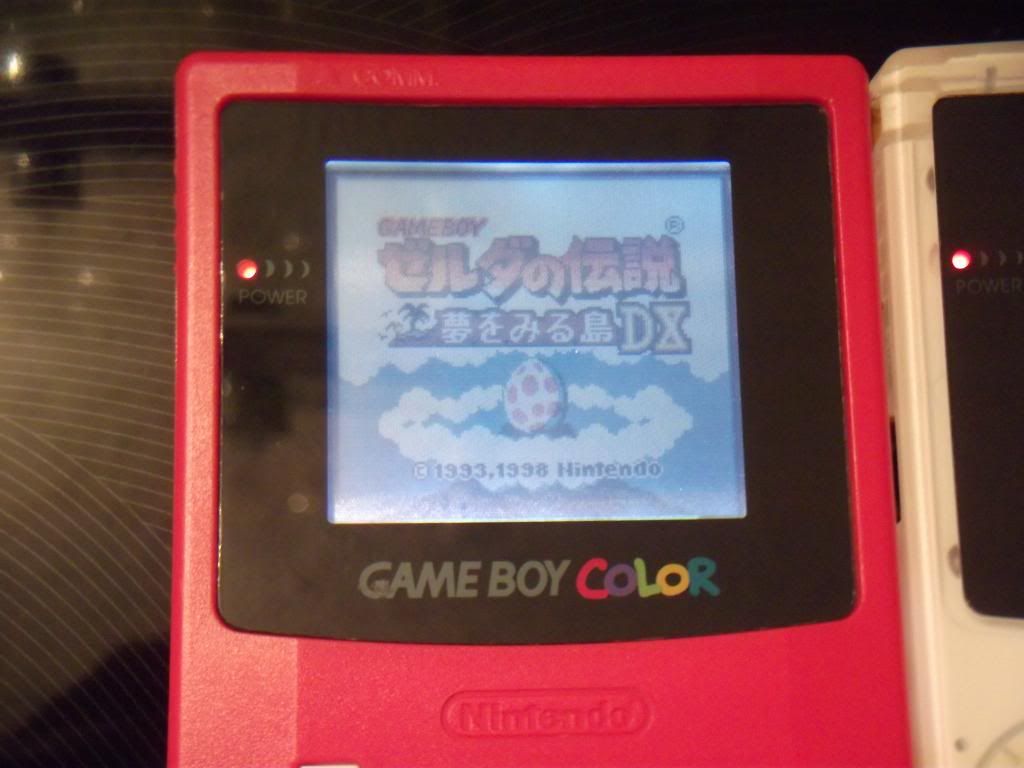
Hope that helps save some GBA-SPs from getting poached for their light panels.
Now go get some kitsch-bent light panels before they sell out again you crazy kids! 3-).
They're going fast!
Benefits in comparison to the standard, GBA-SP front-light method:
- improved brightness
- better light distribution
- no more wavy lines / bad glare
- eliminates dust / debris contamination between lcd and light panel
- better durability (the one SP led light is VERY delicate and prone to failure from age / heavy use or hard bangs / bumps)
- easier shell case interchangeability
- MUCH easier to handle / clean the light panel
(mishandling an SP light panel is a sure way to ruin it along with your day)
- no additional resistor required
- less light bleeding through shell case (on non-corrected orientation SP light panels)
- minimal modification required to inner shell case
Original inspiration and ideas for the loca application:
http://chipmusic.org/forums/topic/13236 … bc/page/3/
However, they are back in stock again (as of this writing) and so I feel obligated to share this knowledge with the rest of you, at least in a simple form, in case you are not already aware.
Setting the panel into the shell and soldering are pretty simple and covered in the product tutorial, so for now, I'll just cover the light panel / lcd bonding, which is the hardest part.
[I am using a stripped down light panel that I had from my older experiments so it is missing the led strip with wires.
Same steps apply. ---> On your new one, the led strip with wires and front, reflective tape will stay in place.]
- - - - - - - - - - - - - - - - - - - -
Items used:
- 1x cgb lcd screen
- 1x kitsch-bent cgb light panel
- 1x tube of loca (liquid optical clear adhesive)(the higher quality the better, right now I prefer "Osaka" brand)
- UV curing lamp (or equivalent, large UV curing bulb, etc)(I'm using a UV nail curing lamp (china, ebay) direct sunlight also works)
- - - - - - - - - - - - - - - - - - - -
Basic steps to properly bonding the light panel to the lcd screen.
1.) Remove the foam layer off the back of the lcd (to relieve pressure to the screen when reassembling cgb)

2.) Remove the clear, protective layers from both sides and the reflective strip of tape from the back (smooth) side of the light panel. (to have a nice, flush bond with the lcd screen)(the front of the light panel has the bumps on it. that side goes facing out from the lcd screen to face the user as the game boy is being played)
3.) Apply the loca to the back side (again, the smooth side) while laying the panel face down. This may take a little practice. I have screwed it up a handful of times, better to not be enough than too much since the light panel can be pulled off and reset with more loca.
Apply similarly to the photos, in that general amount (maybe just a tiny pinch less).
Place the lcd screen onto the loca'd light panel, slowly and gently, then apply some pressure to spread it a little.

Lift the entire thing together so you can see all the little details like all those wonderful little air bubbles (you will get them every time).
Not a problem my friend! As the kitsch-bent light panel is very resilient in it's ability to be cleaned again and again of fingerprints or dirt and debris.
Just don't get any loca on it, especially if you don't have any loca remover. (who needs it anyway if you're careful enough?)

Now that you can see every single air bubble, simply apply some pressure to them directly to force them off and out the edge.
Do this while spreading the loca as evenly as possible, covering all the hard to reach spots like the corners.
Take your time and start in the middle, working your way to the edges.
They are generally compliant but sometimes you'll get a toughy or two, try working those a little more.
The idea is to get the bubbles out without making a big loca mess.
Use a rag you don't care about to clean up any small leakage you may have (if any, maybe you're pretty slick). Again, avoid getting loca on the light panel itself as it will leave darker spots on the panel when it lights up.
Now that the bubbles are taken care of, set the light panel to align properly with the lcd screen for a proper seating into the shell case.
May be hard to see in the pics but basically, the top of the light panel should be aligned with (or as close as you can get it to) the darker edge of the lcd screen. The dark boarder that surrounds the main area of the screen.

Clean up the light panel face with some screen cleaner or rubbing alcohol and a micro-fiber cloth to ensure there are no traces of loca.
4.) Find a way to keep the ribbon cable flat so when you place the lcd screen on a flat surface to cure so the cable won't push the lcd screen up at an angle, making the light panel slide around (don't be a wise guy and bend the cable back, I screwed that up too. use something like a pair of pliers to lay on the ribbon cable when curing so the whole thing stays flat, your call)
5.) Cure (bond) the loca to the lcd using a proper UV curing method (like I said above, direct sunlight or a decent UV curing lamp work the best (no heat lamps! they just make the loca all runny and messy)
Be sure to check and make sure the light panel is still set where you placed it and hasn't skewed off.
The internet info I found said 3 minutes would do to cure the Osaka loca and it was correct. (time may vary depending on the type of loca used. do your research if not sure)


That's basically it.
After that, it's smooth sailing.
Just cut your slots in the lcd housing for the wires, place your lcd, solder the wires, reassemble and fire her up!


Hope that helps save some GBA-SPs from getting poached for their light panels.
Now go get some kitsch-bent light panels before they sell out again you crazy kids! 3-).
They're going fast!
Benefits in comparison to the standard, GBA-SP front-light method:
- improved brightness
- better light distribution
- no more wavy lines / bad glare
- eliminates dust / debris contamination between lcd and light panel
- better durability (the one SP led light is VERY delicate and prone to failure from age / heavy use or hard bangs / bumps)
- easier shell case interchangeability
- MUCH easier to handle / clean the light panel
(mishandling an SP light panel is a sure way to ruin it along with your day)
- no additional resistor required
- less light bleeding through shell case (on non-corrected orientation SP light panels)
- minimal modification required to inner shell case
Original inspiration and ideas for the loca application:
http://chipmusic.org/forums/topic/13236 … bc/page/3/
