The definitive 3.5" Lcd review

hailrazer

Frequent Poster
I wanted to see how all three 3.5" screens on the market stacked up. So I bought them and tested them out.
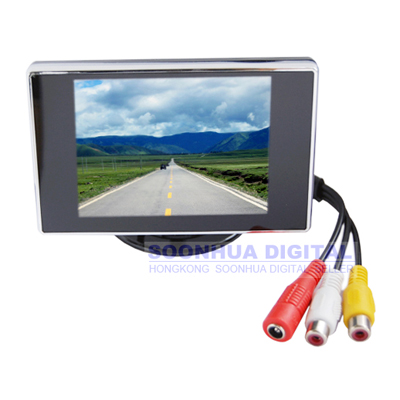
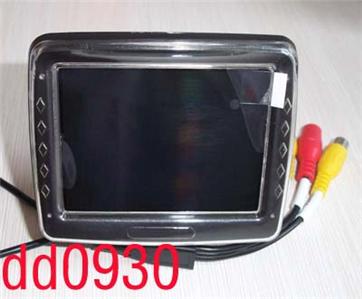
These are the three I got :

sku_20415_2.jpg


TFT_LCD.jpg


319912576_tp.jpg


Now just a few notes before I continue.

We are going to label them for reference:
1. Flip Out 3.5"
2. Widescreen 3.5" (it's not but it looks like it is)
3. 3.5" with air fins.

1. Costs $49.89 shipped on Ebay
2. Costs $29.99 shipped on Ebay
3. Costs $29.99 shipped on Ebay

#1 has antiglare on it. #2 1nd #3 are glossy and have a good amount of glare.

Now I hooked them all up together to see what they look like running side by side :

DSC00228.JPG


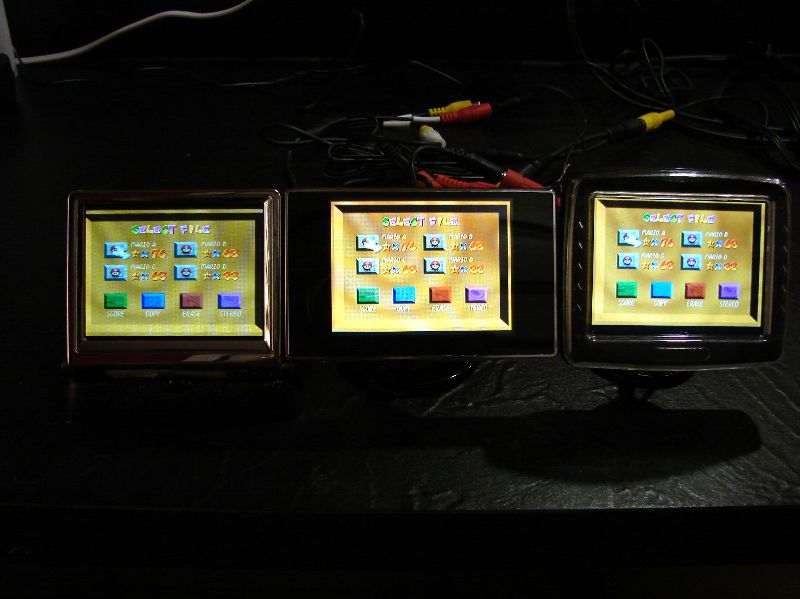
First thing you will notice is that #2 is brightest and #1 is dimmest. The antiglare would be the reason #1 is the dimmest.
You will also notice #1 and #3 have cooler colors and #2 is warmer. This means that whites are more yellow on #1 and #3 and whites are more blue on #2.

This is evident on these pics:

DSC00234.JPG


DSC00235.JPG


Also even though #2 is brightest , it actually has the worst viewing angle. From the top it is washed out and from the sides it starts to darken quicker than the others :

DSC00230.JPG


DSC00231.JPG


DSC00233.JPG


Now to show you the contrast. #1 actually IMO has the better contrast and more realistic colors as seen in dark scenes.

DSC00236.JPG


DSC00237.JPG


Now for some insides pics and measurements.
 
The insides are quite similar on these screens. They are all less than 1/2" thick. The smallest is #1 and #2 both at just slightly over 3/8"

#1 is the hardest to take apart and use. You have 8 screws to remove. You have to pry the Lcd plastic case apart. You have to remove the ffc extension. The lcd and the ffc extension are double sided taped on and difficult to pry off. And you have to re-attach the lcd ffc when done which is slightly difficult and the ffc connector can break.

#2 is the easiest and simplest to take apart and use. 2 screws and everything falls right out. And the controller board is already taped to the Lcd .

#3 is easy to remove with 4 screws but the Lcd is double sided foam taped to the controller board and these need to be removed to make the lcd/board thinner.

Pics of the Lcd's disassembled:

#1
dsc00247.JPG

dsc00251.JPG

dsc00249.JPG


#2
dsc00240.JPG

dsc00241.JPG

dsc00242.JPG


#3
dsc00244.JPG

dsc00245.JPG

dsc00246.JPG


Pics of them side by side disassembled:
dsc00250.JPG


Now for current draw.

At 7.4v

#1 -- 113mA
#2 -- 125mA
#3 -- 128mA

Conclusion:

I really like the brightness of #2 and the fact that it has "warmer" colors. But the top angle wash-out and the side darkening is hard to ignore. Also the screen is the glossiest of all of them with a lot of glare.

I like the antiglare on #1. For a portable that helps to eliminate a lot of the glar and mirror like problems of reflection. But the brightness is a bit lower than the rest. The more natural reds and browns and the better contrast are almost worth the decrease in brightness though.

#3 is overall very good. Not the brightest , not the best colors, but overall good in every detail.

Which one will I use. Well it's hard to say. I my Nomad mods I might go with #2 since it is behind another plastic screen on the Nomad which would reduce glare and it's nice and bright and it's VERY easy to disassemble and use.. For an exposed screen portable , probably #1 because of the antiglare.

Oh and with all of these. If using them in a portable, the negative (ground) power wire needs to be tied in to the negative (ground) wire on the yellow rca plug to work properly.
 
what's negative rcs?
edit
you edited your post, you fiend! (thanks for the info on that:D)
 
Short note, screen #3 can accept s-video with a little bit of SMT wiring. The image quality does not improve an appreciable amount, though, especially since it has a decent comb filter for composite.
 
umm, I tied my screen and snes's grounding together, but it still has a rolling screen. Any help on that?(it's screen 3 but the internals look a bit different)
 
I've owned screen #3. It gave me a rolling image on my Genesis. From what I've read, there is no fix for this. Not even Marshallh got it to work.
 
godDang. I'm gonna send it back to dealextreme.
edit
DAMNIT, I forgot taht I opened it.
 
mako321 said:
umm, I tied my screen and snes's grounding together, but it still has a rolling screen. Any help on that?(it's screen 3 but the internals look a bit different)

Try grounding the battery negative to the screens composite video ground on the screens board.
 
I just got screen number 3 in the mail and it's great, I tested it at lower voltages and and got it to run off of 3 volts! :eek:

Anyway here are the ratings

3v = 180mA
4.5v = 150mA
6v = 105mA
7.5v = 105mA
9v = 91mA

And these were all tested while playing smash bros, the current doesn't change nearly at all when actually processing video.
 
snowpenguin said:
Hail, your screen #2 was glossy on the inside? After taking the cover off of mine I see an antiglare layer.

Yes it was glossy. As you can see in the close-up pic. You can see the pixels, but on the first screens close-up you just see the matte finish , no individual pixels.

Take a pic with a light reflecting off the screen for me :)
 
Naw, too lazy. But I can assure you, this thing has an antiglare layer. There is no huge amount of glare, and the screen looks "Murky". I can't differentiate pixel from pixel either.

It also has a different driver board.
 
Back
Top