You are using an out of date browser. It may not display this or other websites correctly.
You should upgrade or use an alternative browser.
You should upgrade or use an alternative browser.
My first GameCube portable /Questions I have
- Thread starter SCHjunior
- Start date
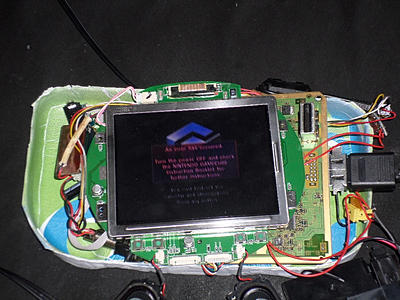
It turns out, that the wire I was using that came with it belongs to a PS2. I had no idea. It fits in the GameCube perfectly.
I also found out that the colors on the other wire I had must have been backwards. The yellow is sound and the red is video for some reason. It works fine now with that one.
When I say fine, I mean that the video and sound show up and work. There is still is one problem. The video is a little off. It is not cut off or anything, but it is not in the center.
The built in control has sound which is great, but no control for ratio or screen movement like the other one I returned did. The screen is also a lot more square than the other one. This affects my design a bit but I believe I can work around it.
After I make this portable, if it is successful that is, I want to make a Nintendo 64 portable. I want to use that same screen I returned. It will be a lot more slim line and I am going to use standard black Nintendo buttons like on the DSi and 3DS. I am also going to use 3DS sliders instead of regular joysticks. This console I am making now is going to be large for large hands but light.
I want this one to have an AV out and a One and Two player port. The N64 portable will just be a stand alone one person handheld.
Glad to hear it is working. Mine has a AV out as well and will have a player two port only. Debating on if I should heat lift the connector off the board and rewire to save some space or not...
I cut my board today and it went great.
Why make a n64 portable when you could make another GC portable to emulate n64? lol
I cut my board today and it went great.
Why make a n64 portable when you could make another GC portable to emulate n64? lol
I am probably going to use my original ports, I am just going to wire the internal controller to the player one port I already have. It's much easier in my case. I am debating whether to include a switch to shut off the internal controller or not.
I could make another GameCube portable with the emulator, but I believe the Nintendo 64 is probably smaller. Bacman has a complete tutorial for the N64. I also want it to be SUPER Slim and long.
I could make another GameCube portable with the emulator, but I believe the Nintendo 64 is probably smaller. Bacman has a complete tutorial for the N64. I also want it to be SUPER Slim and long.
So, I have been reading a lot of information on the powering of the system today. Most of this stuff is nonsense to me. I am currently going to college for a BAS. I am going to be a robotic engineer someday. (If that exists.) Right now I am just taking general engineering classes for a major in Mechanical Design. This means that I SUCK at circuitry.
So after reading all this important information on how to correctly solder the GameCube and screen together with a bunch of solder points, I found an easier way. The solder points on this Zenith screen are MUCH smaller than that on the PSone screen. They seem much harder to solder to for this reason.
I was reading the information about this screen, and it says that it runs off of 7.5v. With two cells I can easily get 7.4v, which will be fine. However, the fan that I will be using already gets 12v DC anyhow. I just spliced the cable for the fan and added the screen power to it. When I plug the GameCube into the wall it powers the screen fine. This way, I can just use the original ports coming from the AV in on the screen and just attach them to the motherboard just as before. My case is definitely big enough to fit this stuff.
Side note: I also figured out how to center the screen. I forgot all about the screen adjustment in the GameCube menu. That worked fine. Now it is centered.
It's still a little messy. Just a little. The final product will involve a lot of slimming of the screens board and the case will be 1/4" taller, and 1/4" thinner. The wires will also be cut and soldered really small.
I am working on purchasing a cnc machine for school work and just because I have been dying to own one since they first became popular. I am just waiting on the money, of course. I am in the middle of selling one of my cars. Once I do, I shall buy a machine. I want to make some cases with it. I use CAD a lot for a reference when designing stuff. I will then be able to cut these design prototypes out.
My polystyrene for the cases arrived today. unfortunately, I ordered the wrong thickness. I asked to return it for a refund and I purchased a few new sheets that are the correct thickness. They replied to my return and said I could keep the first few sheets free of charge and they gave me a refund.
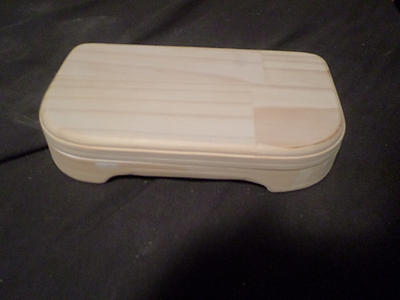
Since I did not want to wait for the styrene to make a case, so that I could start trimming and fitting this motherboard; I made another case. This one is out of wood. It was just going to be a prototype, but it turned out alright. I might use it for another GameCube portable, who knows...
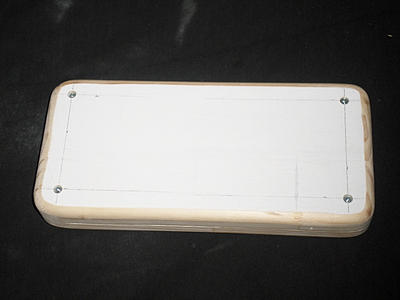
This didn't take long to make, maybe 20 minutes. I just kind of like the "simple" shape. It is just a rectangle with rounded edges. It is not complex, but comfortable. My other case ideas were all ergonomic and free form in some sense. This one is just plain. I like it.
Also, I went down to the electrical engineering lab at my college today and asked them if they had any project enclosure lying around. It just so happened that they had a bunch left over that they were going to throw away. They said I could take as much as I wanted. I grabbed a cardboard box and filled it with as much as I could. Anyway, this is what I got:
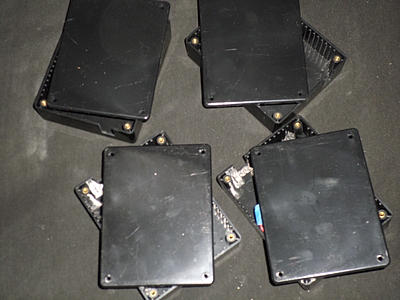
I got 4 complete enclosures, but they are kind of small. I was thinking of either making mini portables or combining to cases side by side and making them look nice as one big case.
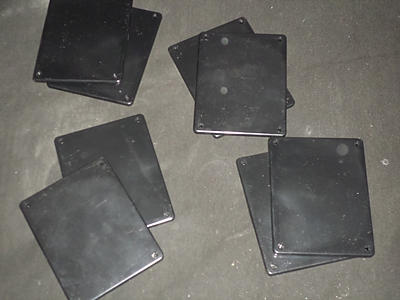
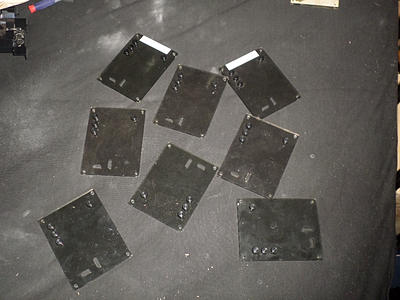
I also got like 25 lids for enclosures. They are useless alone, but if I use two of them, I could make up some kind of edge material to go around them to make a complete enclosure. Maybe even metal...
Half of the lids are just plain black. The other half is dark gray transparent acrylic. Some of the acrylic also has buttons in it from the previous project.
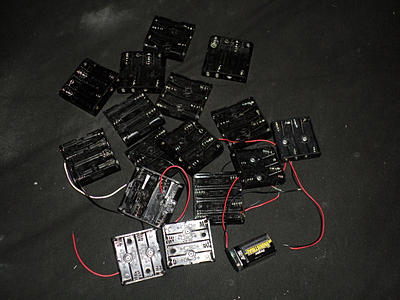
Along with these enclosures, I got PLENTY of AAA and AA battery housings. If anyone needs a couple battery housings, just PM me and I can send you a few.
Since I did not want to wait for the styrene to make a case, so that I could start trimming and fitting this motherboard; I made another case. This one is out of wood. It was just going to be a prototype, but it turned out alright. I might use it for another GameCube portable, who knows...
This didn't take long to make, maybe 20 minutes. I just kind of like the "simple" shape. It is just a rectangle with rounded edges. It is not complex, but comfortable. My other case ideas were all ergonomic and free form in some sense. This one is just plain. I like it.
Also, I went down to the electrical engineering lab at my college today and asked them if they had any project enclosure lying around. It just so happened that they had a bunch left over that they were going to throw away. They said I could take as much as I wanted. I grabbed a cardboard box and filled it with as much as I could. Anyway, this is what I got:
I got 4 complete enclosures, but they are kind of small. I was thinking of either making mini portables or combining to cases side by side and making them look nice as one big case.
I also got like 25 lids for enclosures. They are useless alone, but if I use two of them, I could make up some kind of edge material to go around them to make a complete enclosure. Maybe even metal...
Half of the lids are just plain black. The other half is dark gray transparent acrylic. Some of the acrylic also has buttons in it from the previous project.
Along with these enclosures, I got PLENTY of AAA and AA battery housings. If anyone needs a couple battery housings, just PM me and I can send you a few.
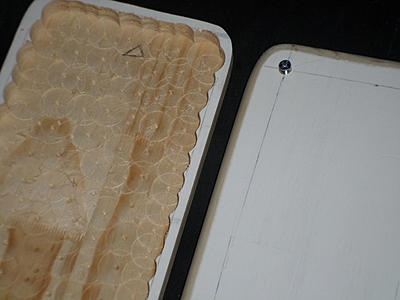
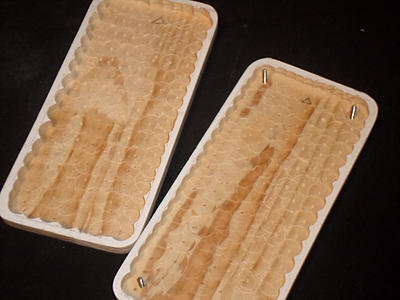
I made a proper mold for my case. I needed to make the case 1/4" taller and 1/4" thinner. I ended up making it 1/2" taller. This was a good thing too, because the screen's motherboard wouldn't have fit if I hadn't.
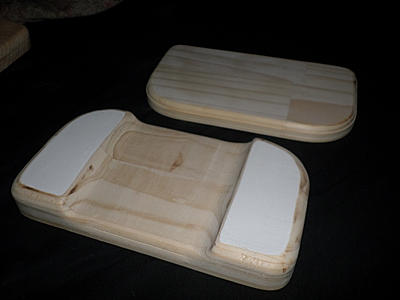
This case is definitely A LOT neater. I really love how it came out. I took off the piece I had in the middle, between the tool palm rests on the old case mold. It is much more comfortable. It can be held firmly and it can also be held with the hands relaxed.
This case is definitely A LOT neater. I really love how it came out. I took off the piece I had in the middle, between the tool palm rests on the old case mold. It is much more comfortable. It can be held firmly and it can also be held with the hands relaxed.
Blargaman91
Well-Known Member
Wow, this is really coming along well. That case mold looks glorious.
So, the last thing I did to the screen I got was take off the bulky connector it had on it. There was a connector that bridged the connections between the power/AV port and the screens motherboard.
After taking the connector off and re-soldering the connections, the sound won't work. I have tried everything I could think of. I doubt the amp is broken because the speakers still make static noise when I touch the connections with my finger.
What am I doing wrong? What else could stop the sound from working? Is there a simple solution I am missing?
I also did check with another GameCube to make sure it wasn't the GameCube, and it is not.
I NEED HELP!
SCHjunior said:So, the last thing I did to the screen I got was take off the bulky connector it had on it. There was a connector that bridged the connections between the power/AV port and the screens motherboard.
After taking the connector off and re-soldering the connections, the sound won't work. I have tried everything I could think of. I doubt the amp is broken because the speakers still make static noise when I touch the connections with my finger.
What am I doing wrong? What else could stop the sound from working? Is there a simple solution I am missing?
I also did check with another GameCube to make sure it wasn't the GameCube, and it is not.
I NEED HELP!
Don't worry you didn't break anything this happened to me as well, I randomly lost sound. I would get static as well when touching the connections.
Perform this and it should work

Re: Re: My first GameCube portable /Questions I have
Yep, you're right. No battery doors. I think I still may be able to use a couple though. Got a lot of project ideas floating around. Let me know what you'd need from me. Thanks
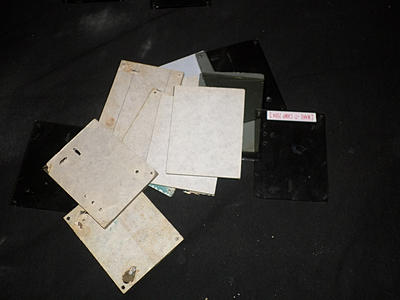
SCHjunior said:Yes I do. I don't know if you can really use them the way you plan to.
But, this is what they look like:
http://static.wixstatic.com/media/1a454 ... 00_jpg_srz
Yep, you're right. No battery doors. I think I still may be able to use a couple though. Got a lot of project ideas floating around. Let me know what you'd need from me. Thanks
I'm back!
So after a long hiatus of time, I have gotten a hold of a 3D printer. I have been really pleased with the quality of this printer. On its max settings it can print some nice detailed parts. I wanted to get a 3D printer for a number of reasons, one of these being for my GameCube Portable case.
I haven't done much at all with the electronics end of my GameCube Portable. I have wired up the video properly. I am still having issues with the sound. If worst comes to worst, I will have to restart the electronics aspect of this project. I really wouldn't mind getting a new screen. I am using the PlayStation One screen and it is kind of a pain. I am not particularly happy about the shape of the screen anyway. I prefer my games to be in widescreen format, even the older systems. I don't mind the stretch at all. If I have to restart I will use a nice 5 inch widescreen I found on eBay that has a higher resolution.
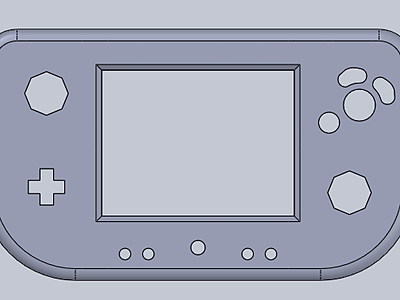
I finally got around to modeling my case in SolidWorks yesterday, at least the top half anyway. I really like it.
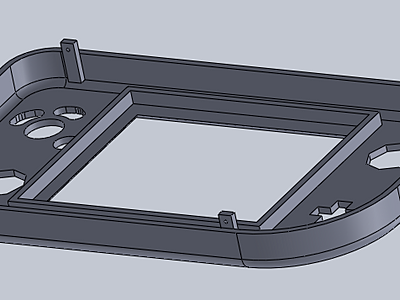
To print this part of the case, I had to split it down the middle. I could still print the whole thing, I just had to re-position the halves on the printer to print it.
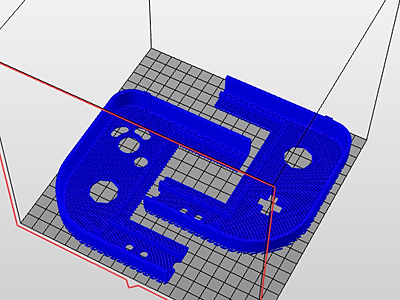
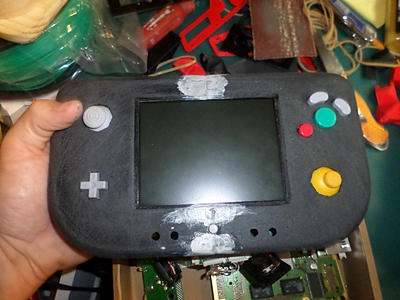
I printed it at max speed and it came out a little sloppy, so I had to sand it. On the final product I will print it at the max settings my printer is capable of.


The white stuff in the center is just residue from the ABS/acetone solution I used to adhere the pieces. I will sand that off later. Also, in the next print I will glue it before I sand it. I got it a little uneven on the ends that had to be glued.
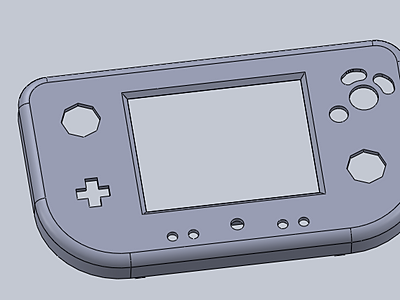
I triple checked that all of my parts fit in. The one hole that wasn't particularly perfect was the start button, which I have chosen to put right in the center. It needs a little tweaking. The fact that the start button is in the center seems like a bit of an inconvenience, but I have a habit of my fingers slipping when I play for extended period of time. I don't want to be hitting the start button accidentally.
I am going to either find some buttons for the volume and brightness control, or print them. If you have any recommendations of what buttons would be best, I am all ears.
So what do you think? Am I going in the right direction. Your feedback is definitely appreciated!
So after a long hiatus of time, I have gotten a hold of a 3D printer. I have been really pleased with the quality of this printer. On its max settings it can print some nice detailed parts. I wanted to get a 3D printer for a number of reasons, one of these being for my GameCube Portable case.
I haven't done much at all with the electronics end of my GameCube Portable. I have wired up the video properly. I am still having issues with the sound. If worst comes to worst, I will have to restart the electronics aspect of this project. I really wouldn't mind getting a new screen. I am using the PlayStation One screen and it is kind of a pain. I am not particularly happy about the shape of the screen anyway. I prefer my games to be in widescreen format, even the older systems. I don't mind the stretch at all. If I have to restart I will use a nice 5 inch widescreen I found on eBay that has a higher resolution.
I finally got around to modeling my case in SolidWorks yesterday, at least the top half anyway. I really like it.
To print this part of the case, I had to split it down the middle. I could still print the whole thing, I just had to re-position the halves on the printer to print it.
I printed it at max speed and it came out a little sloppy, so I had to sand it. On the final product I will print it at the max settings my printer is capable of.
The white stuff in the center is just residue from the ABS/acetone solution I used to adhere the pieces. I will sand that off later. Also, in the next print I will glue it before I sand it. I got it a little uneven on the ends that had to be glued.
I triple checked that all of my parts fit in. The one hole that wasn't particularly perfect was the start button, which I have chosen to put right in the center. It needs a little tweaking. The fact that the start button is in the center seems like a bit of an inconvenience, but I have a habit of my fingers slipping when I play for extended period of time. I don't want to be hitting the start button accidentally.
I am going to either find some buttons for the volume and brightness control, or print them. If you have any recommendations of what buttons would be best, I am all ears.
So what do you think? Am I going in the right direction. Your feedback is definitely appreciated!
chairsgotoschool
Member
cool, I like it.
What 3d printer and software did you use?
What 3d printer and software did you use?
Similar threads
- Replies
- 1
- Views
- 1K