You are using an out of date browser. It may not display this or other websites correctly.
You should upgrade or use an alternative browser.
You should upgrade or use an alternative browser.
I'm entering the race: SonyQrios µGC Worklog
- Thread starter SonyQrio
- Start date
Tchay
Frequent Poster
Sony, you need to get screw posts in there. For something this dense, screw posts are the only guarantee to keep it closed. You could try side screws (look at Zenlocs N64Ps for an example)
After you get screw posts:
Here's the trick: get that sucker REAL HOT, and then slowly close it together over time. With the Envision, I gave it wall power, left it running Twilight Princess for 3 hours, then covered it in foaming (for protection from scratches) and put a bunch of textbooks on top of it
Eventually all the wires and flax you have in there will find their resting place.
Oh and....
tits or gtfoSonyQrio said:It's done.
nuke
Well-Known Member
Tchay said:tits or gtfo
SonyQrio
Frequent Poster
I was actually thinking about that. This is what I'll do. Now... to drill those holes without puncturing something on the inside. Hmm.BayCoder1 said:Hey Sony on my portable I'm going to drill 4 holes 2 on top half and 2 on the bottom half on the left and right sides of the case.
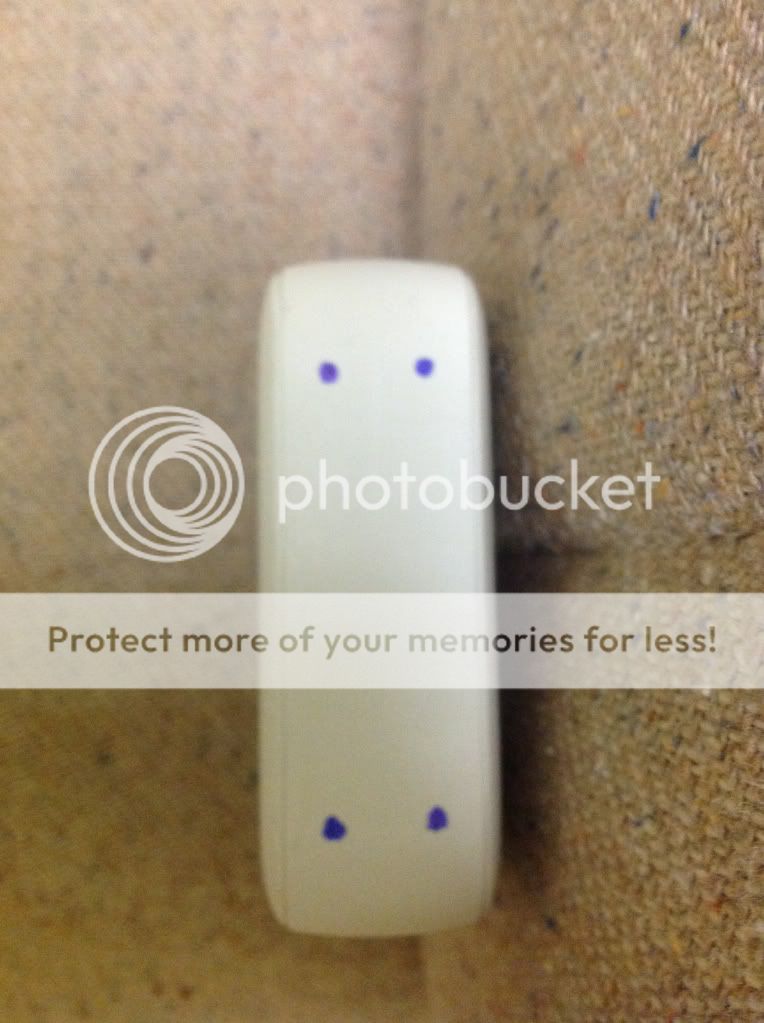
Each dot is a screw hole make sure u drill through the spacer and the case.
O and make sure the hole is smaller than the screw
Hope this helps
Do you think that I could take my drill press and put a piece of tape on the bit to mark it just as it clears the inside of the case? It will leave shavings in there, but I doubt plastic could hurt anything.
That's also a really good idea. I've noticed that the heat makes the insulation on the wires malleable. After letting it run for a long time, I could probably squish everything in and screw it together.Tchay said:Sony, you need to get screw posts in there. For something this dense, screw posts are the only guarantee to keep it closed. You could try side screws (look at Zenlocs N64Ps for an example)
After you get screw posts:
Here's the trick: get that sucker REAL HOT, and then slowly close it together over time. With the Envision, I gave it wall power, left it running Twilight Princess for 3 hours, then covered it in foaming (for protection from scratches) and put a bunch of textbooks on top of it
Eventually all the wires and flax you have in there will find their resting place.

I'm going to assume you meant these:nuke said:Tchay said:tits or gtfo


Instead of the.... never mind.
Also, a quick vidja! It must be christmas!
SonyQrio
Frequent Poster
bud said:Looks good, but it only counts if you can close it")
I can close it fine. It's just a matter of keeping it closed once i've squished it.Ashen said:Looks great Sony! Thats alot of squishing though. I'm sure you can do it.")
Expect a finished projects thread soon. I'll be drilling those holes tomorrow.
SonyQrio
Frequent Poster
There is a hole that that button lines up with on the bottom half of the case.Noah said:How is it supposed to close with what looks like the Z button where it is? Won't it prevent the case from being closed all the way? Nice job, by the way.
BayCoder1
Member
Glad I can helpSonyQrio said:
Tchay
Frequent Poster
You've come a long way Sony. I'm very impressed.
That video quality looks like it could be improved (or maybe it just looks worse on youtube?) I noticed some vertical lines showing up....
What wiring are you using for your Composite line? I assume its shielded. You may also want to shield your power line to the actual screen. Also make sure your video line is as far from any power lines as possible (I know that's ganna be tough with this tiny sucker). Then you should try shielding the controller board for your screen (where all the caps are and what not). You can do this with aluminum foil (its tricky to solder to, but possible). Obviously cover the foil in black tape. And lastly, use thick and excessive grounding from the screen to the controller board to the motherboard.
public-pervert
Well-Known Member
Looks dang epic!
I'm looking forward to see it done.
You did an awesome work, man. Congrats!!
I'm looking forward to see it done.
You did an awesome work, man. Congrats!!
SonyQrio
Frequent Poster
Video looks as clear and line free as it gets in real life. I think it's just my camera that creates that effect.Tchay said:You've come a long way Sony. I'm very impressed.
That video quality looks like it could be improved (or maybe it just looks worse on youtube?) I noticed some vertical lines showing up....
What wiring are you using for your Composite line? I assume its shielded. You may also want to shield your power line to the actual screen. Also make sure your video line is as far from any power lines as possible (I know that's ganna be tough with this tiny sucker). Then you should try shielding the controller board for your screen (where all the caps are and what not). You can do this with aluminum foil (its tricky to solder to, but possible). Obviously cover the foil in black tape. And lastly, use thick and excessive grounding from the screen to the controller board to the motherboard.
And thanks, Tchay! That means a lot coming from you.
SonyQrio
Frequent Poster
So,  . I let the thing run for an hour then turned it off and crammed everything. I got the sucker closed and finally screwed it together. Then low and IGNORE something shorts! Woo hoo!
So I had to take it apart, and I haven't been able to fix it yet. I apologize for making all of you anticipate a completion and then not have. Yay.
. I let the thing run for an hour then turned it off and crammed everything. I got the sucker closed and finally screwed it together. Then low and IGNORE something shorts! Woo hoo! So I had to take it apart, and I haven't been able to fix it yet. I apologize for making all of you anticipate a completion and then not have. Yay.