2nd GCP WIP

unicycler17

Well-Known Member
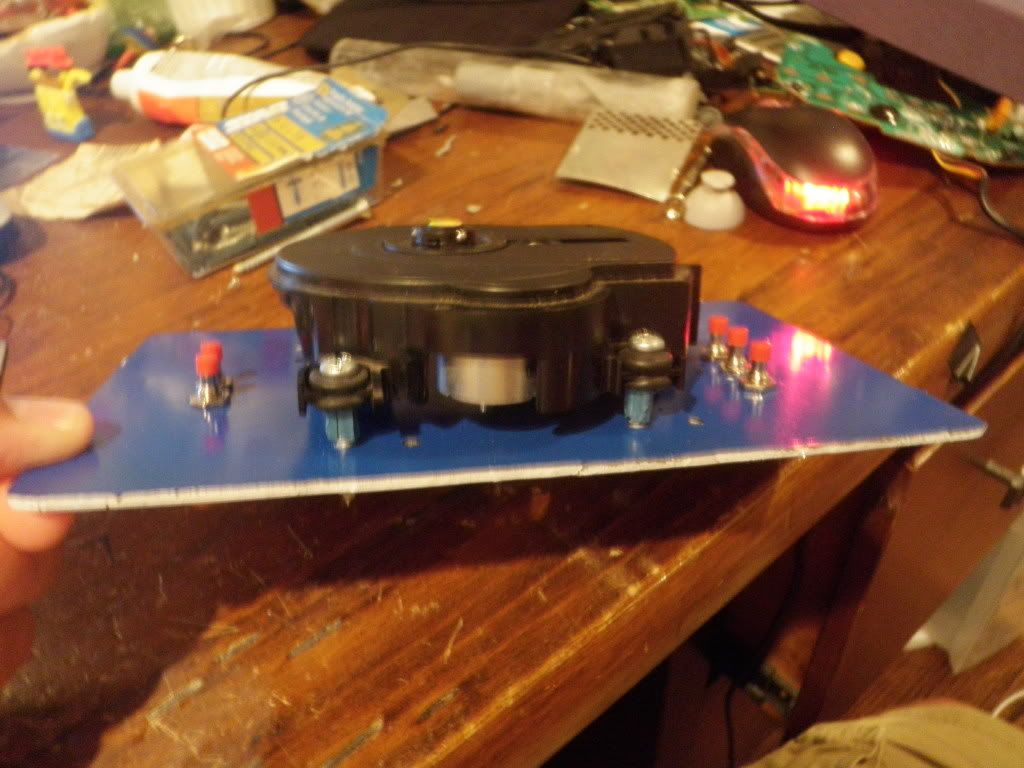
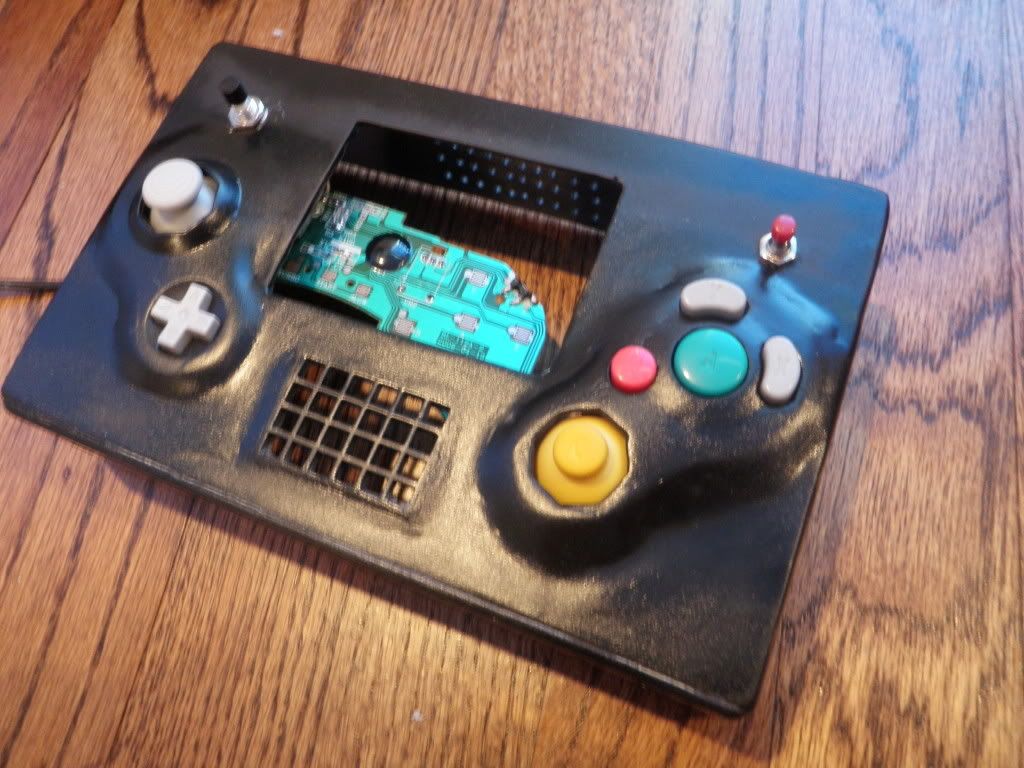
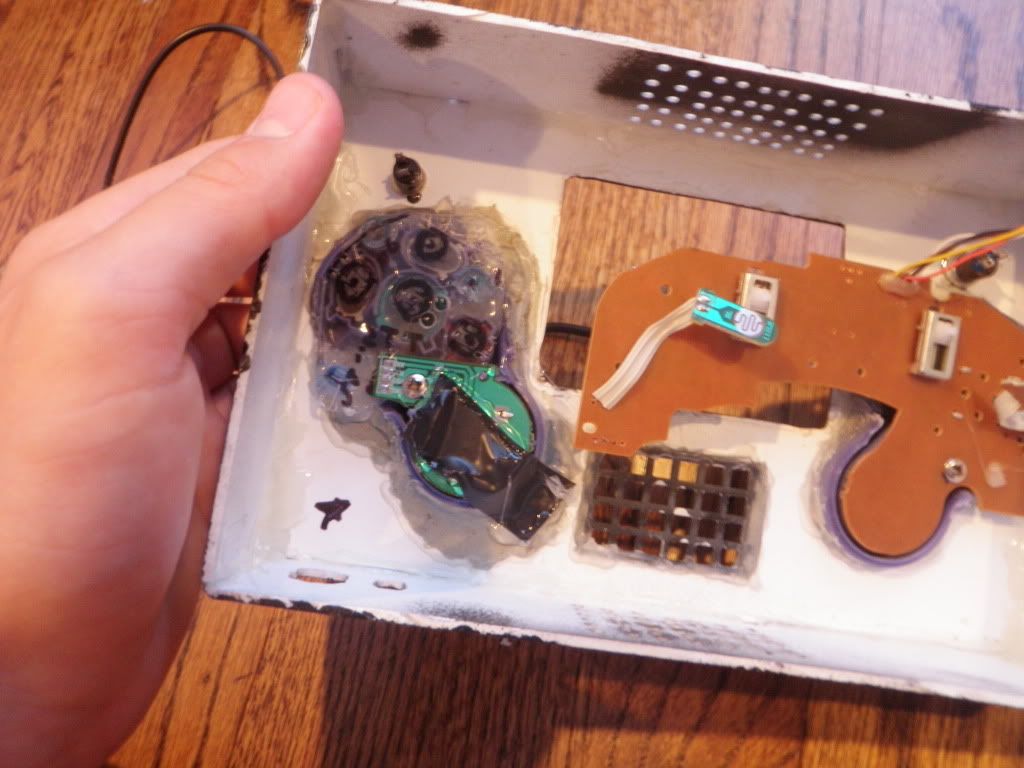
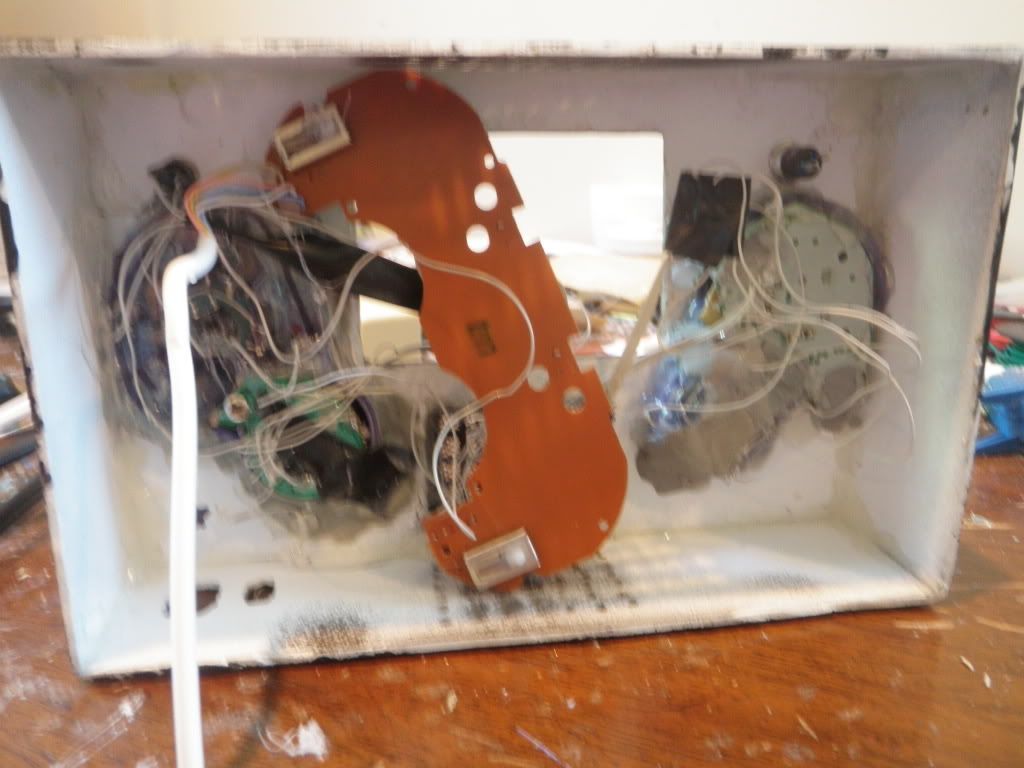
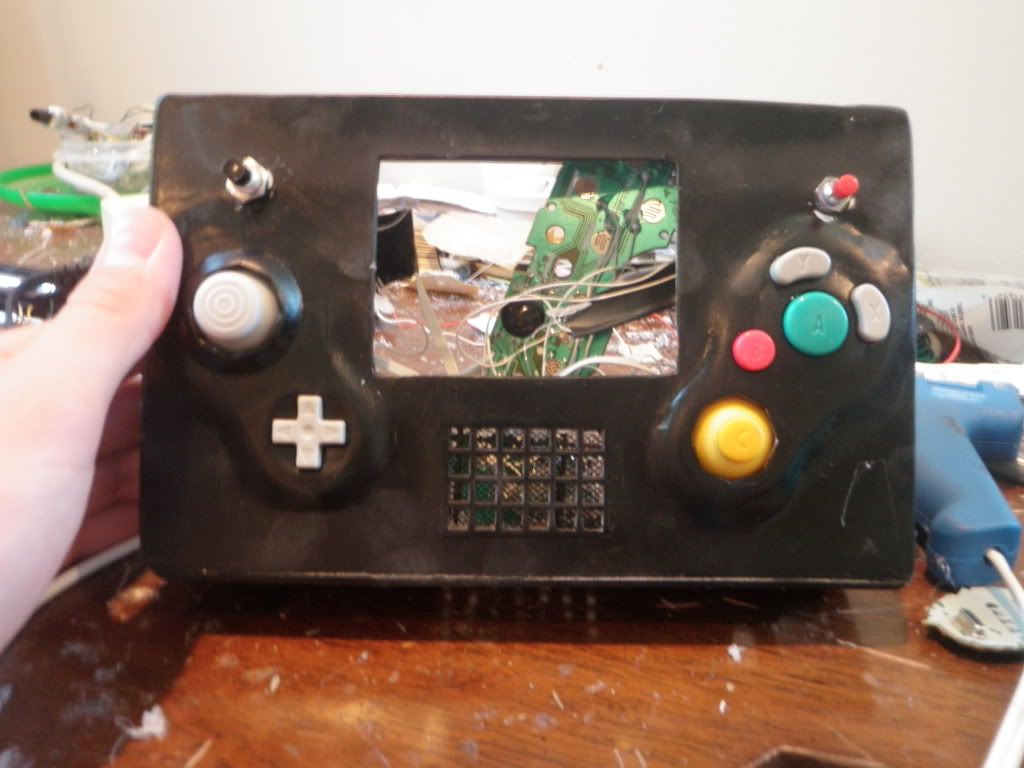
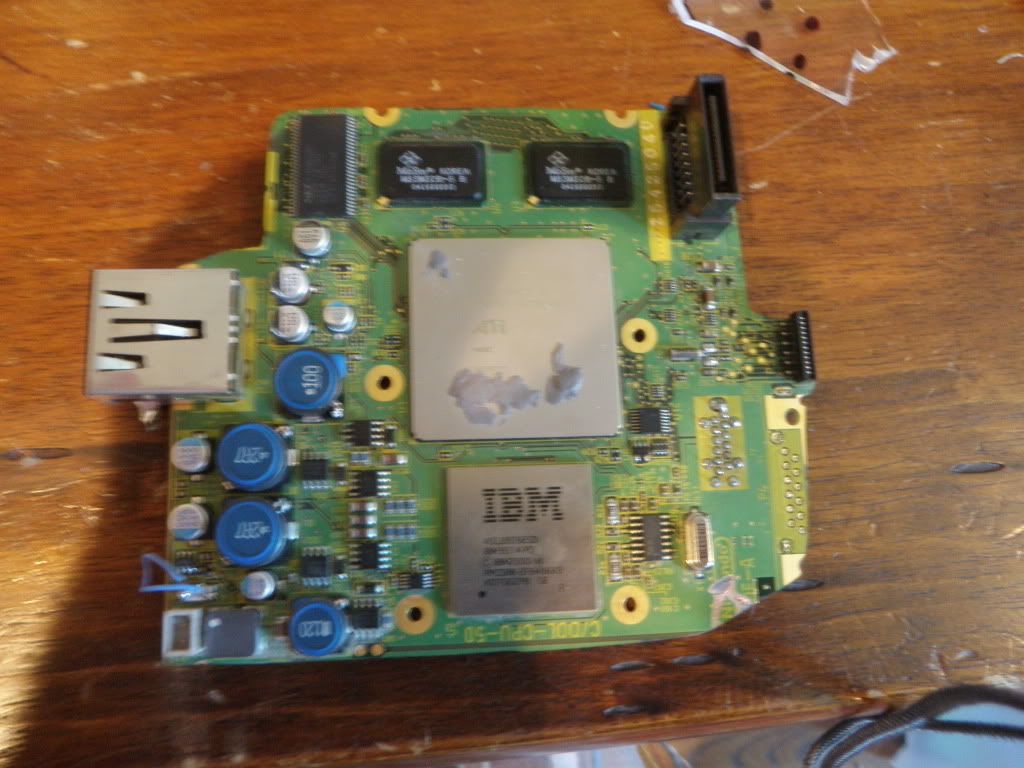
I'm making another largish gcp! With a disc drive! I'm trying to make it as cheaply as possible, using mostly leftover parts.
P1010112.jpg

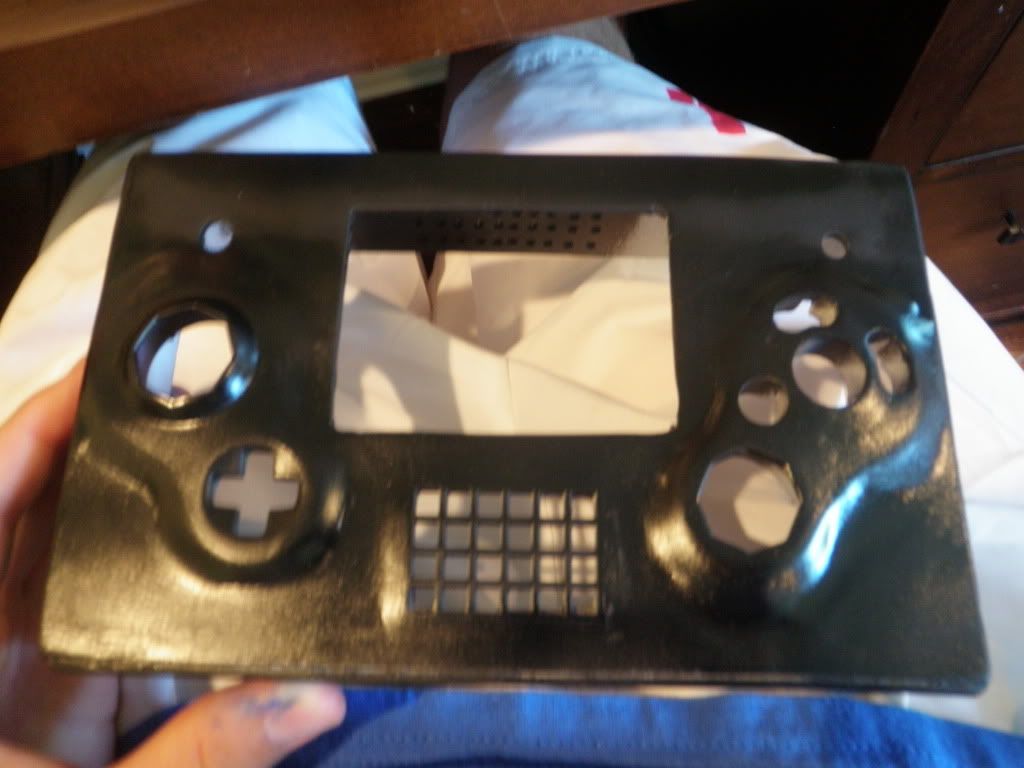
Case measures about 8 inches by 5 inches by 2 inches. And the DD will stick out the back unprotected, like on Hailrazers.
 
Looks like your frankencasing skills have improved quite a bit man. Looking nice so far.
 
Any particular reason why you're forgoing the wiikey option?

Really nice case, looks superb.
 
I'm not doing the wiikey since I'm trying to keep the cost of this project really low. I figured I'd just keep this as simple as possible, sell it (or my first one), then make a really small one with the wiikey, batteries, custom regs, the whole shebang.

Thanks for the case compliments guys. It's definitely not perfect, but it is a huge improvement from my last portable. For the case this time, I just dremeled some plastic pieces out, and glued them together. I need to buy more black paint for the back piece, and figure out screw posts for it.

While I've gotten better at frankencasing, I need some severe improvement on my painting skills. It never seems to come out evenly for me. Oh well.
 
unicycler17 said:
While I've gotten better at frankencasing, I need some severe improvement on my painting skills. It never seems to come out evenly for me. Oh well.

I can't wait to see how this turns out, practice makes perfect though eh? :)
 
unicycler17 said:
I need some severe improvement on my painting skills. It never seems to come out evenly for me. Oh well.
A while back, I found MyCustomXbox's videos to be very educational on the painting front. The videos are for painting controllers, but the same rules apply for our cases.
 
The back of the case is pretty much finished. I ran out of black paint, so the back is blue!
P1010114.jpg

I messed up on the screw hole placement at first, so there are some extra holes in the back that I didn't want to bother filling in. Theyre mostly under the DD, and not very noticeable.

I got a controller (Thanks SQ), a gamecube, and ordered a screen today. Shouldn't take a ton of work from here on out.
 
P1010115.jpg

P1010116.jpg

Mounted buttons! Used tacts for the a b x and y buttons, and will just mount the whole board on the left side, with wires running to the right.
 
for a trigger in the back why not take one of the dreamcast controllers and take the back of the controller with the triggers intact and just franken-case it into the shell also making it a cover for the disc drive. it would looker cleaner in my opinion. the controller im talking about is the one in hailrazers trigger guide.
 
I agree with you, ABOUT90HAMPSTERS, but...

unicycler17 said:
I'm trying to make it as cheaply as possible, using mostly leftover parts.

unicycler17 said:
I'm trying to keep the cost of this project really low. I figured I'd just keep this as simple as possible.
 
The controller I was using fried, so I mounted tacts on the left side and wired everything up to a gc classic controller I had lying around.
P8150118.jpg

P8150119.jpg


I'm having some annoying problems with my mobo also, and I think it's probably fried. Its a rev-c, slightly cut.
P8150120.jpg


The chips wouldn't get hot, and the LED wouldn't turn on. I bridged the fuse, but that didn't do anything. So I wired up a gc regulator board to the points on the bottom ashen showed in his guide, and I wired 5v to the bottom of the DD connector.

As soon as I turned on the board, the LED would flash then the whole thing would turn off after a split second. If I removed the 3.3v line, the board would stay turned on, and one chip would get warm, but it didn't do anything. Should I just get a new board?
 
it sounds like a ground problem my problem was similar and i bought a "broken" cube on ebay and then i figured out the other one still worked
 
I had the same thing happen to my board. 1st of all, make sure that you have a 12-15v input. Then, wire your +12v line right here:

AudioPowerRelocation.jpg


Should do the trick.
 
Back
Top