SonyQrio
Frequent Poster
SonyQrio's Awesome 3DS Analog Stick Nub Replacement Guide:
Parts List:

1x GameCube Joystick Cap, 1x 3DS Analog Stick, 1x PSP Analog Stick Friction Spacer (optional), 1x PSP Analog Stick Cap
Step 1:

Carefully cut the rubber off of your GC Joystick Cap.

It should end up looking like this.
Step 2:

Apply a fair amount of hot glue to the inside of the rubber.
Step 3:

Quickly place the PSP analog stick cap inside the rubber. It fits perfectly!
Step 4:

If you chose to put the friction spacer in, go ahead and do so now.
Step 5:

Apply a small amount of hot glue to the bottom of the PSP analog stick cap so it stick to the 3DS analog stick.
Step 6:

Quickly position the new rubber cap in the center of the 3DS analog stick and let it dry.
__________________________________________________________________________________________
Finished product:


__________________________________________________________________________________________
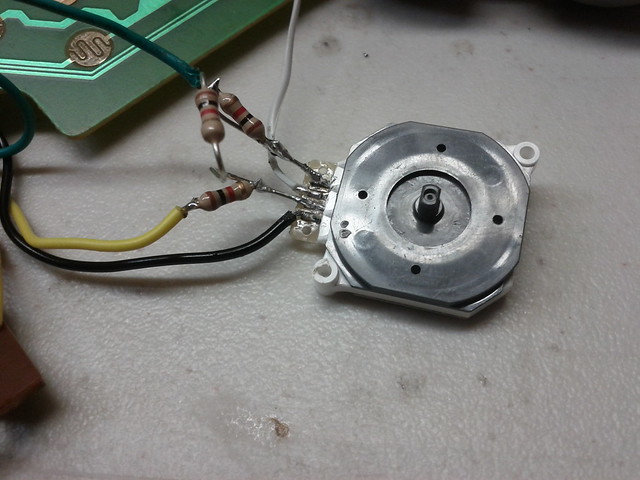
MyMixed's Inverted Axis Schematic and SonyQrio's Resistor Theory:
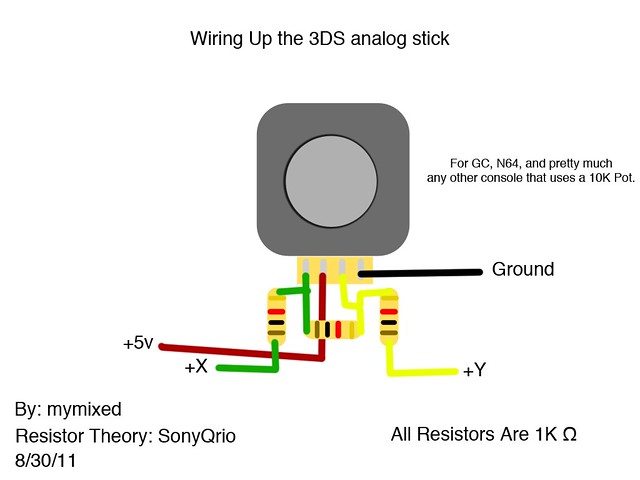
The above schematic inverts the axis and eliminates any "crawling." You also retain full range!
__________________________________________________________________________________________
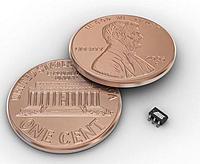
MyMixed nearly broke his $13 dollar 3DS analog stick by taking it apart, but on the way, he found this:

You can break off the tiny piece of plastic covering the end of the ribbon cable and scotch tape the wires (better than solder imo) to the huge contact points! NO MORE TINY SOLDERING!
__________________________________________________________________________________________
More updates soon...
Parts List:
1x GameCube Joystick Cap, 1x 3DS Analog Stick, 1x PSP Analog Stick Friction Spacer (optional), 1x PSP Analog Stick Cap
Step 1:
Carefully cut the rubber off of your GC Joystick Cap.
It should end up looking like this.
Step 2:
Apply a fair amount of hot glue to the inside of the rubber.
Step 3:
Quickly place the PSP analog stick cap inside the rubber. It fits perfectly!
Step 4:
If you chose to put the friction spacer in, go ahead and do so now.
Step 5:
Apply a small amount of hot glue to the bottom of the PSP analog stick cap so it stick to the 3DS analog stick.
Step 6:
Quickly position the new rubber cap in the center of the 3DS analog stick and let it dry.
__________________________________________________________________________________________
Finished product:
__________________________________________________________________________________________
MyMixed's Inverted Axis Schematic and SonyQrio's Resistor Theory:
The above schematic inverts the axis and eliminates any "crawling." You also retain full range!
__________________________________________________________________________________________
MyMixed nearly broke his $13 dollar 3DS analog stick by taking it apart, but on the way, he found this:
You can break off the tiny piece of plastic covering the end of the ribbon cable and scotch tape the wires (better than solder imo) to the huge contact points! NO MORE TINY SOLDERING!
__________________________________________________________________________________________
More updates soon...
 ! I might do this! I'm working on the guide right now!