HillbillyScientist
Member
To start off, I'm aware this has been covered, and everyone has done it. A project like this would normally go in the afternoon projects thread. However, I remember a time when I was so inexperienced it took large amounts of time to do a single solder joint and months worth planing to do a simple project such as this, and sometimes still didn't gather the courage to hack into a perfectly good device. Now that I got that off my chest lets continue.
Disclaimer
This is an extremely simple project for beginners. That being said YOU CAN KILL YOUR SYSTEM. I did my first try, but I didn't have a wonderful guide such as this to follow.
To Start
We will now talk about what is needed.
Tools
Soldering Iron (Any beginner iron will do) and Solder
Needle Nose Pliers (Any should work)
Small File (Not necessary but helpful )
Dremel with High Speed Cutter (If you got it life will be much easier)
Hot Glue Gun and Hot Glue Sticks
Special Screwdriver Great High Quality Set
Components
Wire (Old ribbon cable works nice)
Switch What I bought What you should buy
Crystal Best Value I could find
A GBC
Opening the Case
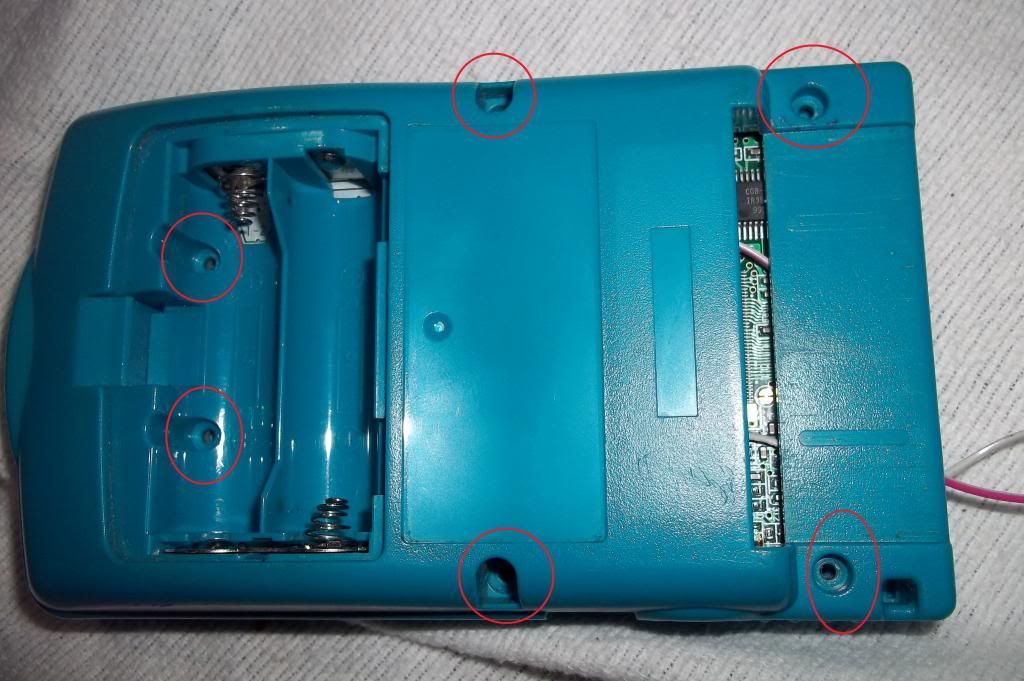
You must remove these six screws, but you must use your awesome new tri-wing screwdriver. Now the rear section of the case should lift off to reveal the motherboard.
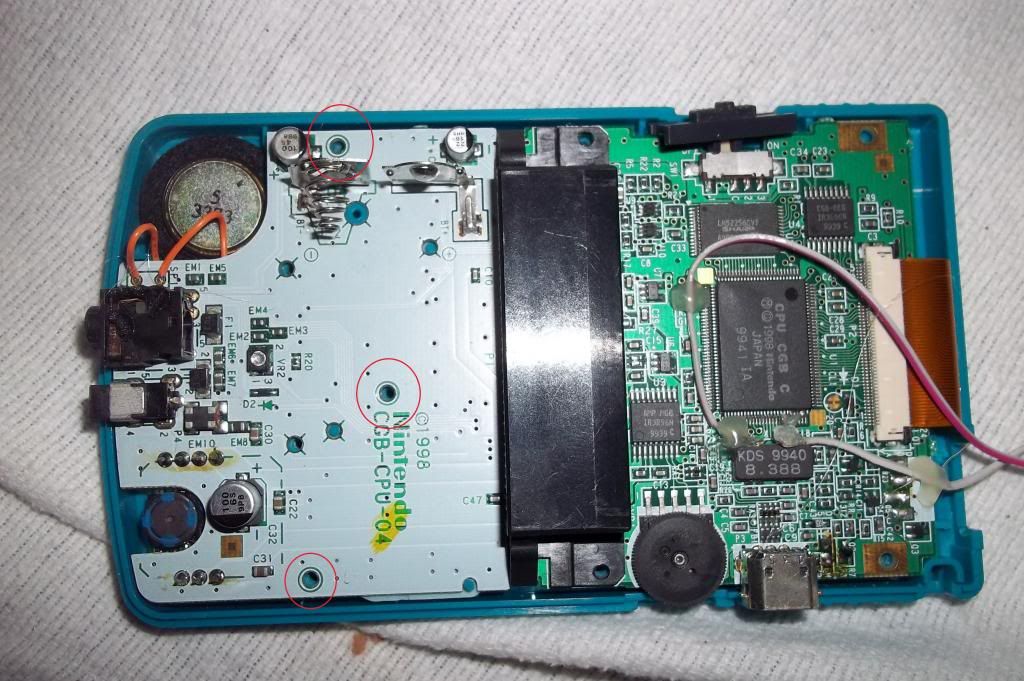
Now you should unscrew the three tiny philips head screws to release the mobo. Unclip the ribbon cable for the screen, and set the screen off to the side. I suggest placing all of the buttons including the slider for the power switch in a small sandwich baggie or something. Also remove the small dark insert for the IR LED's above the upper right corner of the mobo. Also you should probably remove the metal plate on the rear section of the case. You mini philips will do well for this.
Case Prep
First we will make room for your new crystals.

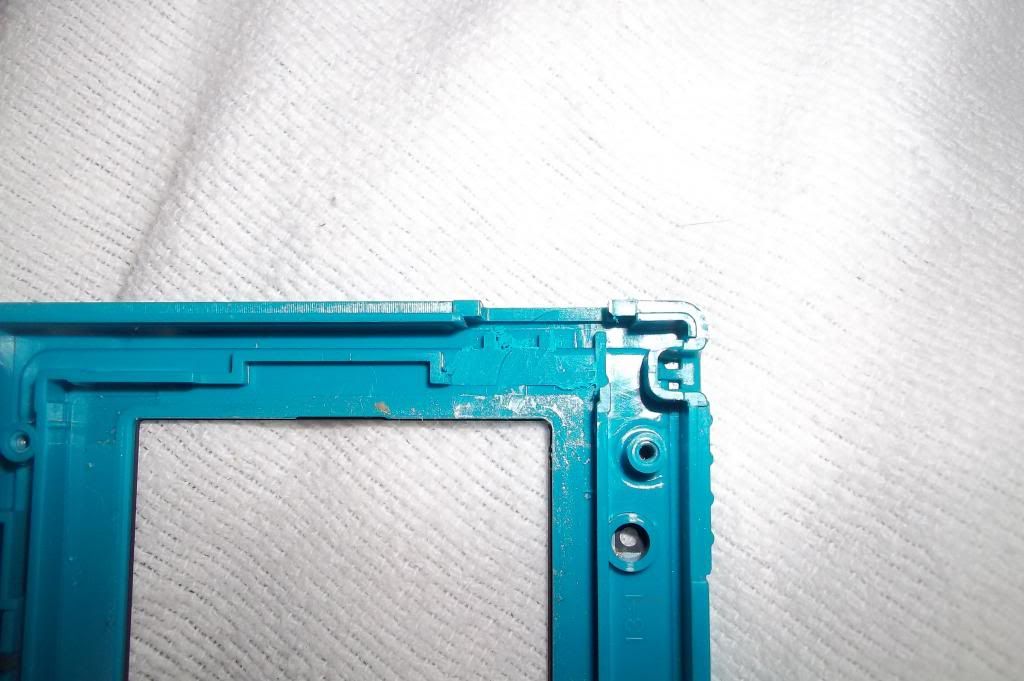
Here is where your new crystals will go. Get in close with your needle nose pliers and rip out the two small pieces of plastic.
It should look like this.
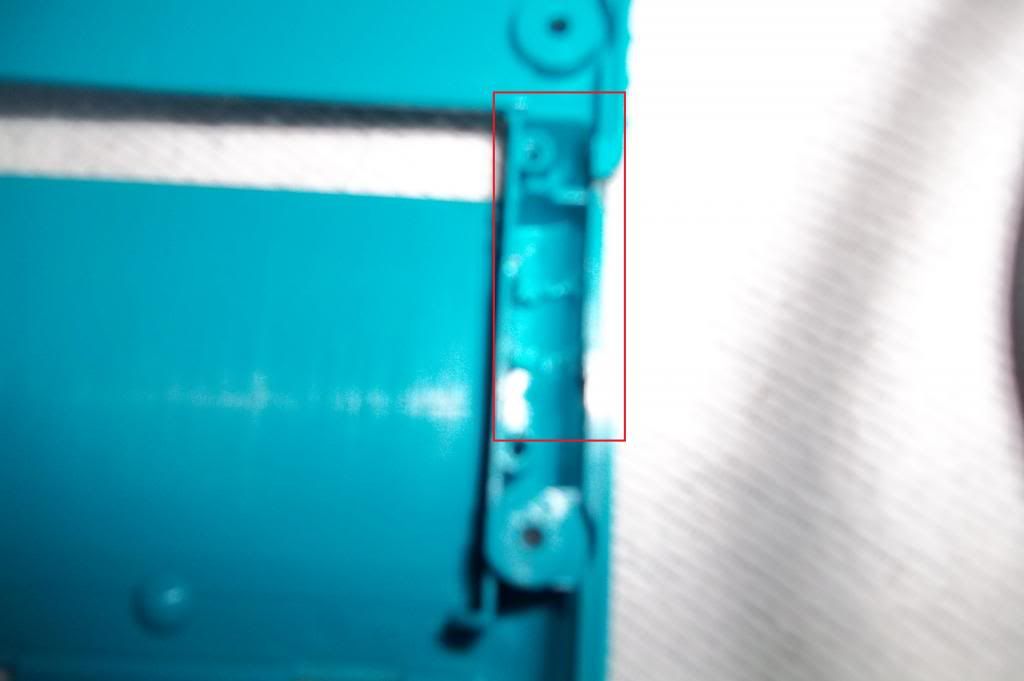
Now we will make room for the new switch. Thankfully the small cut out for the IR LED's to transmit and receive fits the body of the switches I provided perfectly, but there is excess plastic in the way.
On both halves of the case where this small cut out is smooth out the case with a small file, or a dremel if you have one.

This is what the case should now look like. Your case is now fully prepped. Set it off to the side.
Motherboard Work
This is probably the most difficult and risky part. Be sure while doing an soldering here that the tip of your soldering is free of excess solder. A drop of solder can be fatal right now, this is how I killed my GBC on my first try. First we will remove the IR LED's that are rarely used anyway.
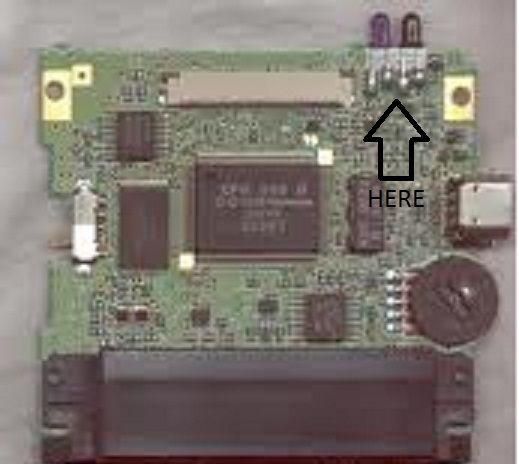
Here is the location. To remove simply heat both contacts at the same time. Then when the solder is melted lift the LED away. Repeat for the other.
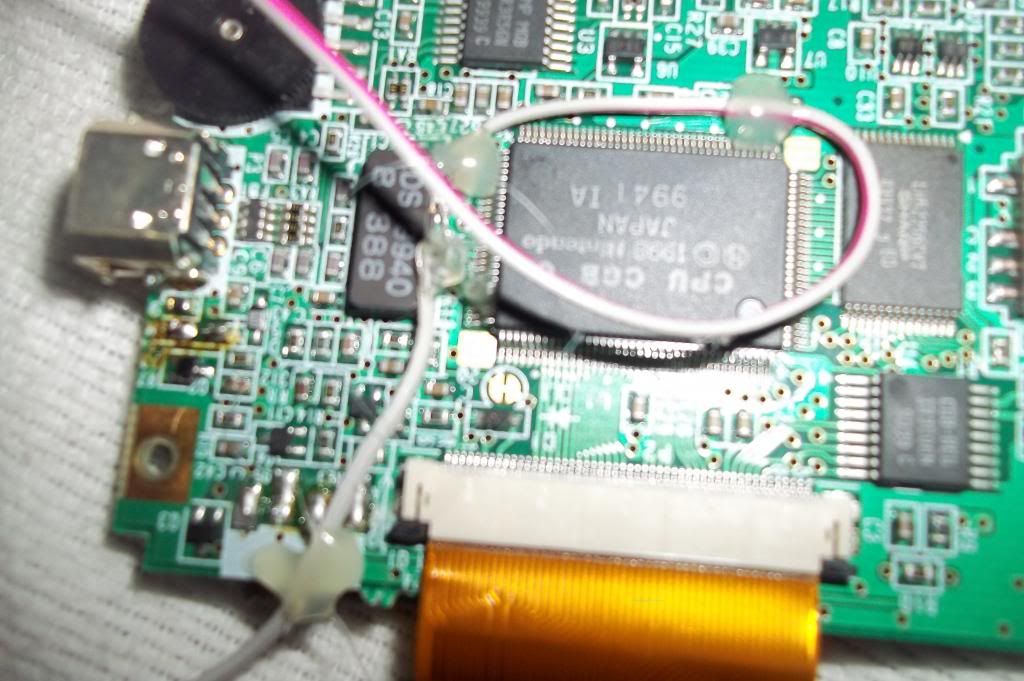
It should now look like this aside from the hot glue and wire.
Now get two pieces of wire. Both should be around two inches and have around the 1/4" on each end stripped and tinned. If you don't know how to do this look elsewhere on the web, information is everywhere. We will now solder each wire to a contact on the crystal.
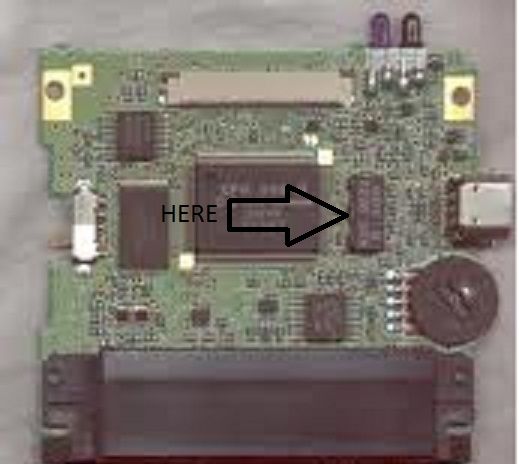
Here is the crystal. To solder the wire hold the pre-tinned end to a contact on the crystal, and press firmly with the tip of your iron for three to four seconds. Then lift the tip of the iron away without moving the wire. You should now have a descent solder joint. However, because of its size I would reinforce it with some hot glue. Now snake one wire to where the crystals will be and the other to the switch. Hot glue both in place on the mobo.
It should now resemble this.
Component Prep
First we will solder our new crystals together. Since if you follow this guide you will have two new speeds you should select two new crystals. If you're going to overclock I would use a 14 mghz and a 16 mghz crystal. You could use a crystal below 8 mghz if you wanted to underclock it however I have not done this.
Now to solder your crystals together bend one lead on each crystal at a 90 degree angle off of the side of the crystal. Now solder these two leads together.
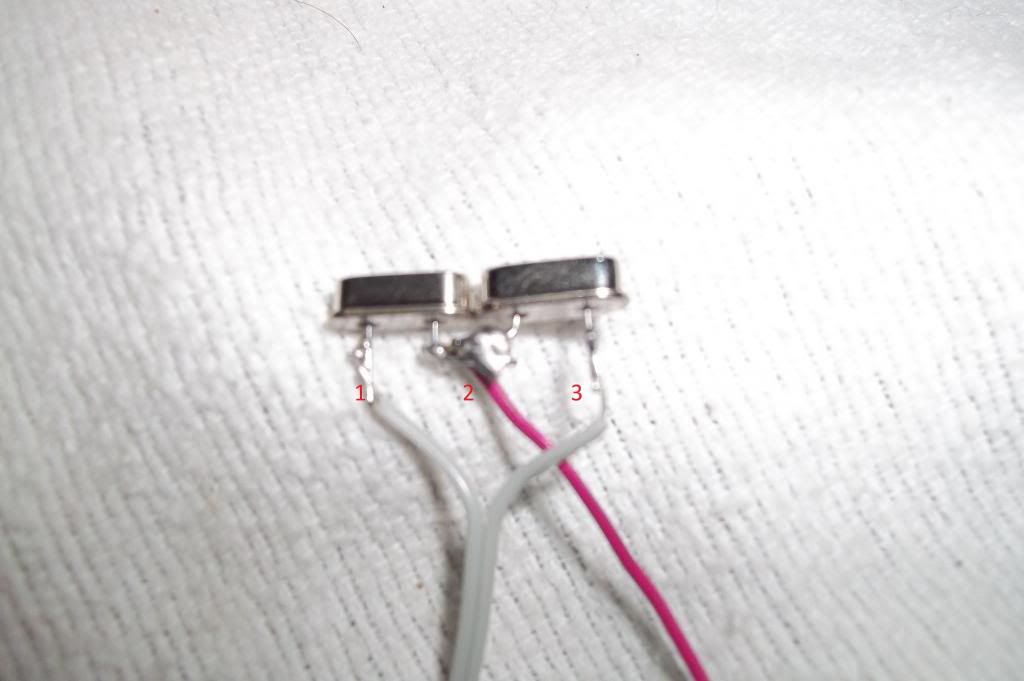
It should now resemble this. Now take two more pieces of wire 3 or 4 inches in length and solder the to leads 1 and 3.
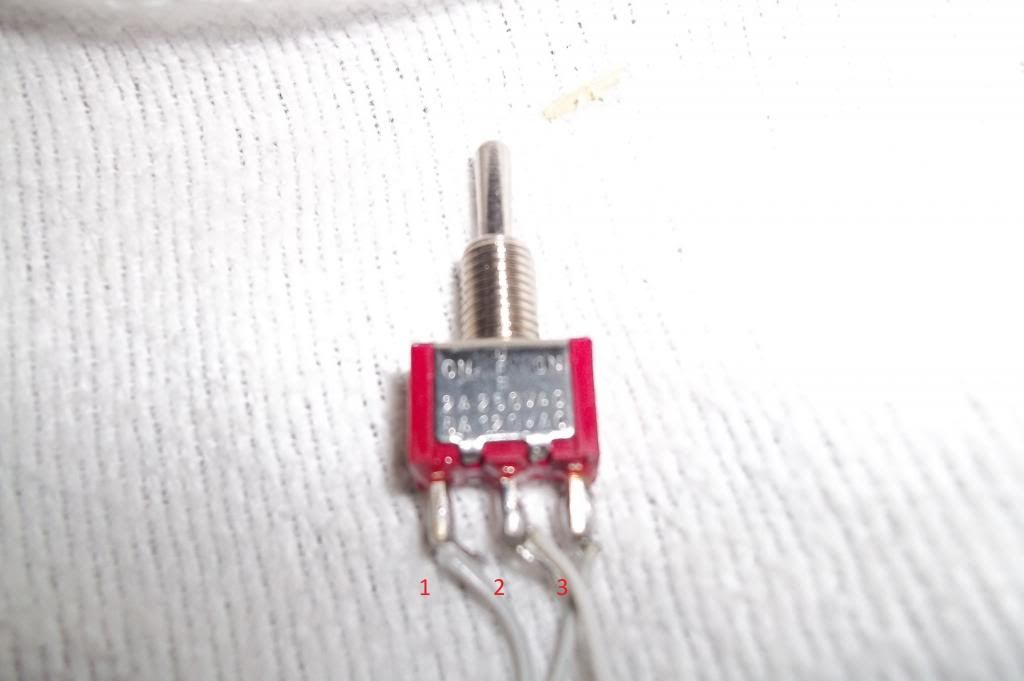
Now solder these wire to leads 1 and 3 on the switch. Now this part may become a little difficult, and there are probably better ways to do I but this is the way I do it. Hot glue the switch and crystals to their predetermined locations on the rear of the case. Now solder a wire from the crystal on mobo to lead 2 on the crystals, and the other wire to lead 2 on the switch. Now carefully reassemble the GBC. Screwing the mobo down isn't really necessary as do not do it to prevent damage to the mobo if the GBC needs to be opened up agian.
Guess What!
You're now finished with your overclocked GBC. This is my first attempt at a guide and I hope it helps someone. If you have any questions post below if I don't help you someone will.
Disclaimer
This is an extremely simple project for beginners. That being said YOU CAN KILL YOUR SYSTEM. I did my first try, but I didn't have a wonderful guide such as this to follow.
To Start
We will now talk about what is needed.
Tools
Soldering Iron (Any beginner iron will do) and Solder
Needle Nose Pliers (Any should work)
Small File (Not necessary but helpful )
Dremel with High Speed Cutter (If you got it life will be much easier)
Hot Glue Gun and Hot Glue Sticks
Special Screwdriver Great High Quality Set
Components
Wire (Old ribbon cable works nice)
Switch What I bought What you should buy
Crystal Best Value I could find
A GBC
Opening the Case

You must remove these six screws, but you must use your awesome new tri-wing screwdriver. Now the rear section of the case should lift off to reveal the motherboard.

Now you should unscrew the three tiny philips head screws to release the mobo. Unclip the ribbon cable for the screen, and set the screen off to the side. I suggest placing all of the buttons including the slider for the power switch in a small sandwich baggie or something. Also remove the small dark insert for the IR LED's above the upper right corner of the mobo. Also you should probably remove the metal plate on the rear section of the case. You mini philips will do well for this.
Case Prep
First we will make room for your new crystals.

Here is where your new crystals will go. Get in close with your needle nose pliers and rip out the two small pieces of plastic.

It should look like this.

Now we will make room for the new switch. Thankfully the small cut out for the IR LED's to transmit and receive fits the body of the switches I provided perfectly, but there is excess plastic in the way.
On both halves of the case where this small cut out is smooth out the case with a small file, or a dremel if you have one.


This is what the case should now look like. Your case is now fully prepped. Set it off to the side.
Motherboard Work
This is probably the most difficult and risky part. Be sure while doing an soldering here that the tip of your soldering is free of excess solder. A drop of solder can be fatal right now, this is how I killed my GBC on my first try. First we will remove the IR LED's that are rarely used anyway.

Here is the location. To remove simply heat both contacts at the same time. Then when the solder is melted lift the LED away. Repeat for the other.

It should now look like this aside from the hot glue and wire.
Now get two pieces of wire. Both should be around two inches and have around the 1/4" on each end stripped and tinned. If you don't know how to do this look elsewhere on the web, information is everywhere. We will now solder each wire to a contact on the crystal.

Here is the crystal. To solder the wire hold the pre-tinned end to a contact on the crystal, and press firmly with the tip of your iron for three to four seconds. Then lift the tip of the iron away without moving the wire. You should now have a descent solder joint. However, because of its size I would reinforce it with some hot glue. Now snake one wire to where the crystals will be and the other to the switch. Hot glue both in place on the mobo.
It should now resemble this.
Component Prep
First we will solder our new crystals together. Since if you follow this guide you will have two new speeds you should select two new crystals. If you're going to overclock I would use a 14 mghz and a 16 mghz crystal. You could use a crystal below 8 mghz if you wanted to underclock it however I have not done this.
Now to solder your crystals together bend one lead on each crystal at a 90 degree angle off of the side of the crystal. Now solder these two leads together.

It should now resemble this. Now take two more pieces of wire 3 or 4 inches in length and solder the to leads 1 and 3.

Now solder these wire to leads 1 and 3 on the switch. Now this part may become a little difficult, and there are probably better ways to do I but this is the way I do it. Hot glue the switch and crystals to their predetermined locations on the rear of the case. Now solder a wire from the crystal on mobo to lead 2 on the crystals, and the other wire to lead 2 on the switch. Now carefully reassemble the GBC. Screwing the mobo down isn't really necessary as do not do it to prevent damage to the mobo if the GBC needs to be opened up agian.
Guess What!
You're now finished with your overclocked GBC. This is my first attempt at a guide and I hope it helps someone. If you have any questions post below if I don't help you someone will.