You are using an out of date browser. It may not display this or other websites correctly.
You should upgrade or use an alternative browser.
You should upgrade or use an alternative browser.
NGCP by Nikoil
Nikoil
Member
Power board
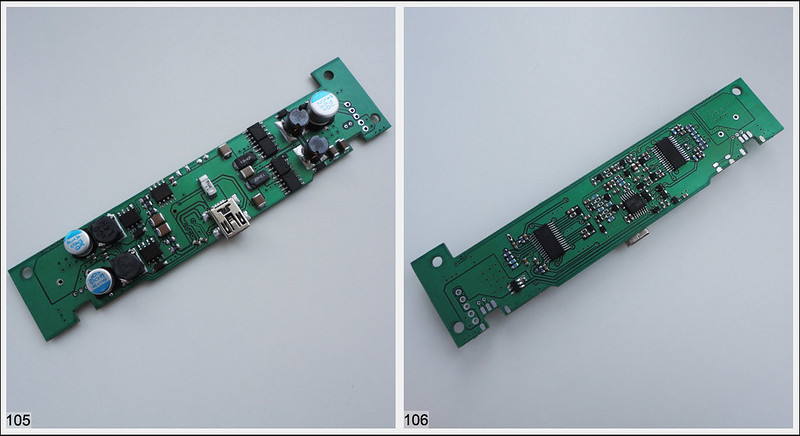
When I started doing the project I wanted to take out the power board from the console and just extend the wires. This did not work because of the long wire, the console was not turn on. There were large voltage losses. When I tried to calibrate the power supply, i burned it))). In the photo, the first version of the board with usb 12v dc in, video output, volume control and z buttons.
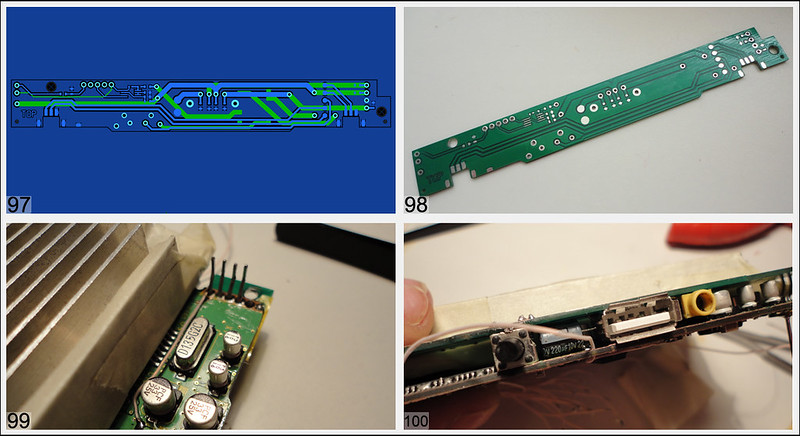
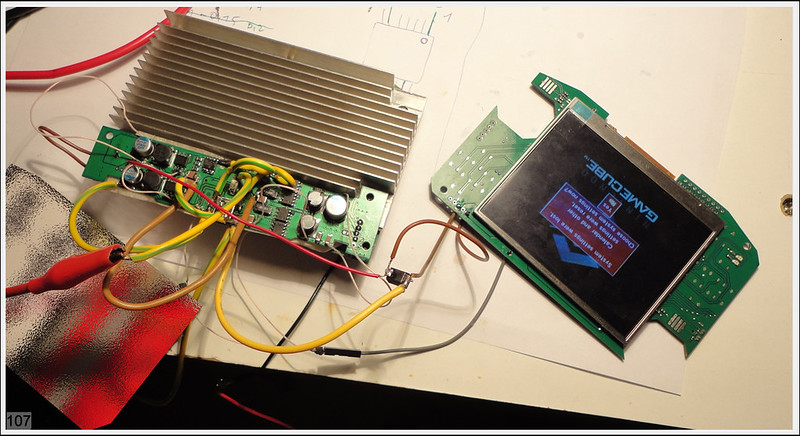
After this fail, I realized that the only correct solution would be to integrate the power board into the console. The ratio of the sizes dc pcb and my GC seen in this photo
Since I had to urgently looking for a replacement dc, I bought a pal gc because ntsc in my country not available.
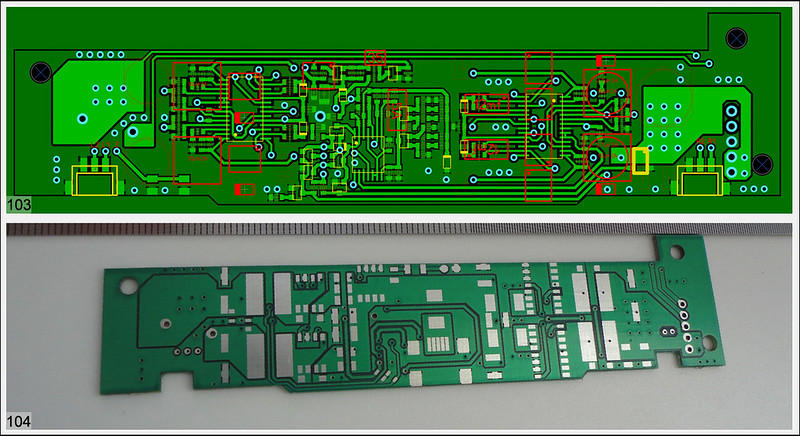
The power supply was 4-layered. This is a very difficult task.
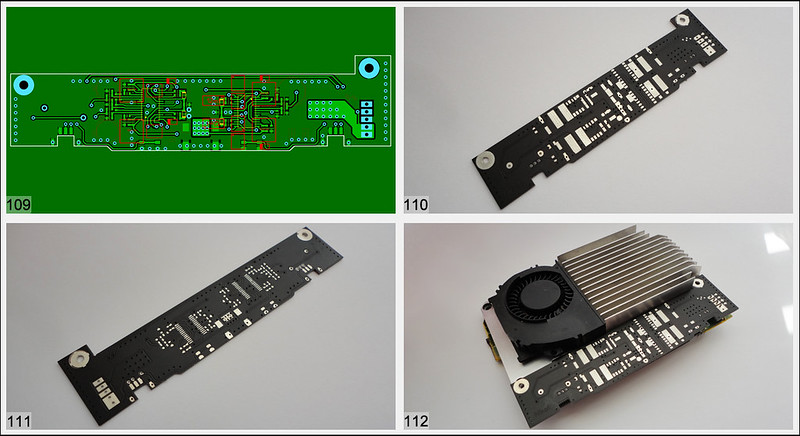
I had to make a 4-layer power supply of smaller dimensions, and then turn it into a two-layer board. And I did it. See animation.

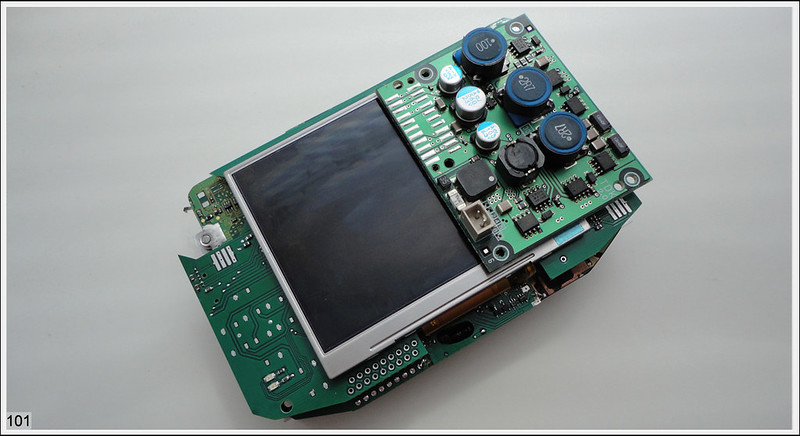
The power supply did not work right away. There were many problems. When he began to work stably I was not satisfied because there was no free space for speaker.
I removed a lot of spare parts from the unit.
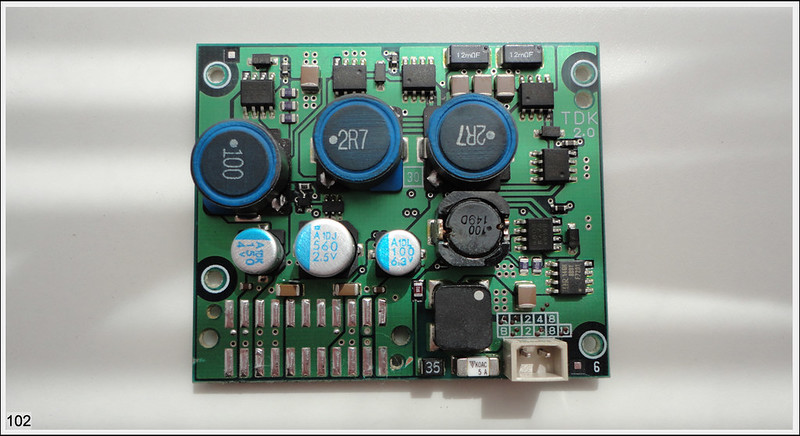
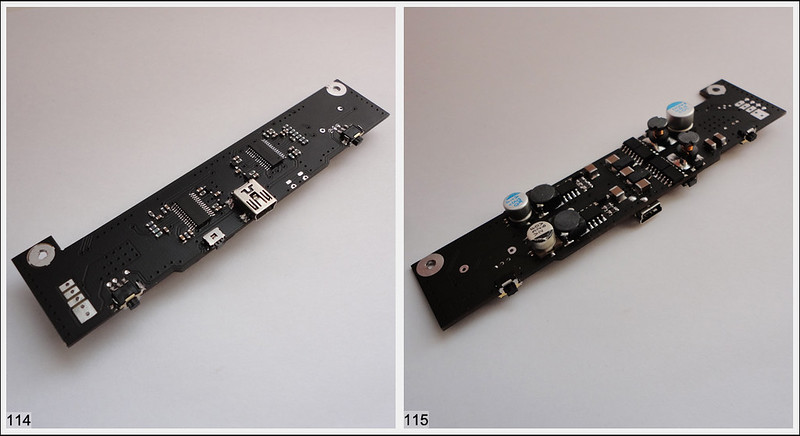
After removing few components i can make board ~ 25% smaller. Now there is where to put the speakers. On dc borad i intagrated a mini Usb 12v in, L \ R analog and digital + Z buttons.
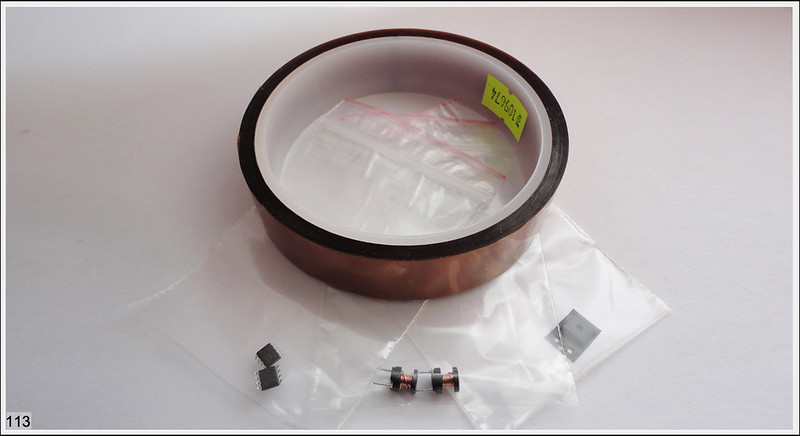
Spares for this board i buy on Ebay. Seller send me from Japan 3x power board. Now left ~2 month. No parcel yet. I think it was stolen((( I had to buy several not original parts and mosfet.
And internal power board - FINISHED
When I started doing the project I wanted to take out the power board from the console and just extend the wires. This did not work because of the long wire, the console was not turn on. There were large voltage losses. When I tried to calibrate the power supply, i burned it))). In the photo, the first version of the board with usb 12v dc in, video output, volume control and z buttons.
After this fail, I realized that the only correct solution would be to integrate the power board into the console. The ratio of the sizes dc pcb and my GC seen in this photo
Since I had to urgently looking for a replacement dc, I bought a pal gc because ntsc in my country not available.
The power supply was 4-layered. This is a very difficult task.
I had to make a 4-layer power supply of smaller dimensions, and then turn it into a two-layer board. And I did it. See animation.
The power supply did not work right away. There were many problems. When he began to work stably I was not satisfied because there was no free space for speaker.
I removed a lot of spare parts from the unit.
After removing few components i can make board ~ 25% smaller. Now there is where to put the speakers. On dc borad i intagrated a mini Usb 12v in, L \ R analog and digital + Z buttons.
Spares for this board i buy on Ebay. Seller send me from Japan 3x power board. Now left ~2 month. No parcel yet. I think it was stolen((( I had to buy several not original parts and mosfet.
And internal power board - FINISHED
Last edited:
Nikoil
Member
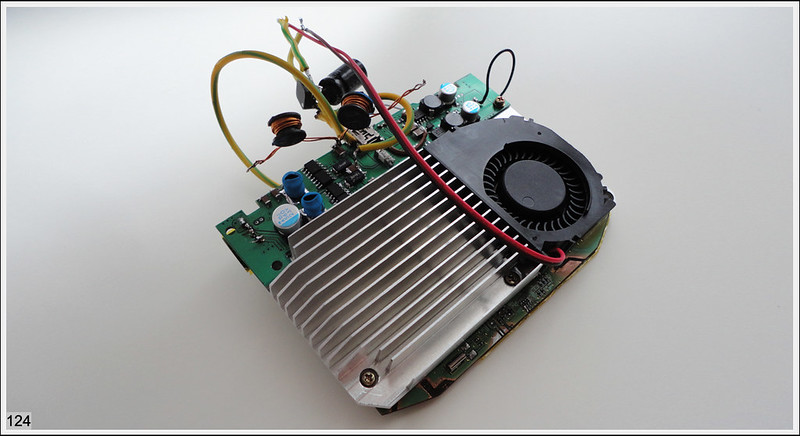
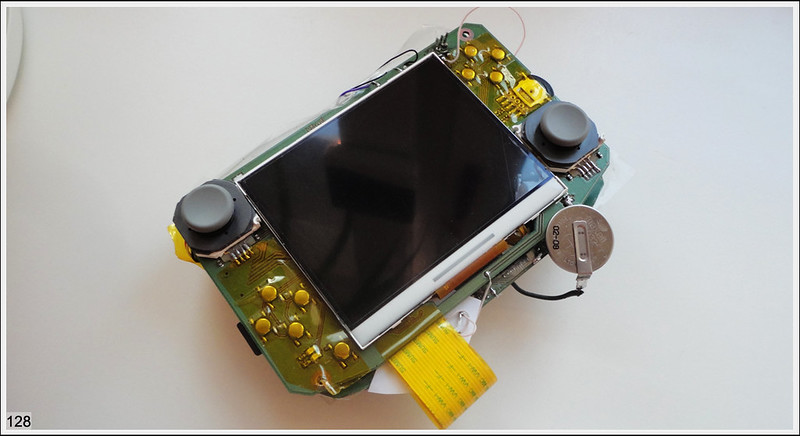
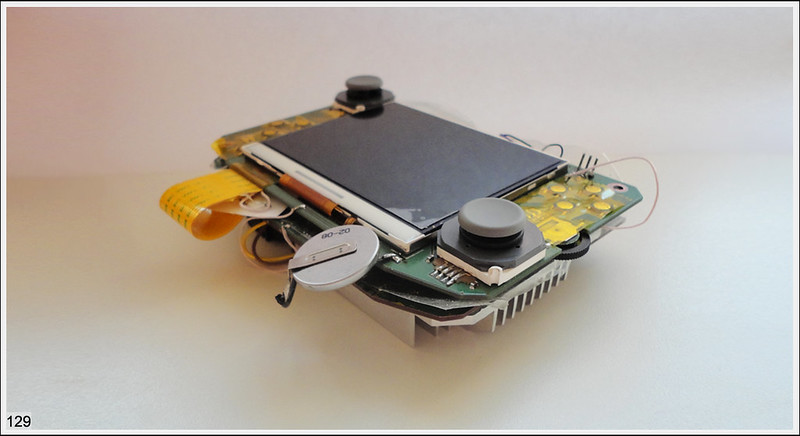
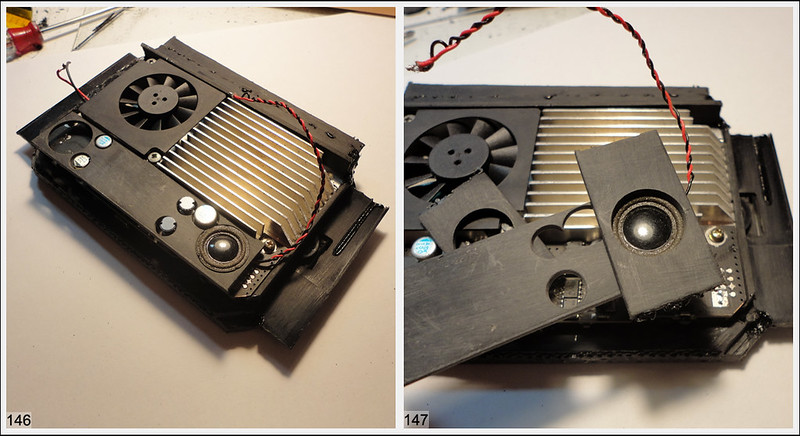
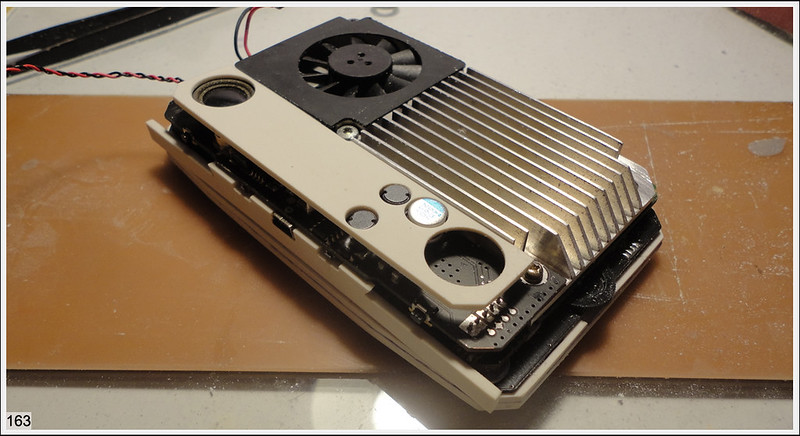
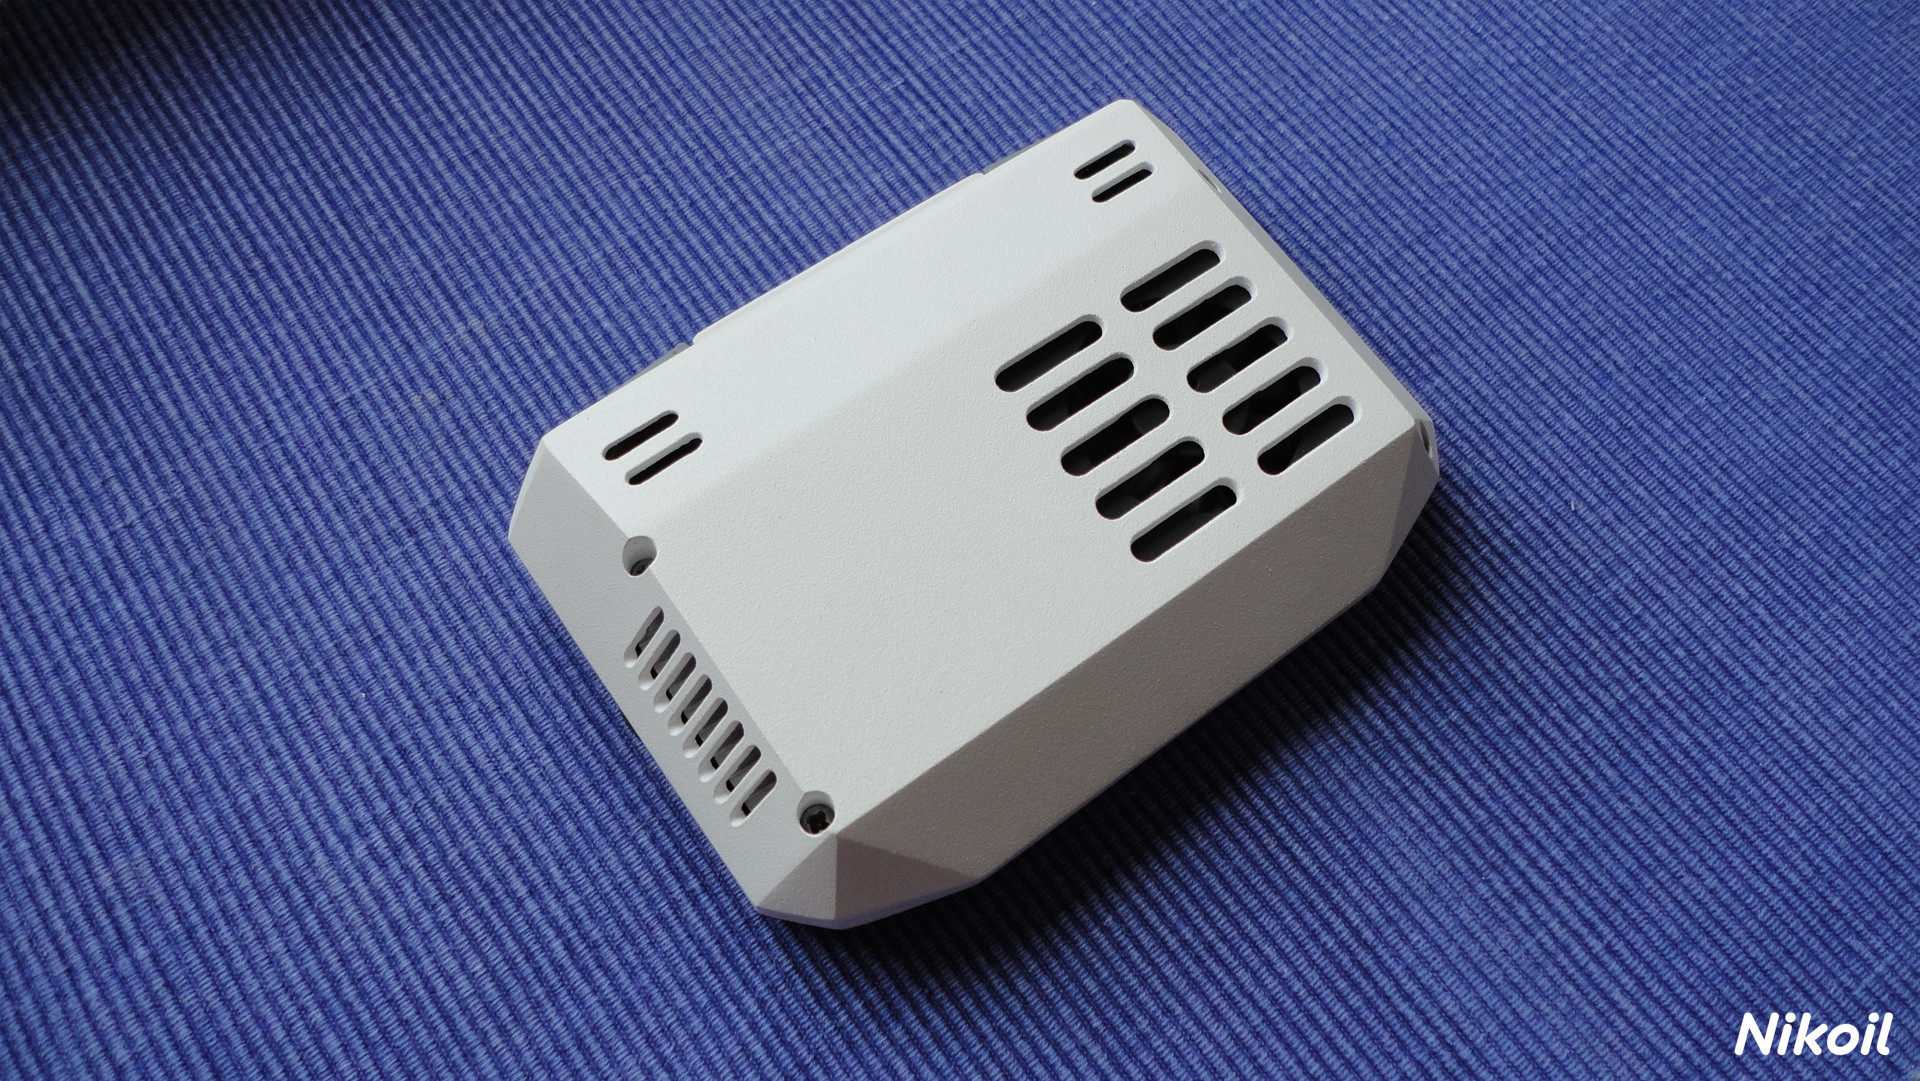
Сooling system
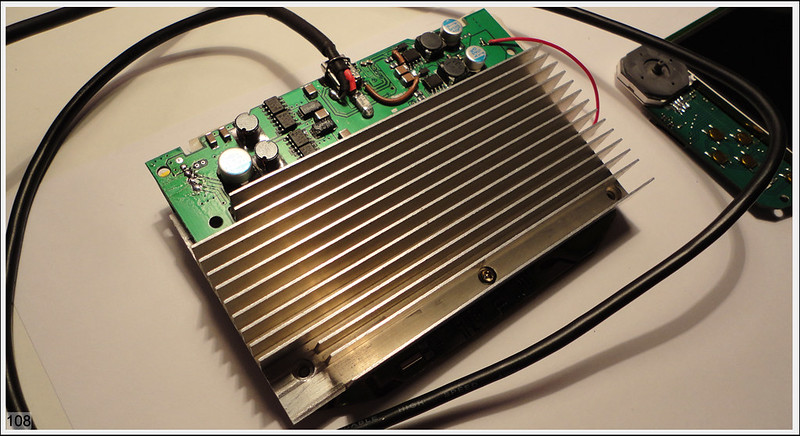
The radiator and the power unit i make at the same time.
Cut and polished..... too long time. It was difficult but incomparably easy compared to designing a power supply.
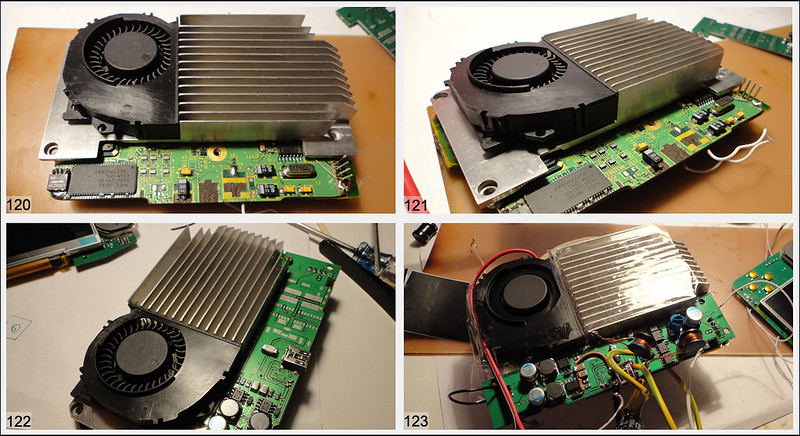
On board with fan duct.
I think it's very beautiful
But I can do better
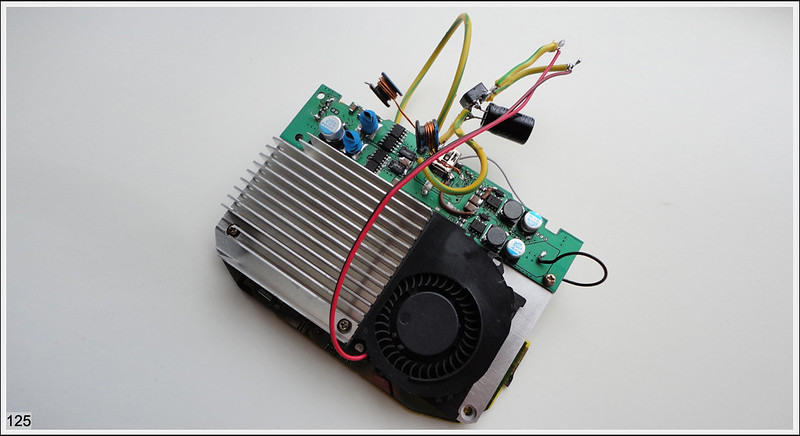
And I will do it better
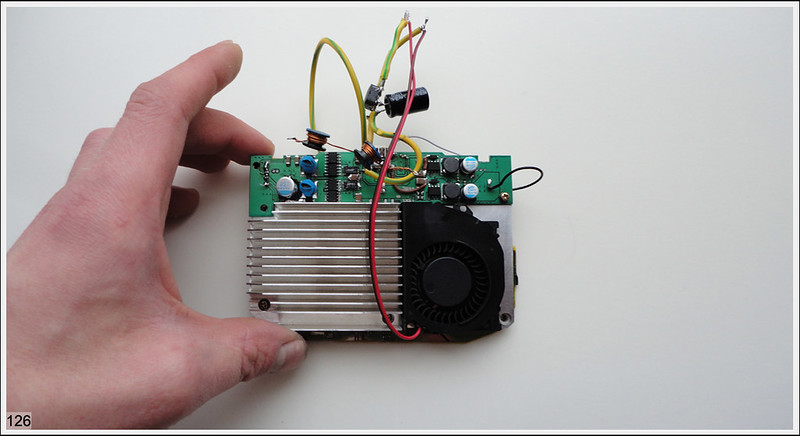
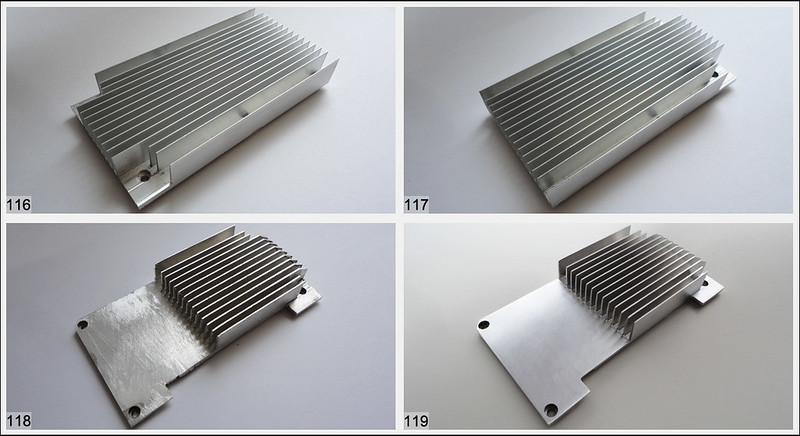
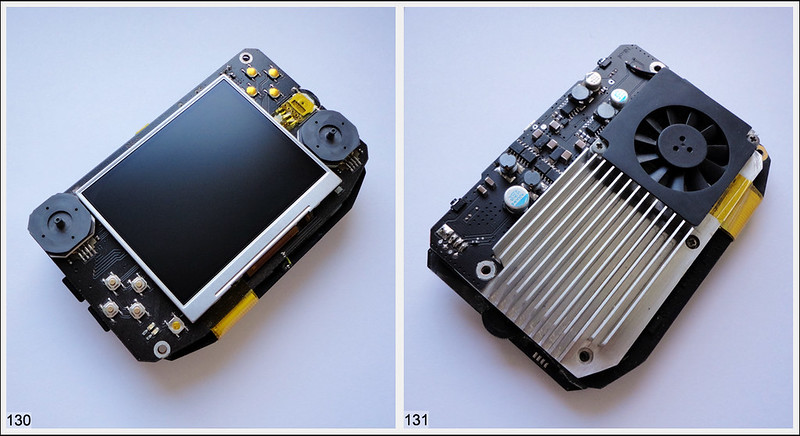
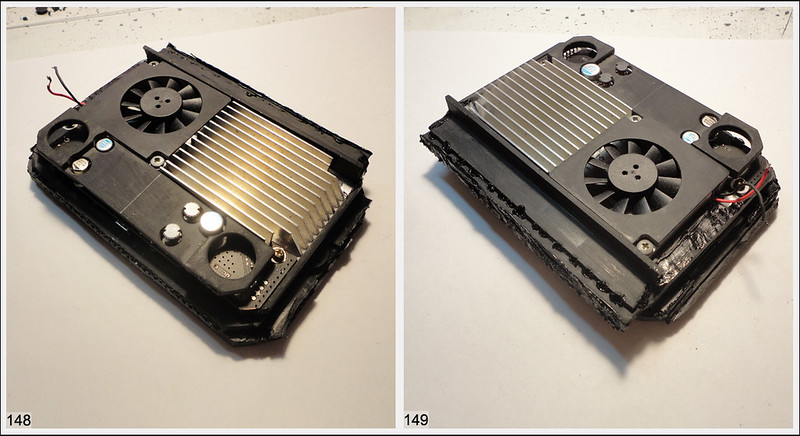
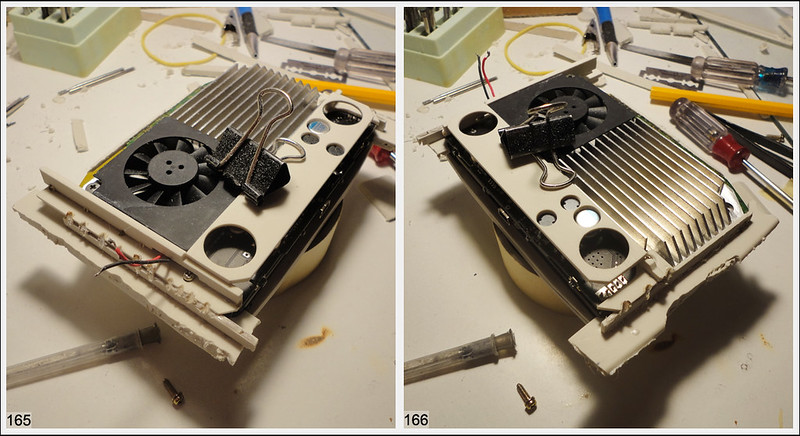
I bought a new fan. Pressure is less by 10% but he has metal housing, lower voltage, smaller dimensions and work quieter than the previous. I made heatsink much thinner. Need polish it
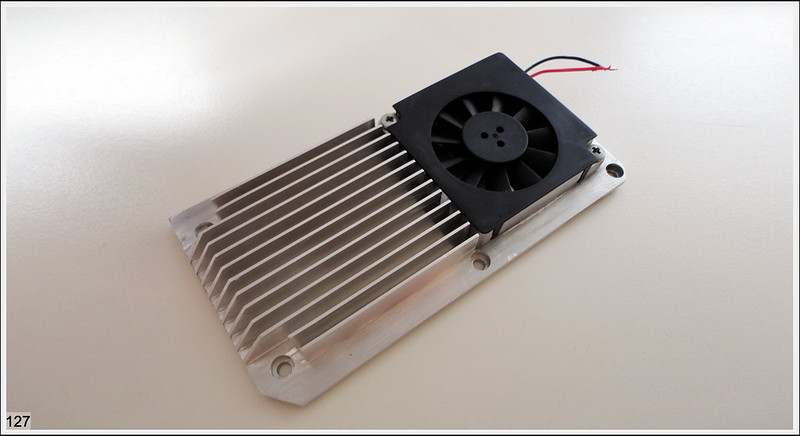
And cooling system - FINISHED
The radiator and the power unit i make at the same time.
Cut and polished..... too long time. It was difficult but incomparably easy compared to designing a power supply.
On board with fan duct.
I think it's very beautiful
But I can do better
And I will do it better
I bought a new fan. Pressure is less by 10% but he has metal housing, lower voltage, smaller dimensions and work quieter than the previous. I made heatsink much thinner. Need polish it
And cooling system - FINISHED
Last edited:
public-pervert
Well-Known Member
Dude, this is actually incredible!
Just an opinion though: Why not just using regulator modules (as the common TI ones) instead of reverse engineering the orginal? It could save some space.
Ps: I'm working on something similar to it, but for the Wii. What software are you using for designing the boards?
Just an opinion though: Why not just using regulator modules (as the common TI ones) instead of reverse engineering the orginal? It could save some space.
Ps: I'm working on something similar to it, but for the Wii. What software are you using for designing the boards?
Last edited:
Nikoil
Member
I read about regulator on this forum. But price )I live not in USA. Shipping cost to my was like GC only for 1 regulator. I know about cheaper module from ali (cheaper copy Texas Instruments) but Nintendo is better. M.b You know better and quality regulator?
In power board Nintendo use only high price and good quality components. When i understend this scheme i was surprised. This dc board like muscle car) twin turbo 1.9v dc for core) with low working temperature. i can make pcb smaller. But it do noot need in this project.
I use my favorite software. For tracing Sprint layout and Autocad for modelling.
Last edited:
lyberty5
Well-Known Member
This is great, a very original way of going about things.
I'm also pretty sure it's going to be the most expensive GCP ever built")
Have you read around the forums? I'm specificaly thinking of the way you tackled power regulation. The TI regulators most people use could have been a little easier to work with.. Maybe you could have even integrated them on a pcb as they are "through hole" if my memory isn't false.
I'm also pretty sure it's going to be the most expensive GCP ever built
Have you read around the forums? I'm specificaly thinking of the way you tackled power regulation. The TI regulators most people use could have been a little easier to work with.. Maybe you could have even integrated them on a pcb as they are "through hole" if my memory isn't false.
Nikoil
Member
Thanks)
About dc.
1 - I read. Power supply was a problem for everyone who makes portable GC) I chose the most difficult way.
2 - When i started make portable Cube i wanted use maximum original components
3 - If make integrated power board to main board - wil be broblems with ground noises. And need make analogue/digital ground, buy bigger shielded inductors and GC will be thicker.
4 - I think i first who did original power board smaller. Its was very hard and too expensive. But i like what i got)
public-pervert
Well-Known Member
This is by far, the most professional work I've seen. Will you release the board schematics in the near future? Unrelated question: What's your first language?
Nikoil
Member
About schematics - at this moment i think no. My first language is russianpublic-pervert
Nikoil
Member
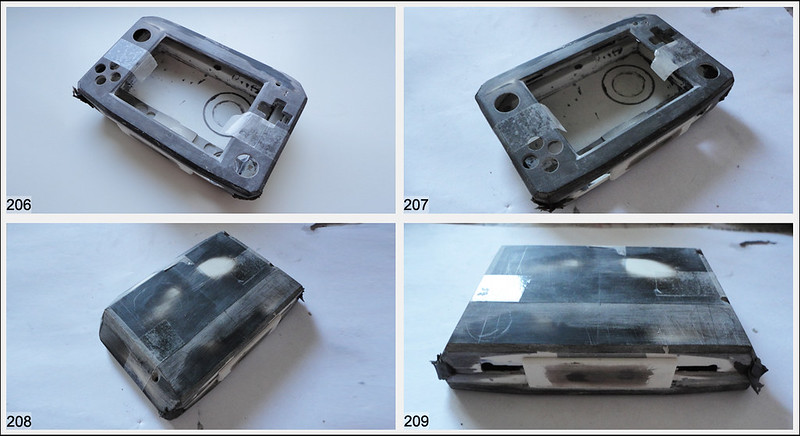
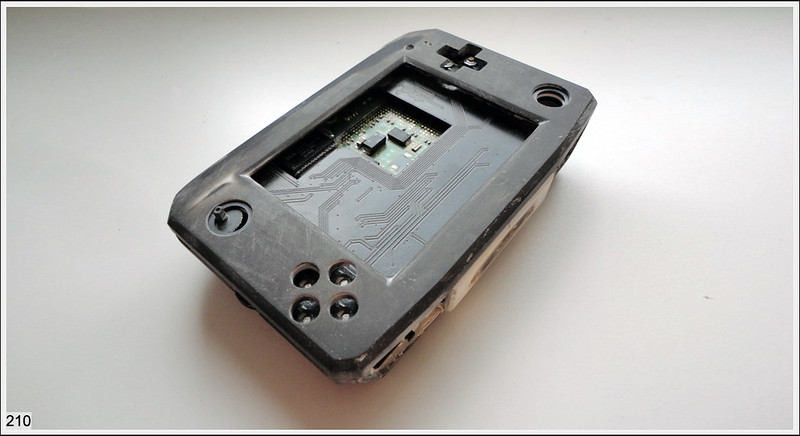
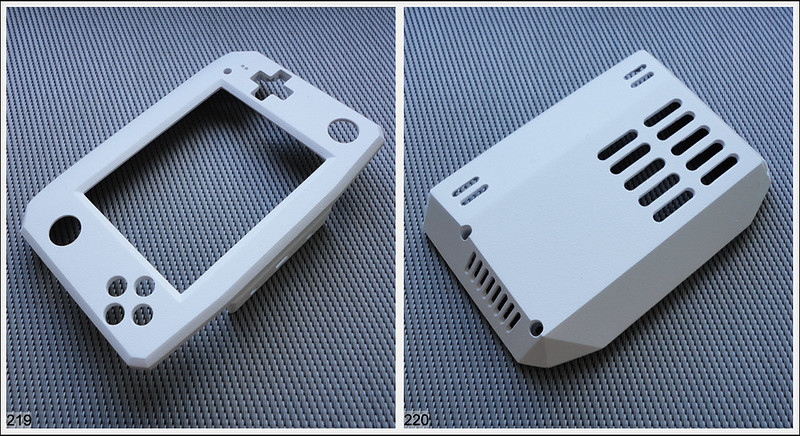
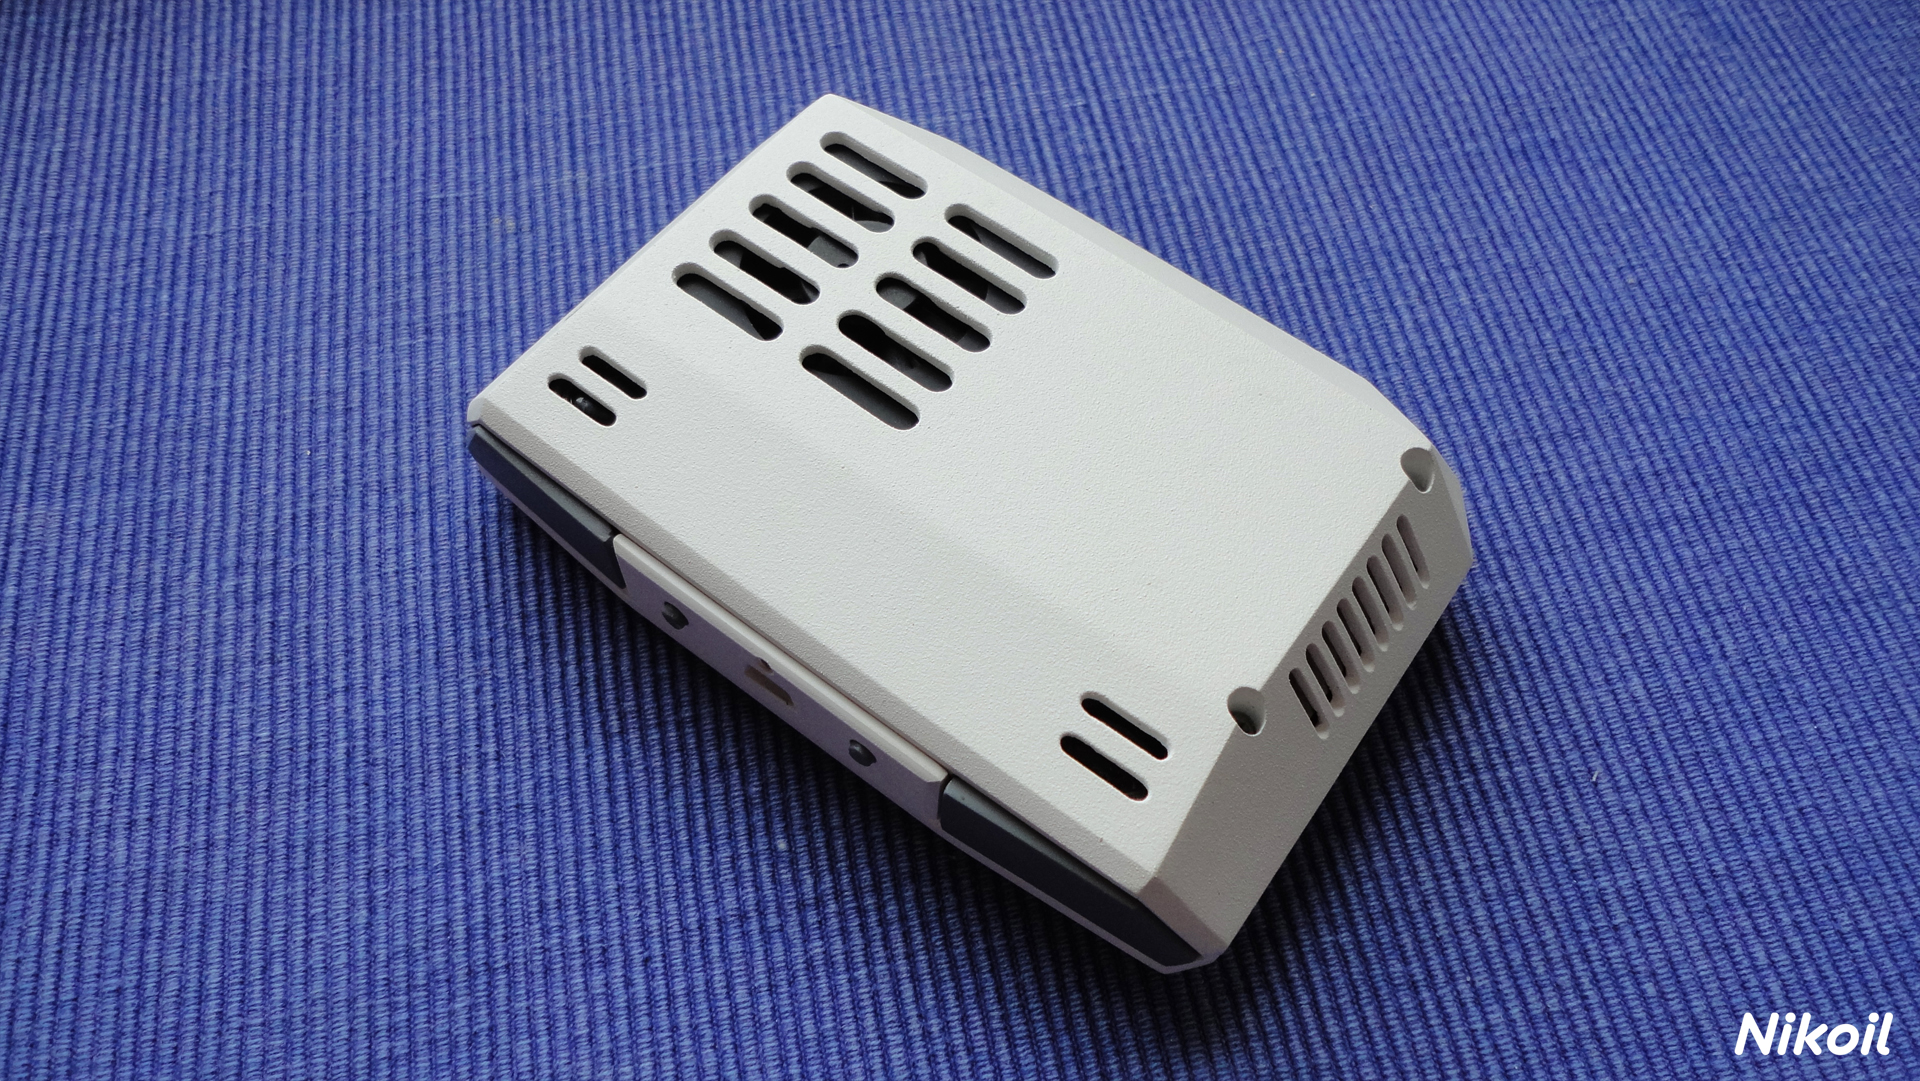
Case mod
The case will be made of abs plastic. 3D project in the photo its top internal button panel only.
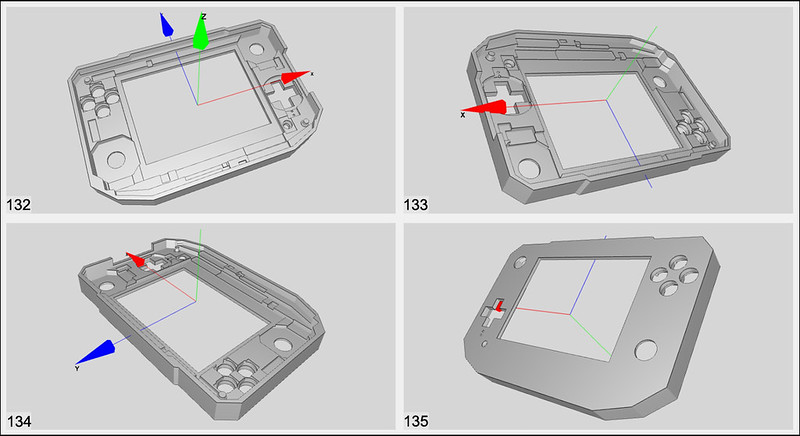
I wanted made case on cnс but when i asked about technical conditions and price I decided to change my mind because for such a simple product require a lot of money and use a large diameter drill. Making at home qualiti plastic product using a simple tool - this is a serious task.
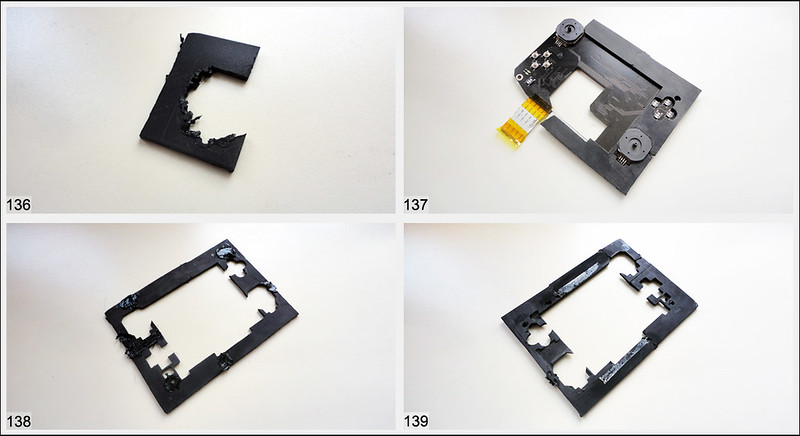
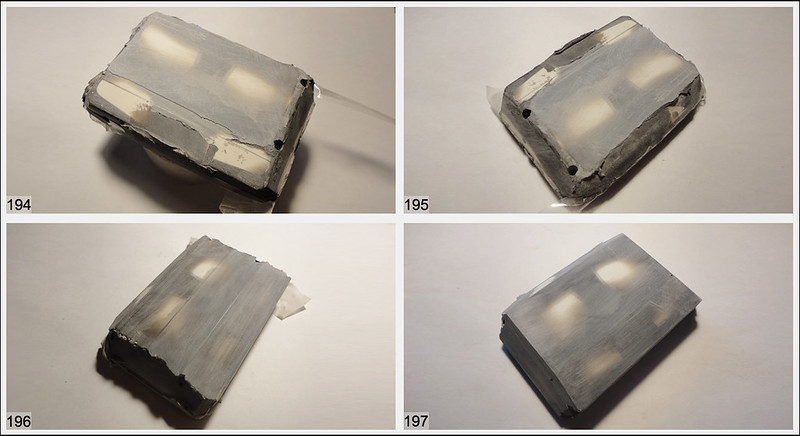
I'm using a new way of making the case. This is a layered application of sheet plastic with subsequent gluing. With a similar way of making, I did not come across and do it for the first time.
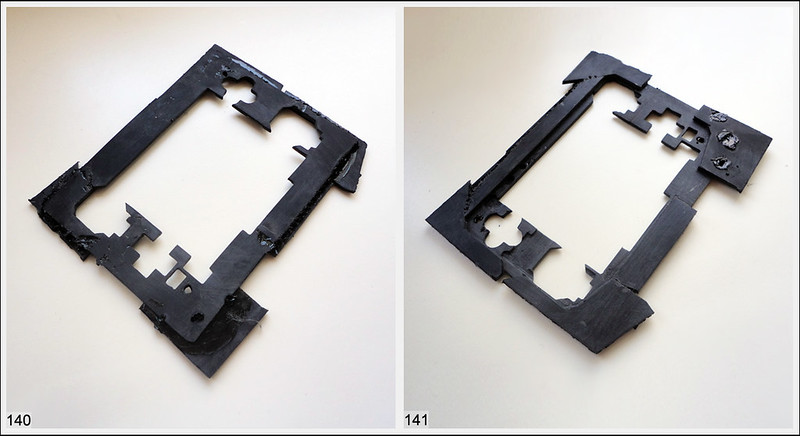
I did not design the exterior because it will take a very long time.
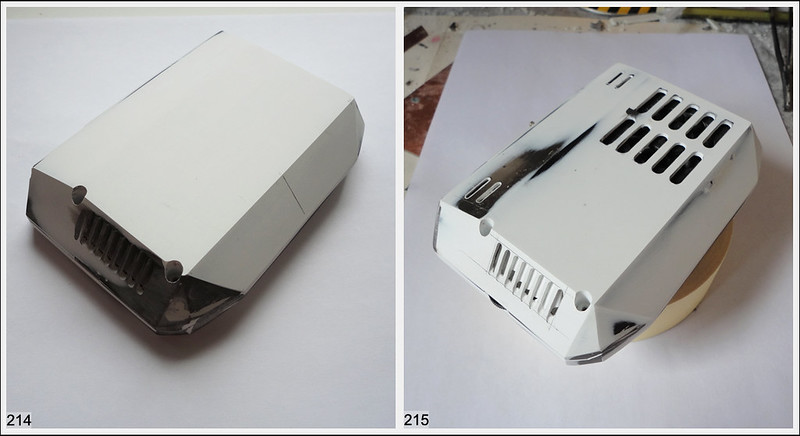
Now the pieces of plastic began to resemble a game console
It's look like a robocop parts
I don't like it
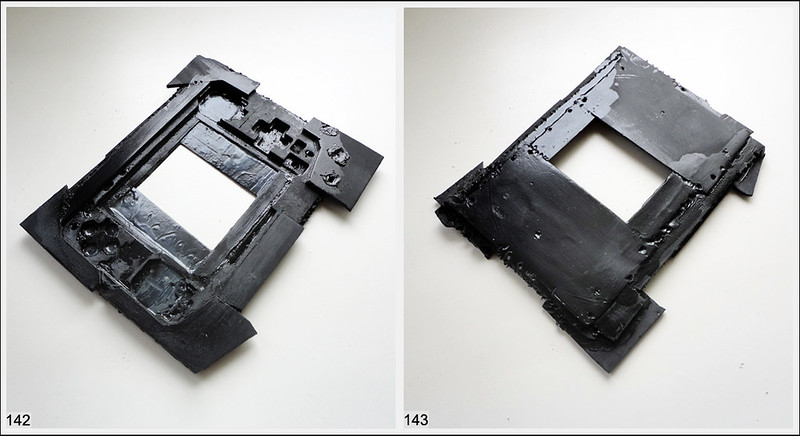
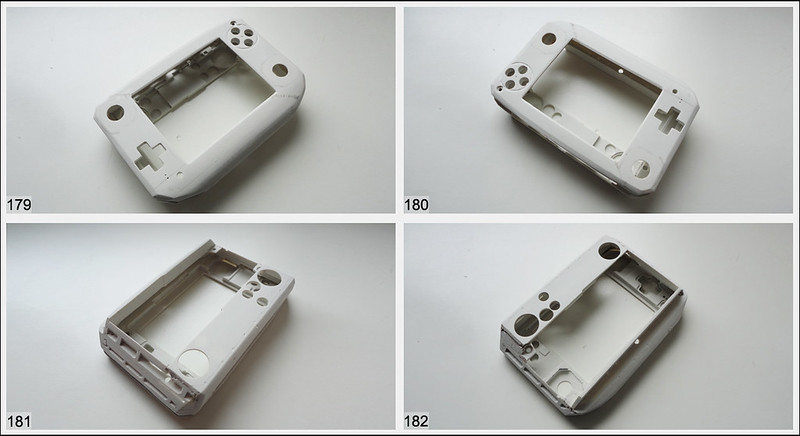
I decided to start on a new case
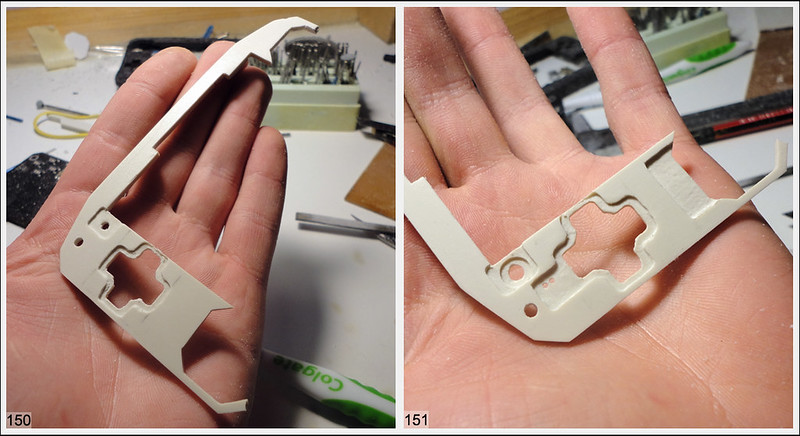
Pic. - 150, 151 the quantity of layers will be smaller.
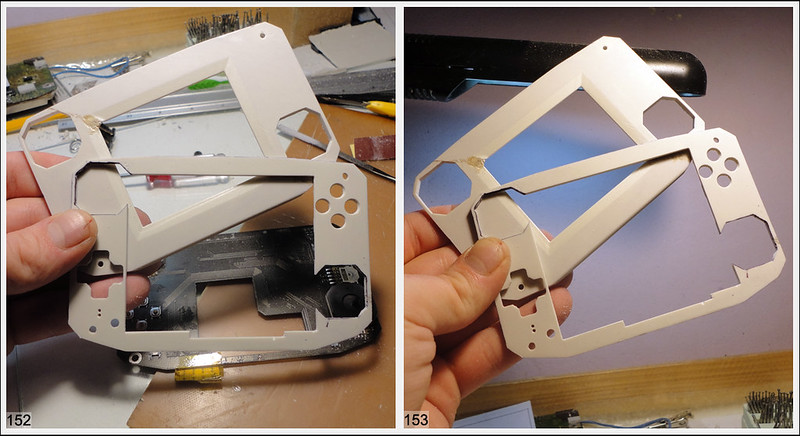
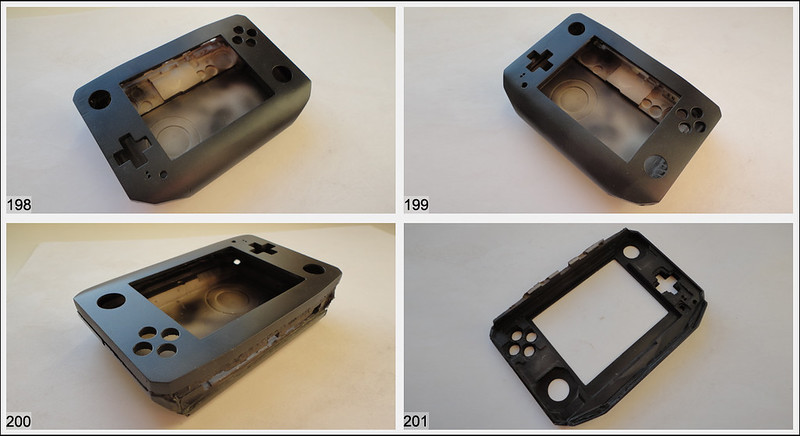
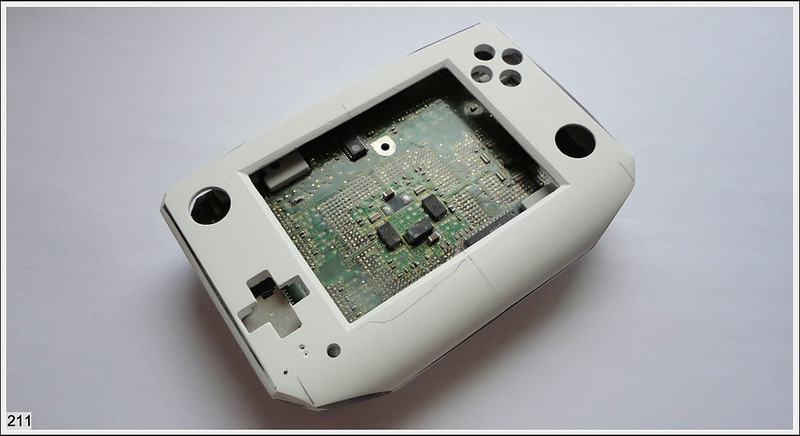
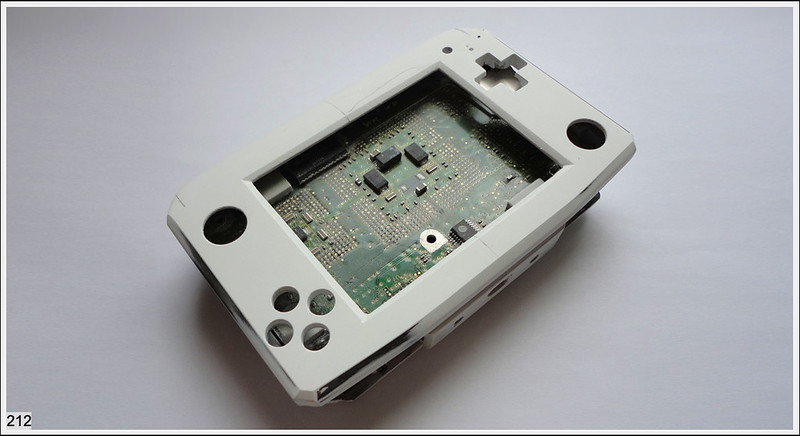
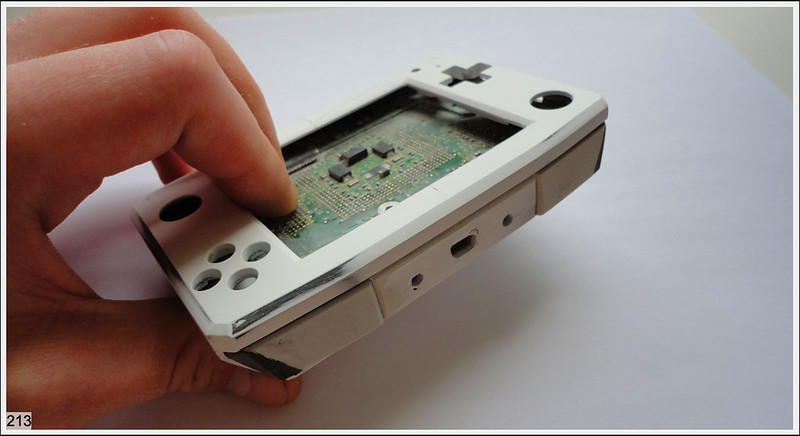
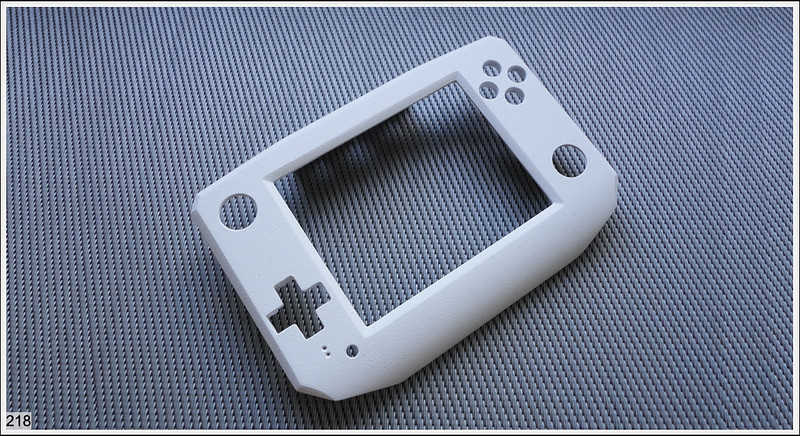
Front view
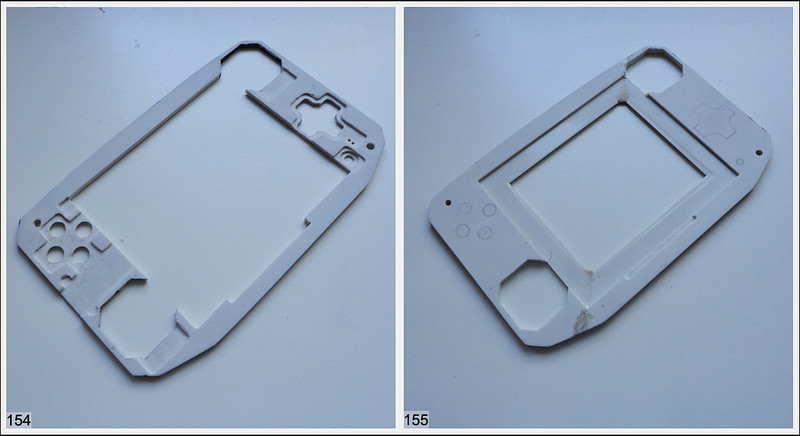
Pic. - 154, 155 the front panel consists of two plastic layers
The cube smiles at me
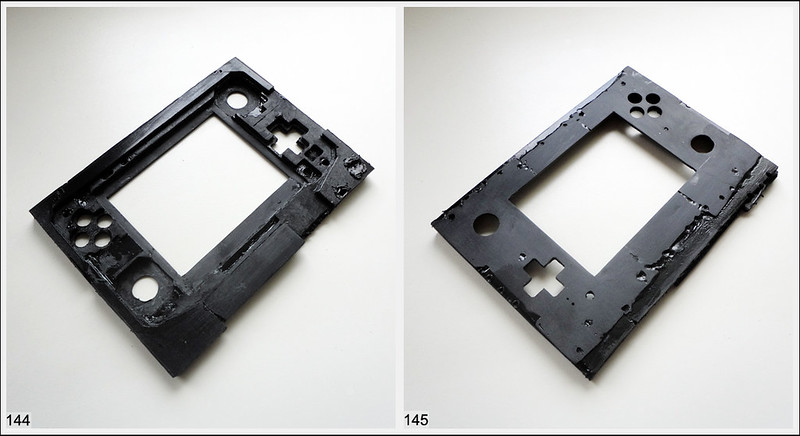
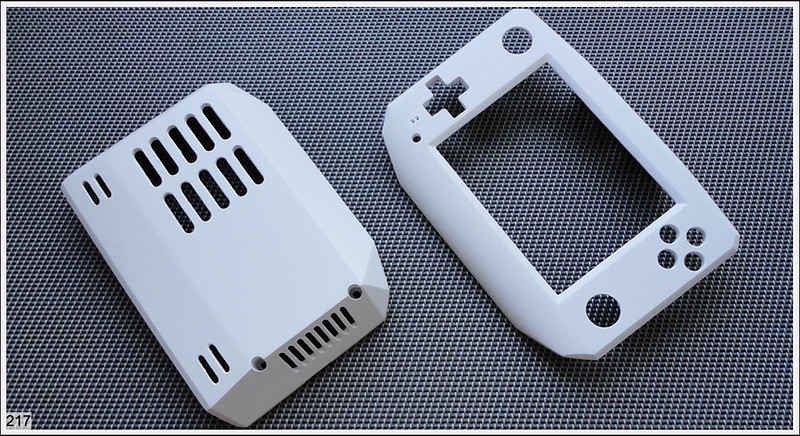
Now i make most difficult panel for speaker
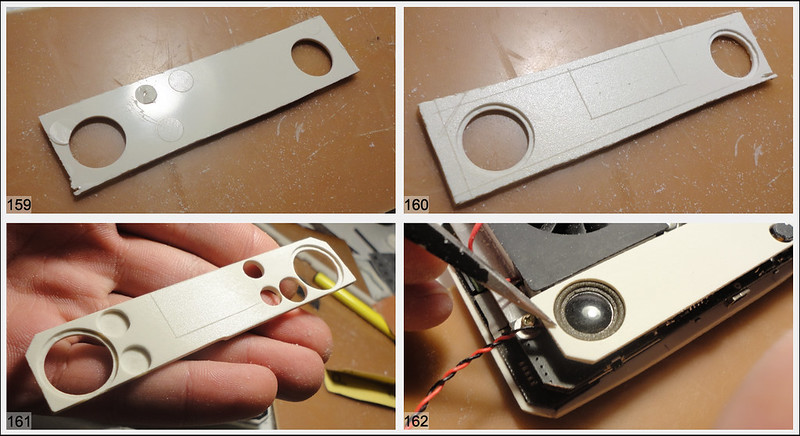
will be like a mini subwoofer
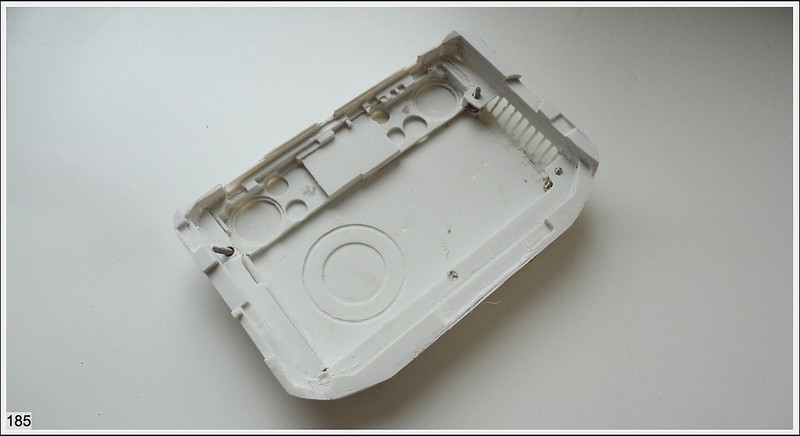
Rounded holes for power board parts and speaker holes done
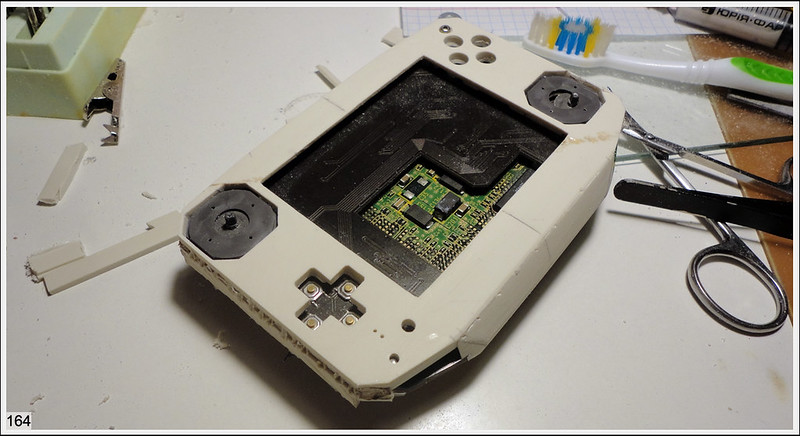
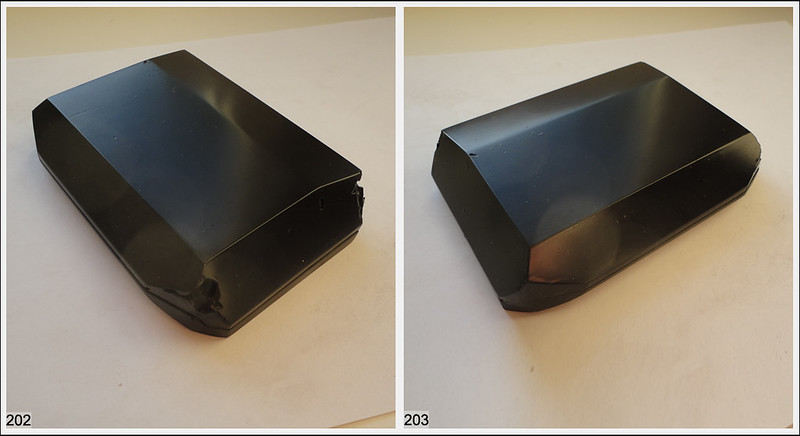
Pic. - 164 the manufacture of the side panels of the console
need make a side stiffeners
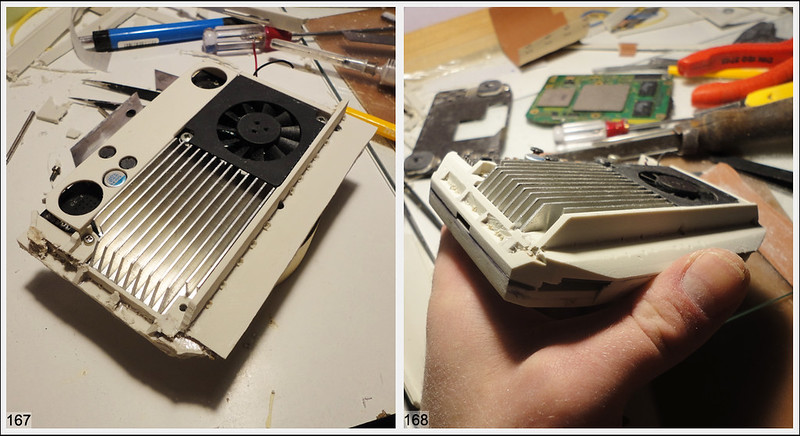
need strengthen the longitudinal lower part of the console pic. 168
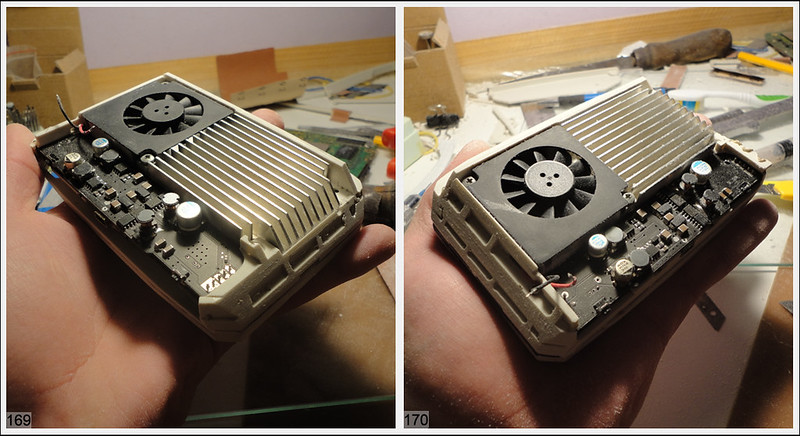
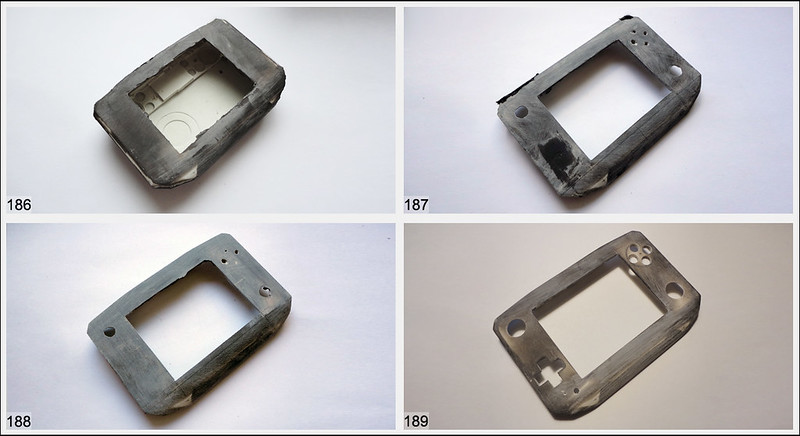
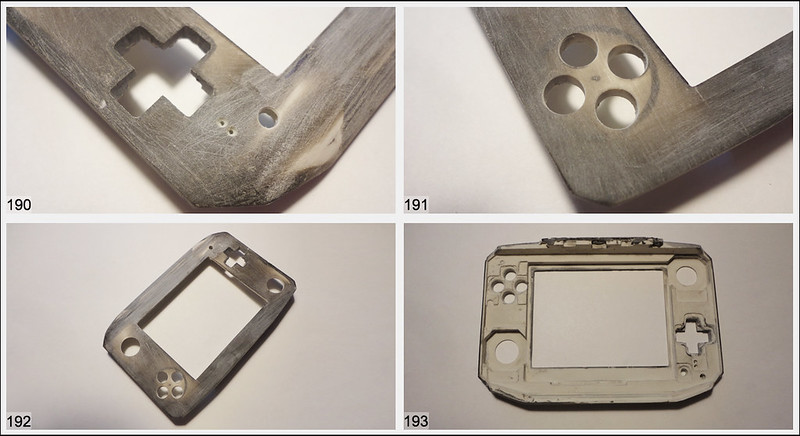
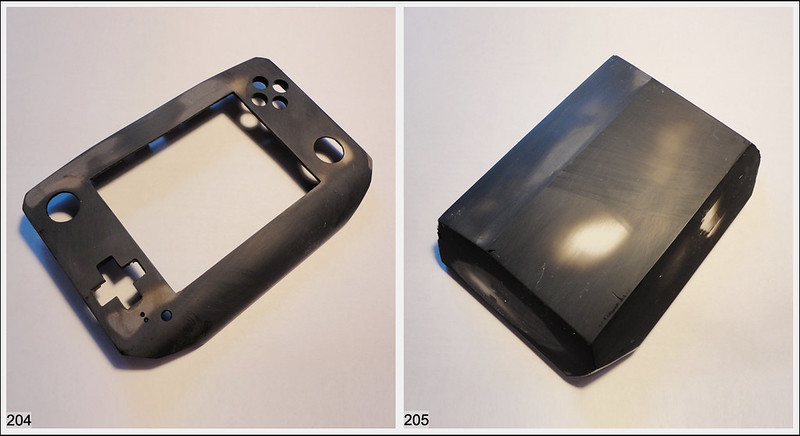
Pic. 169-170 after cutting off excess plastic
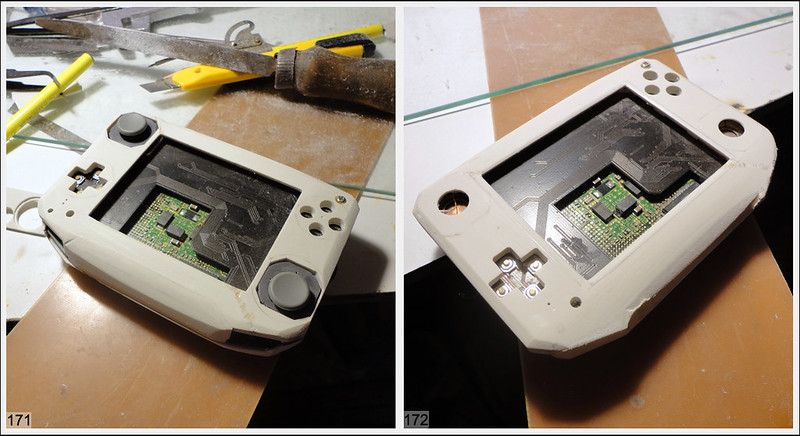
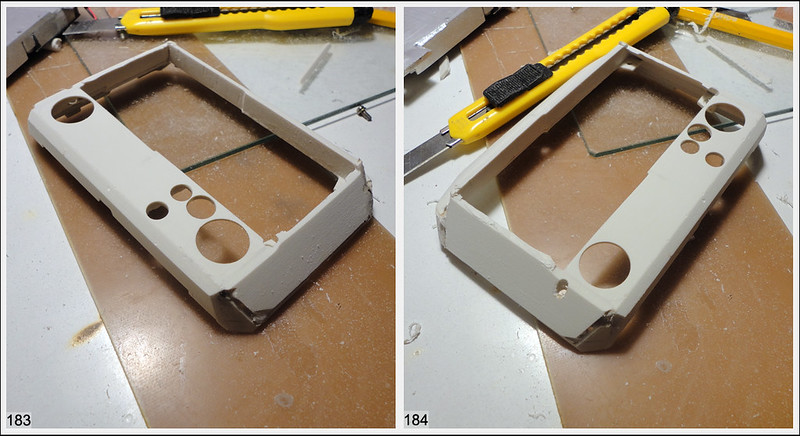
Making analogue stick holes panels
Checking dimension
The case will be made of abs plastic. 3D project in the photo its top internal button panel only.
I wanted made case on cnс but when i asked about technical conditions and price I decided to change my mind because for such a simple product require a lot of money and use a large diameter drill. Making at home qualiti plastic product using a simple tool - this is a serious task.
I'm using a new way of making the case. This is a layered application of sheet plastic with subsequent gluing. With a similar way of making, I did not come across and do it for the first time.
I did not design the exterior because it will take a very long time.
Now the pieces of plastic began to resemble a game console
It's look like a robocop parts
I don't like it
I decided to start on a new case
Pic. - 150, 151 the quantity of layers will be smaller.
Front view
Pic. - 154, 155 the front panel consists of two plastic layers
The cube smiles at me
Now i make most difficult panel for speaker
will be like a mini subwoofer
Rounded holes for power board parts and speaker holes done
Pic. - 164 the manufacture of the side panels of the console
need make a side stiffeners
need strengthen the longitudinal lower part of the console pic. 168
Pic. 169-170 after cutting off excess plastic
Making analogue stick holes panels
Checking dimension
Last edited:
Theengineer
Member
I am very much looking forward to seeing it in its final form, you have done alot of work that most modders would be too lazy to do ( ME ) and i think this will be the most professional looking GCP besides the Varia cube of course..... Also i was and still am a huge fan of XPLAY, that show was my childhood! The whole G4 channel was
Al3x Portugal
Newb
Parabéns! Está tudo tão maravilhoso! Continue!!!
seansboyhole
Newb
This is amazing!!!
DefaultLik
Member
This is amazing! Only problem I see is trying to fix something if it breaks, due to the glue...
Edit
I meant to say that if some Capacitors or the speakers broke, how easy would it be to repair?
Edit
Due to glue it will not break
I meant to say that if some Capacitors or the speakers broke, how easy would it be to repair?
Last edited:


Nikoil
Member
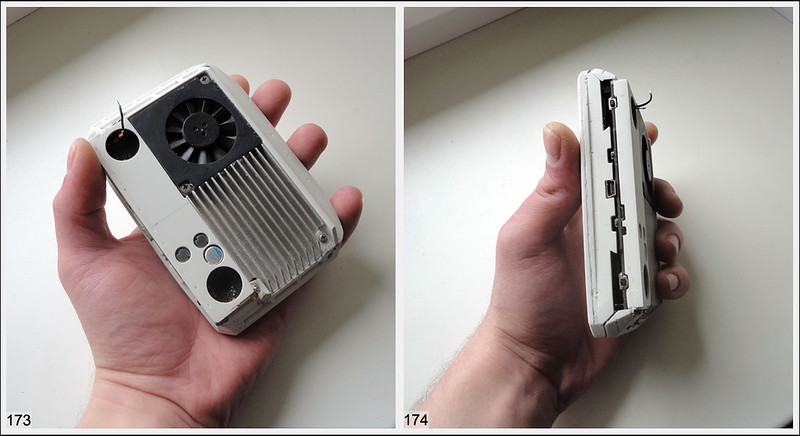
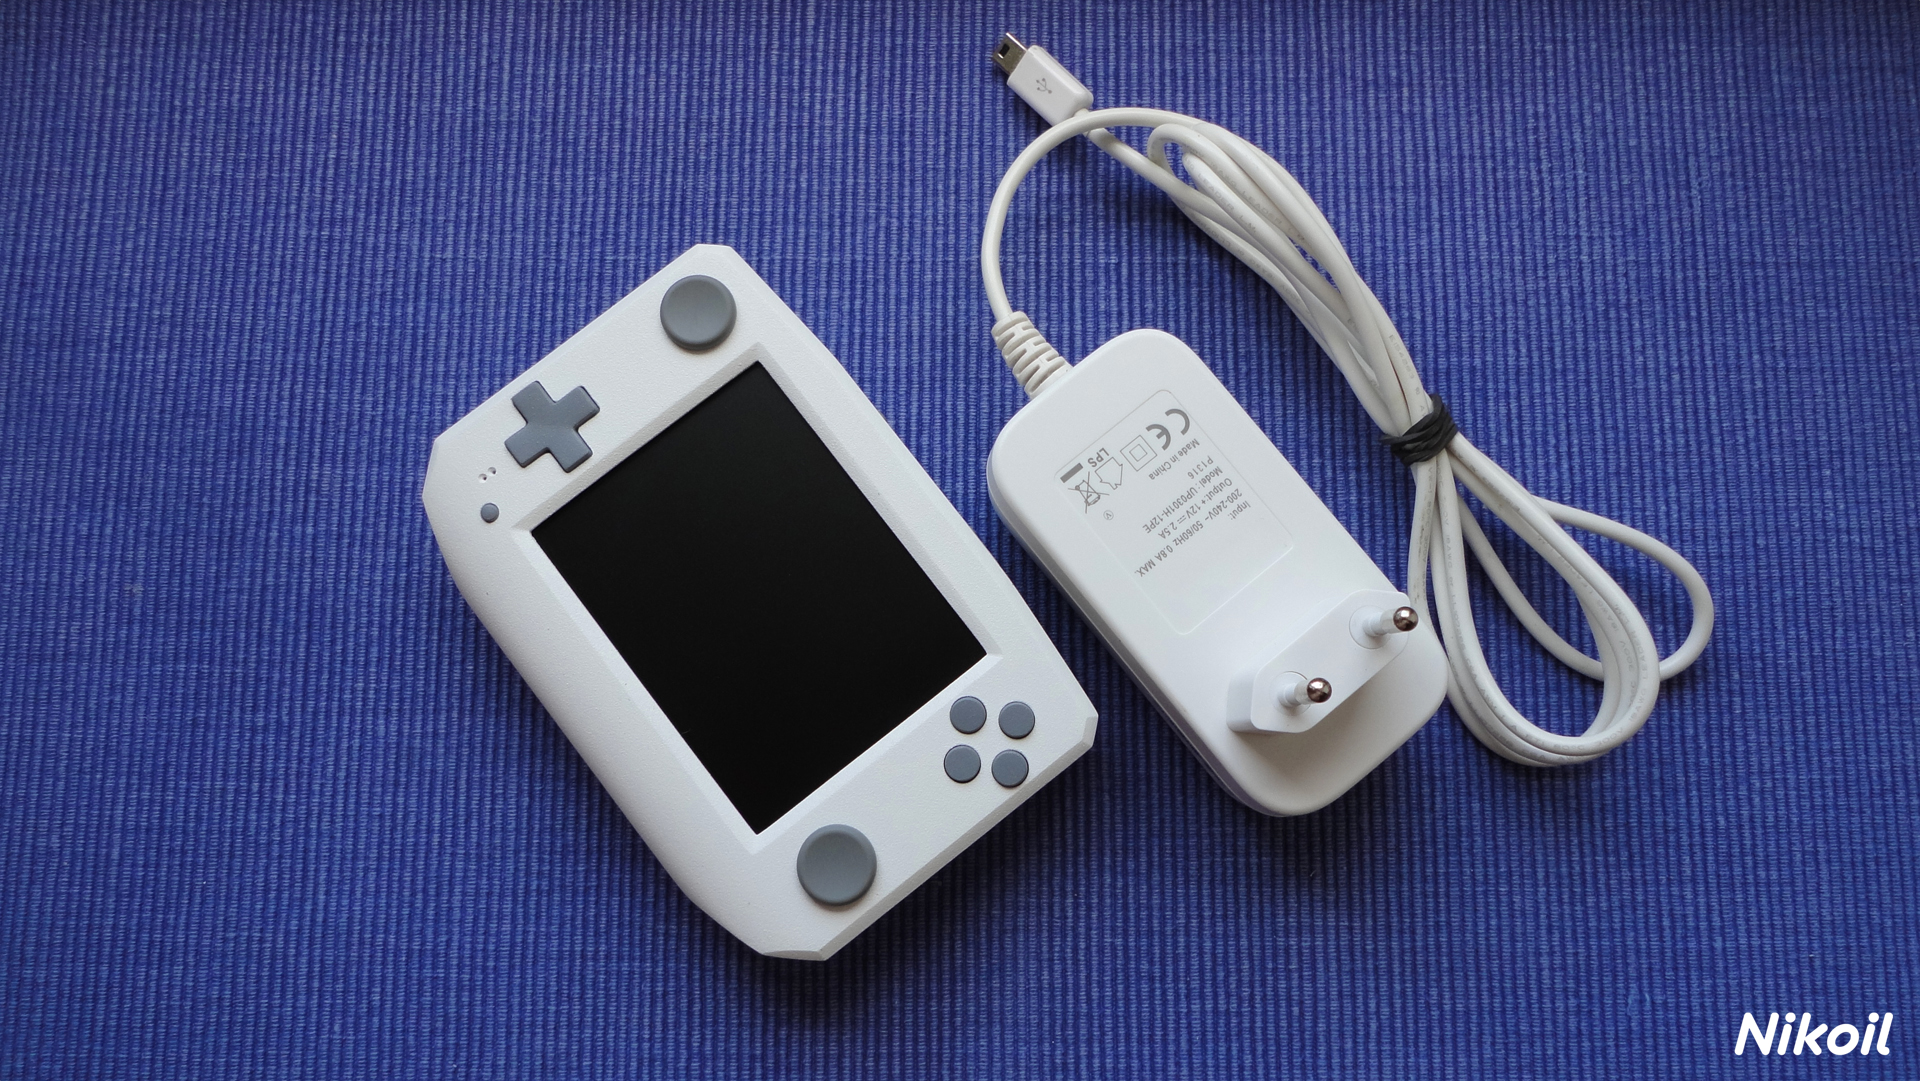
Project Gamecube Portable codename NGCP - Finished!
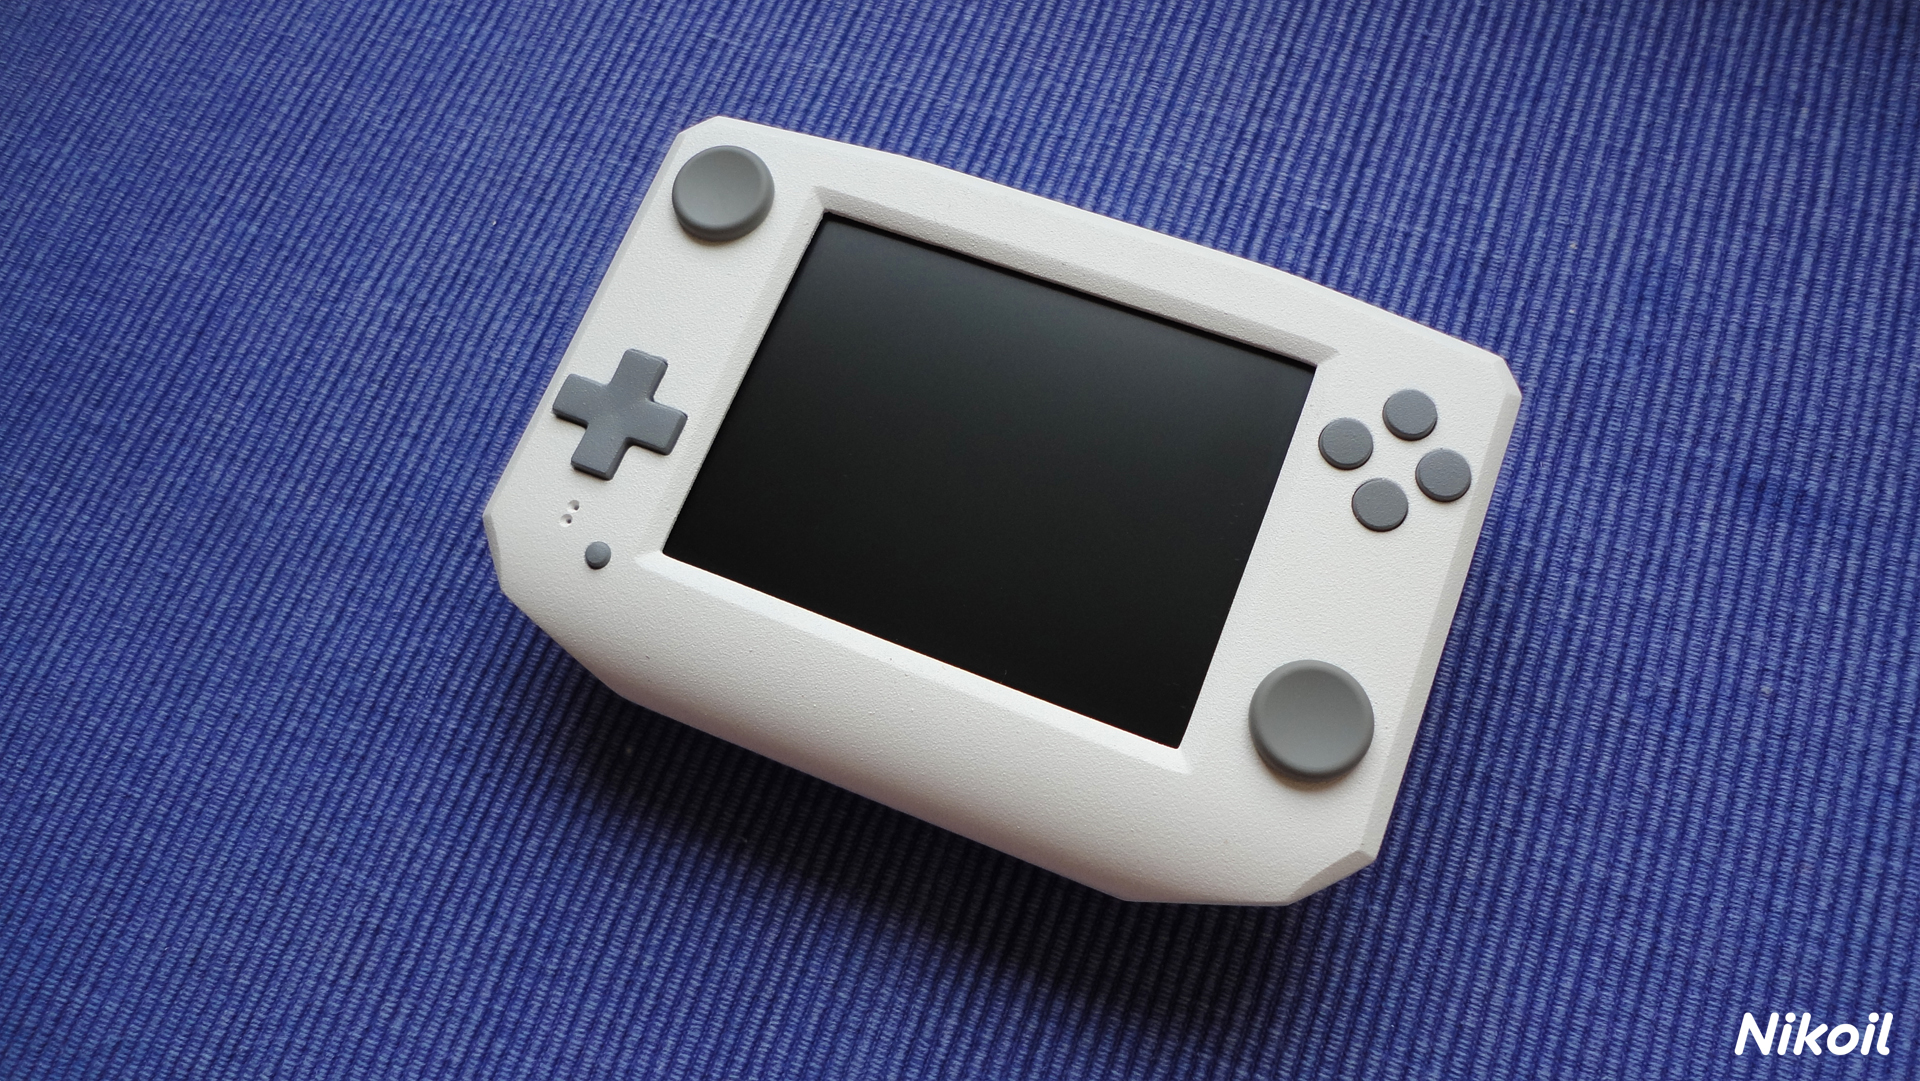
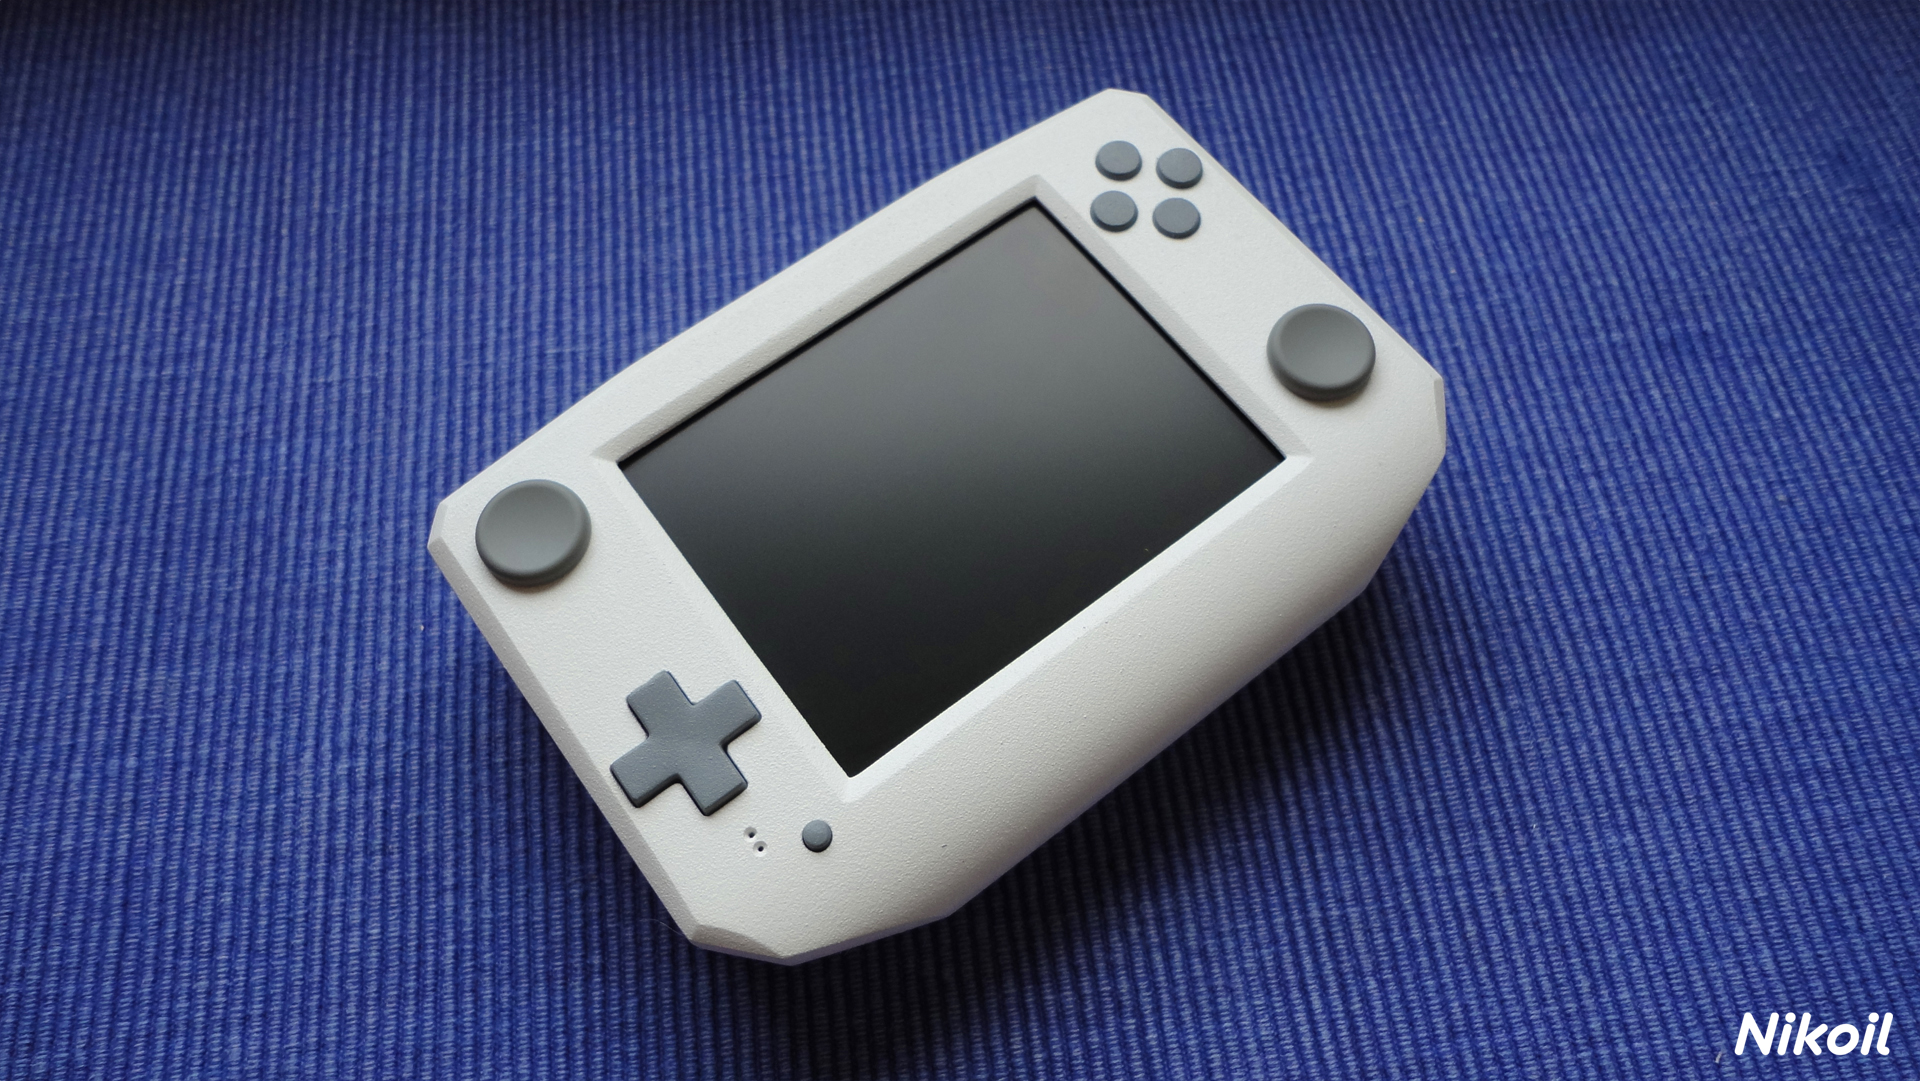
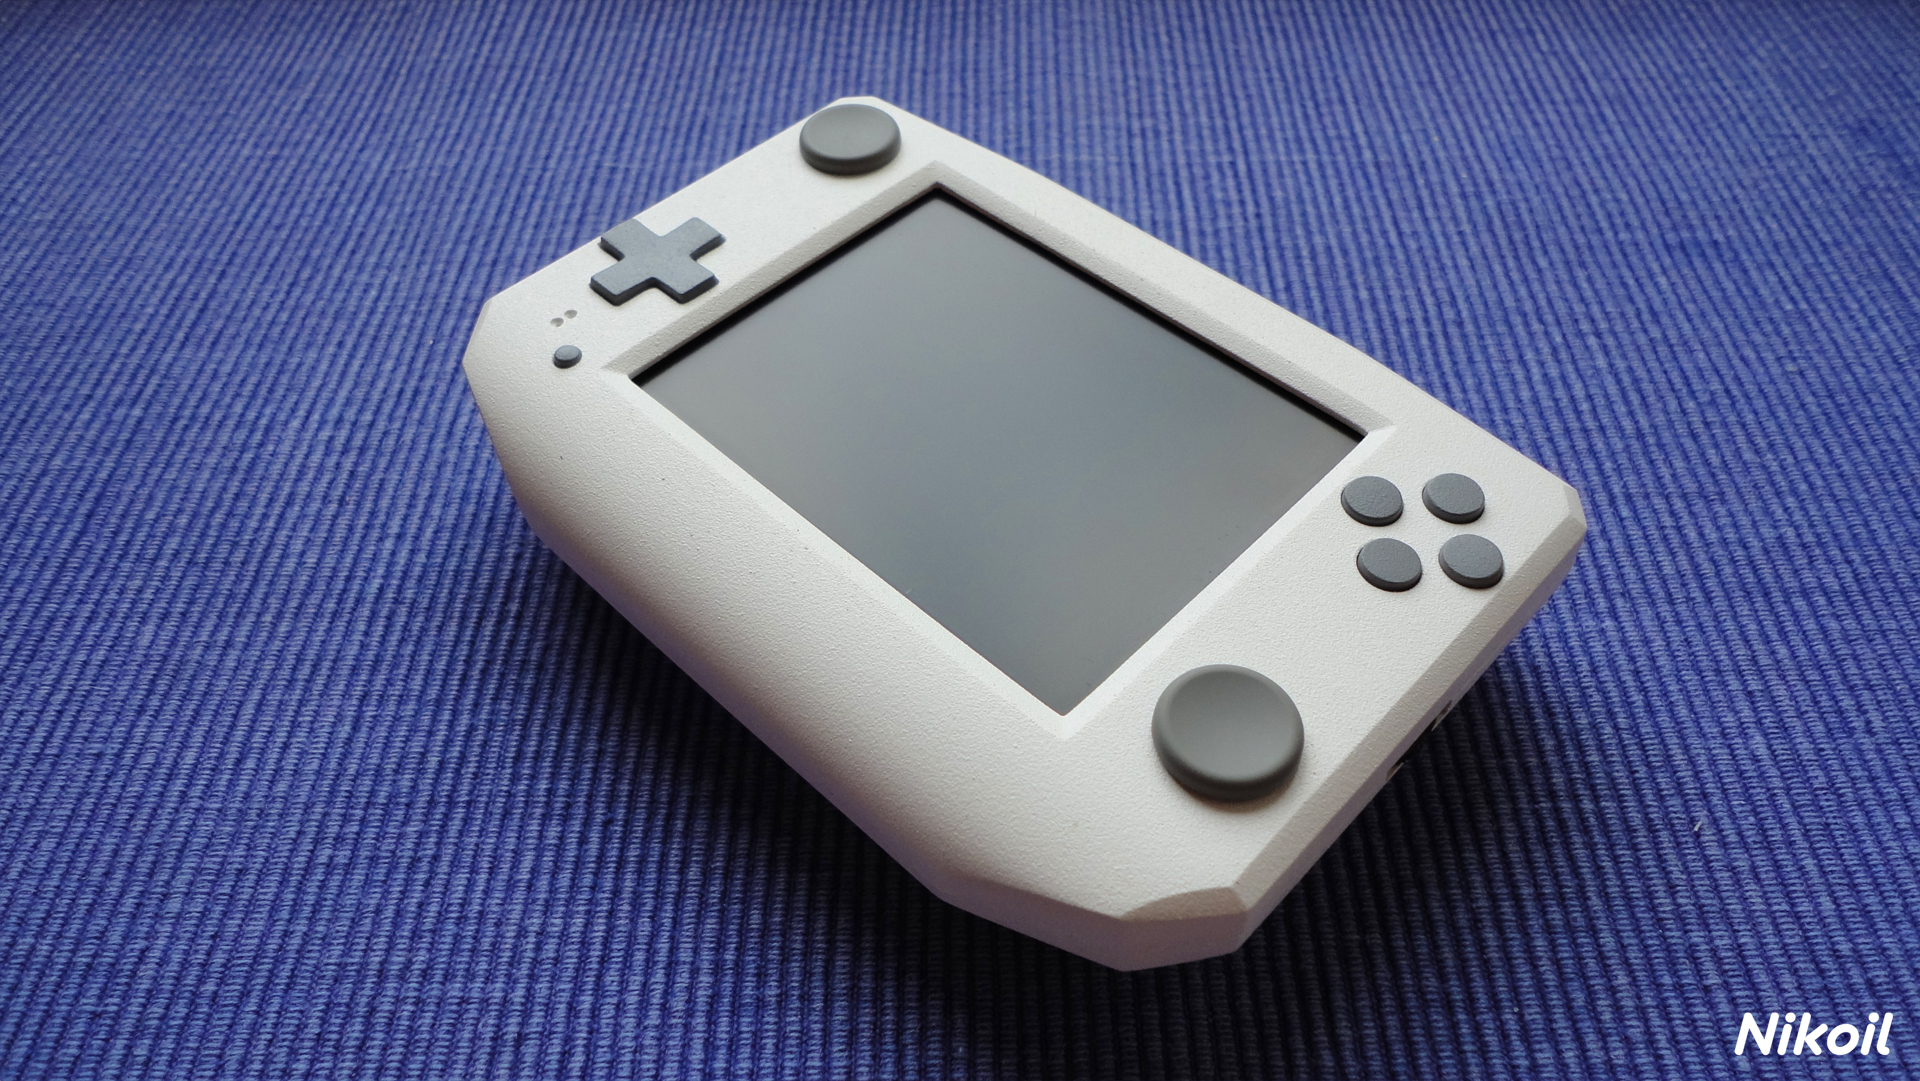
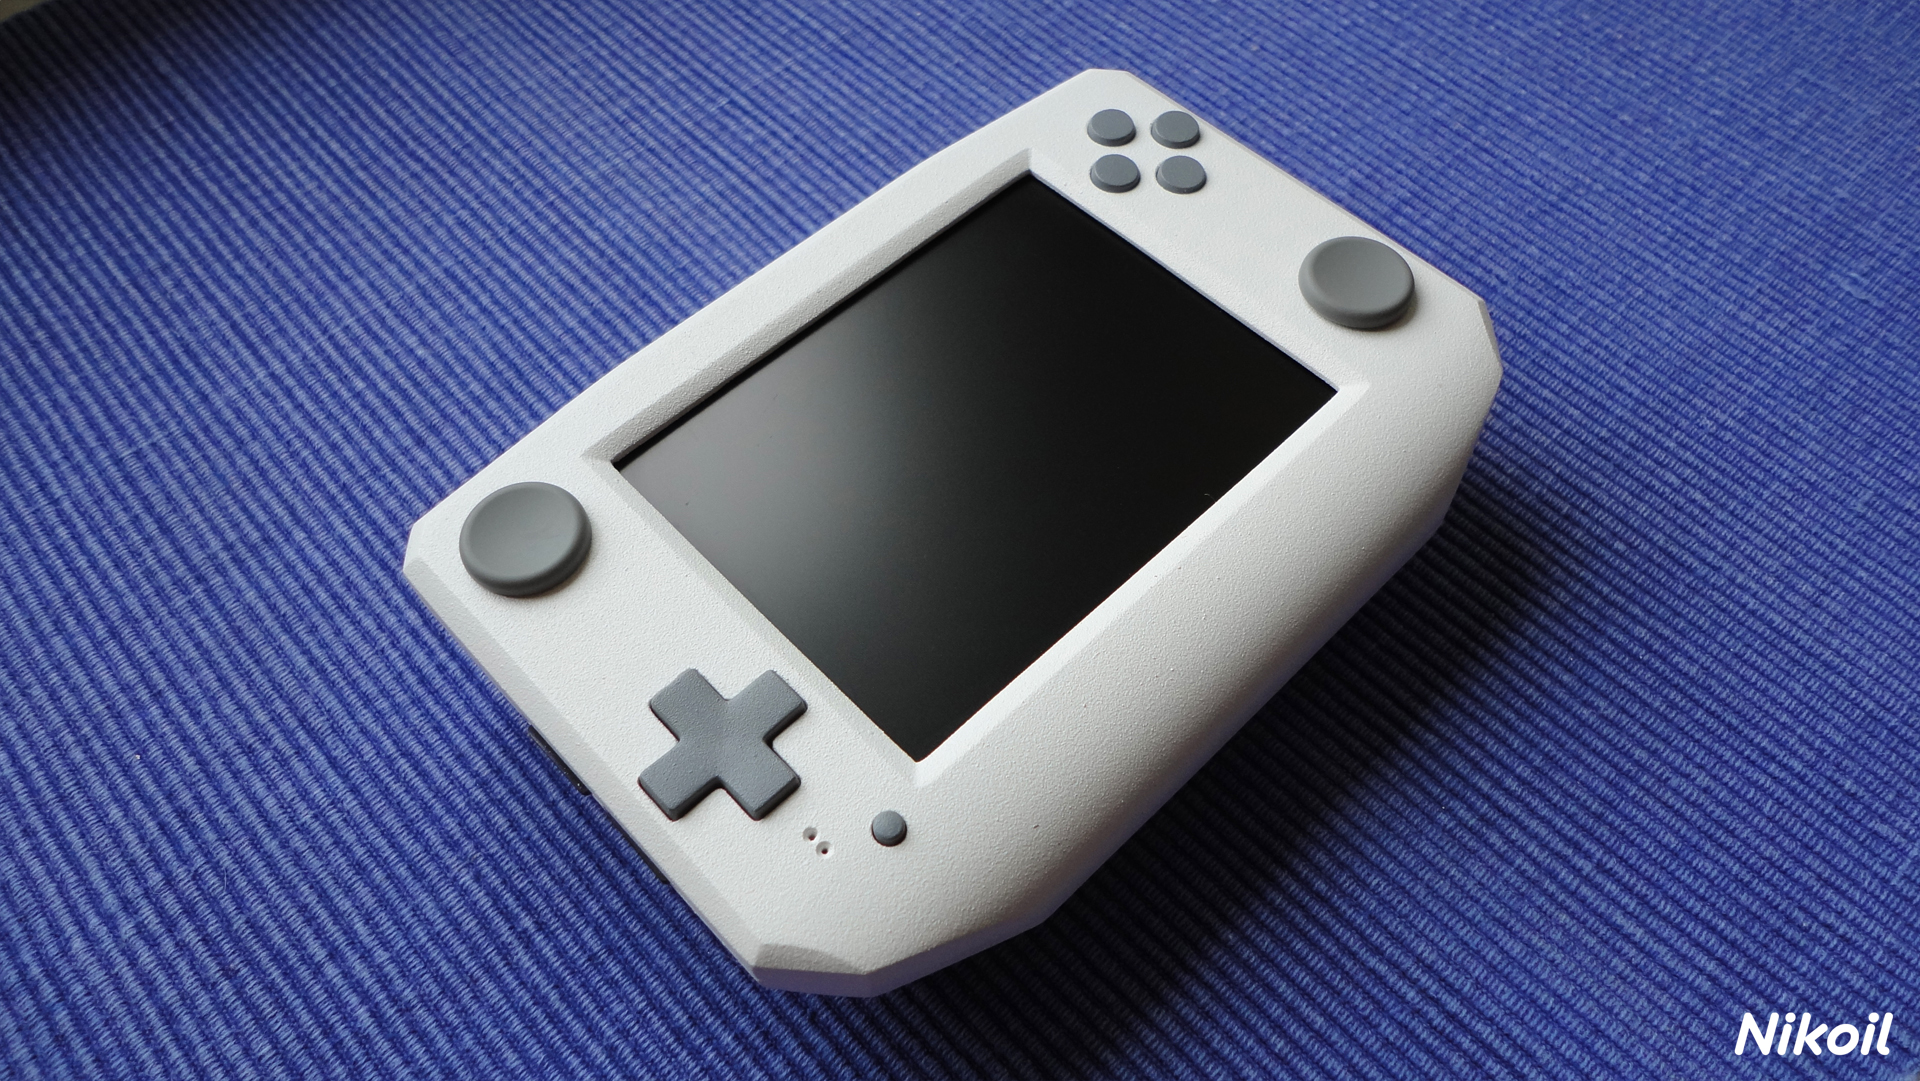
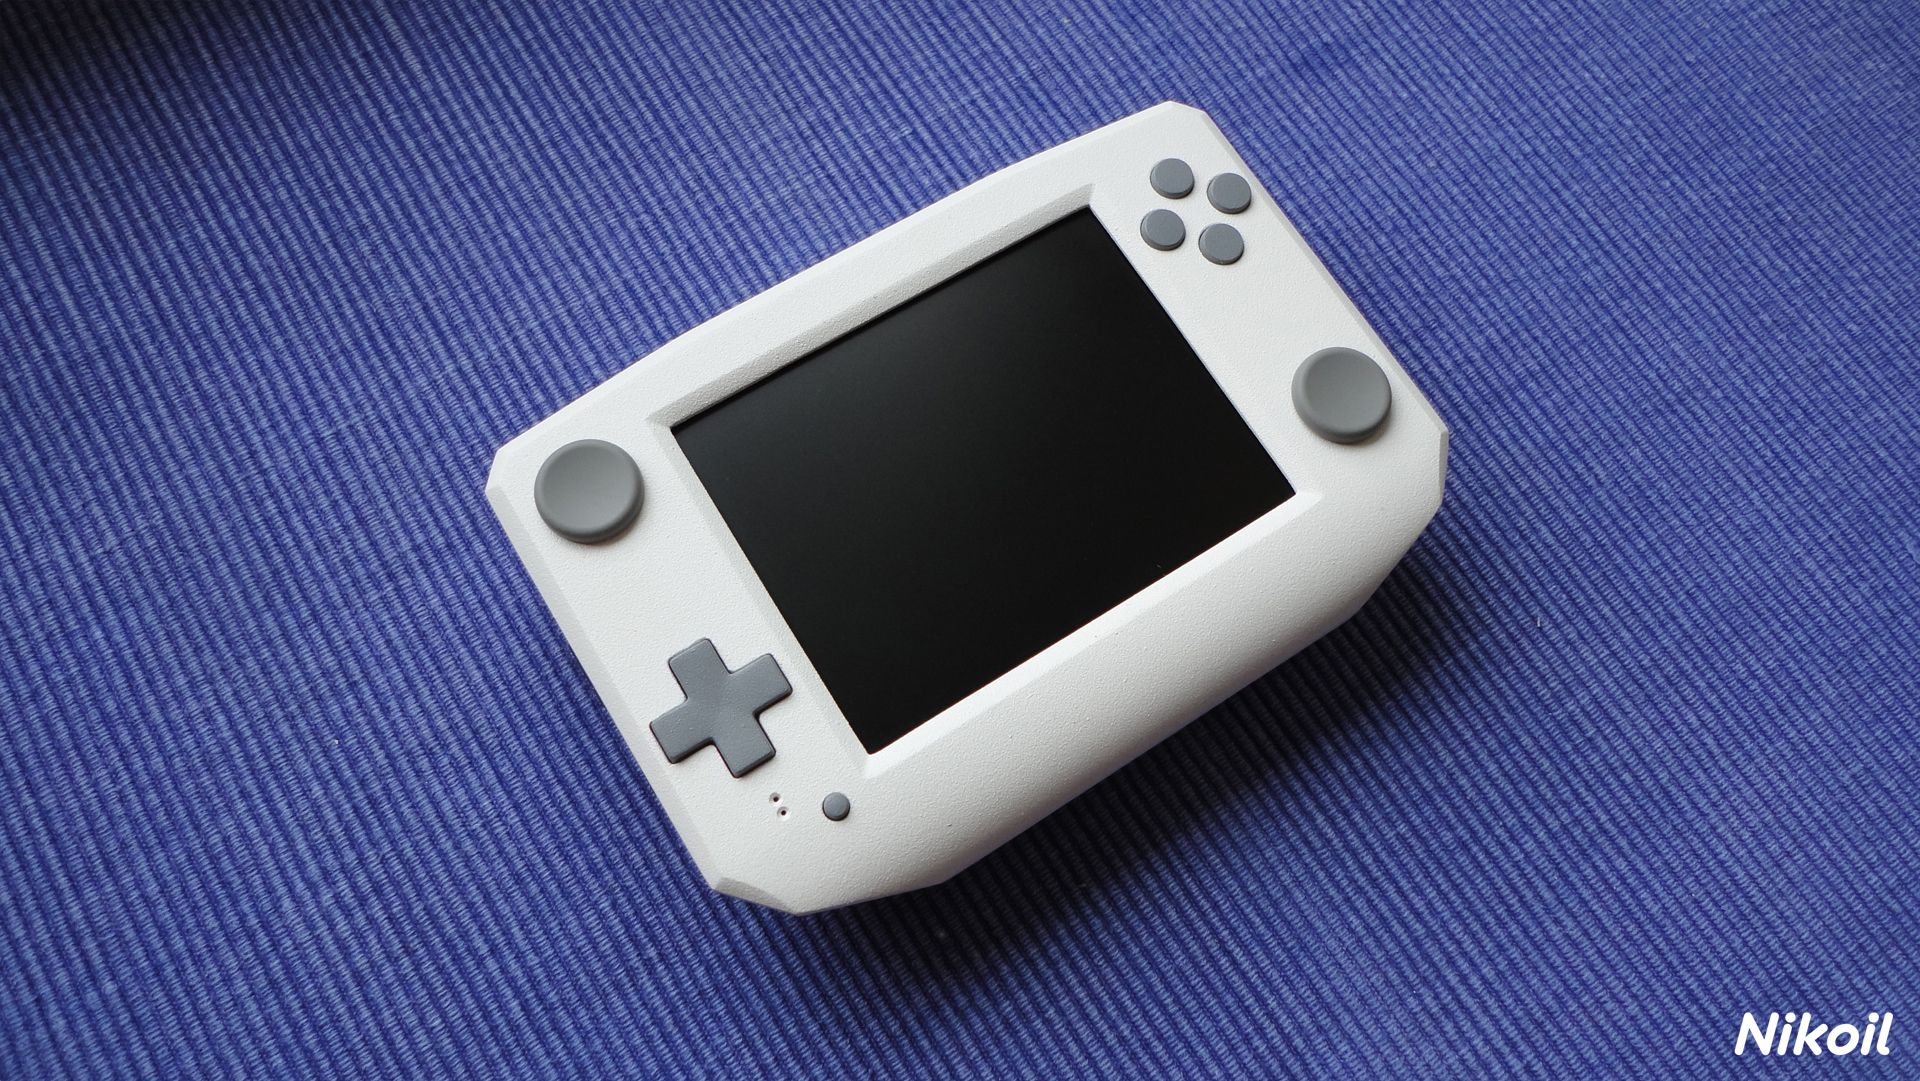

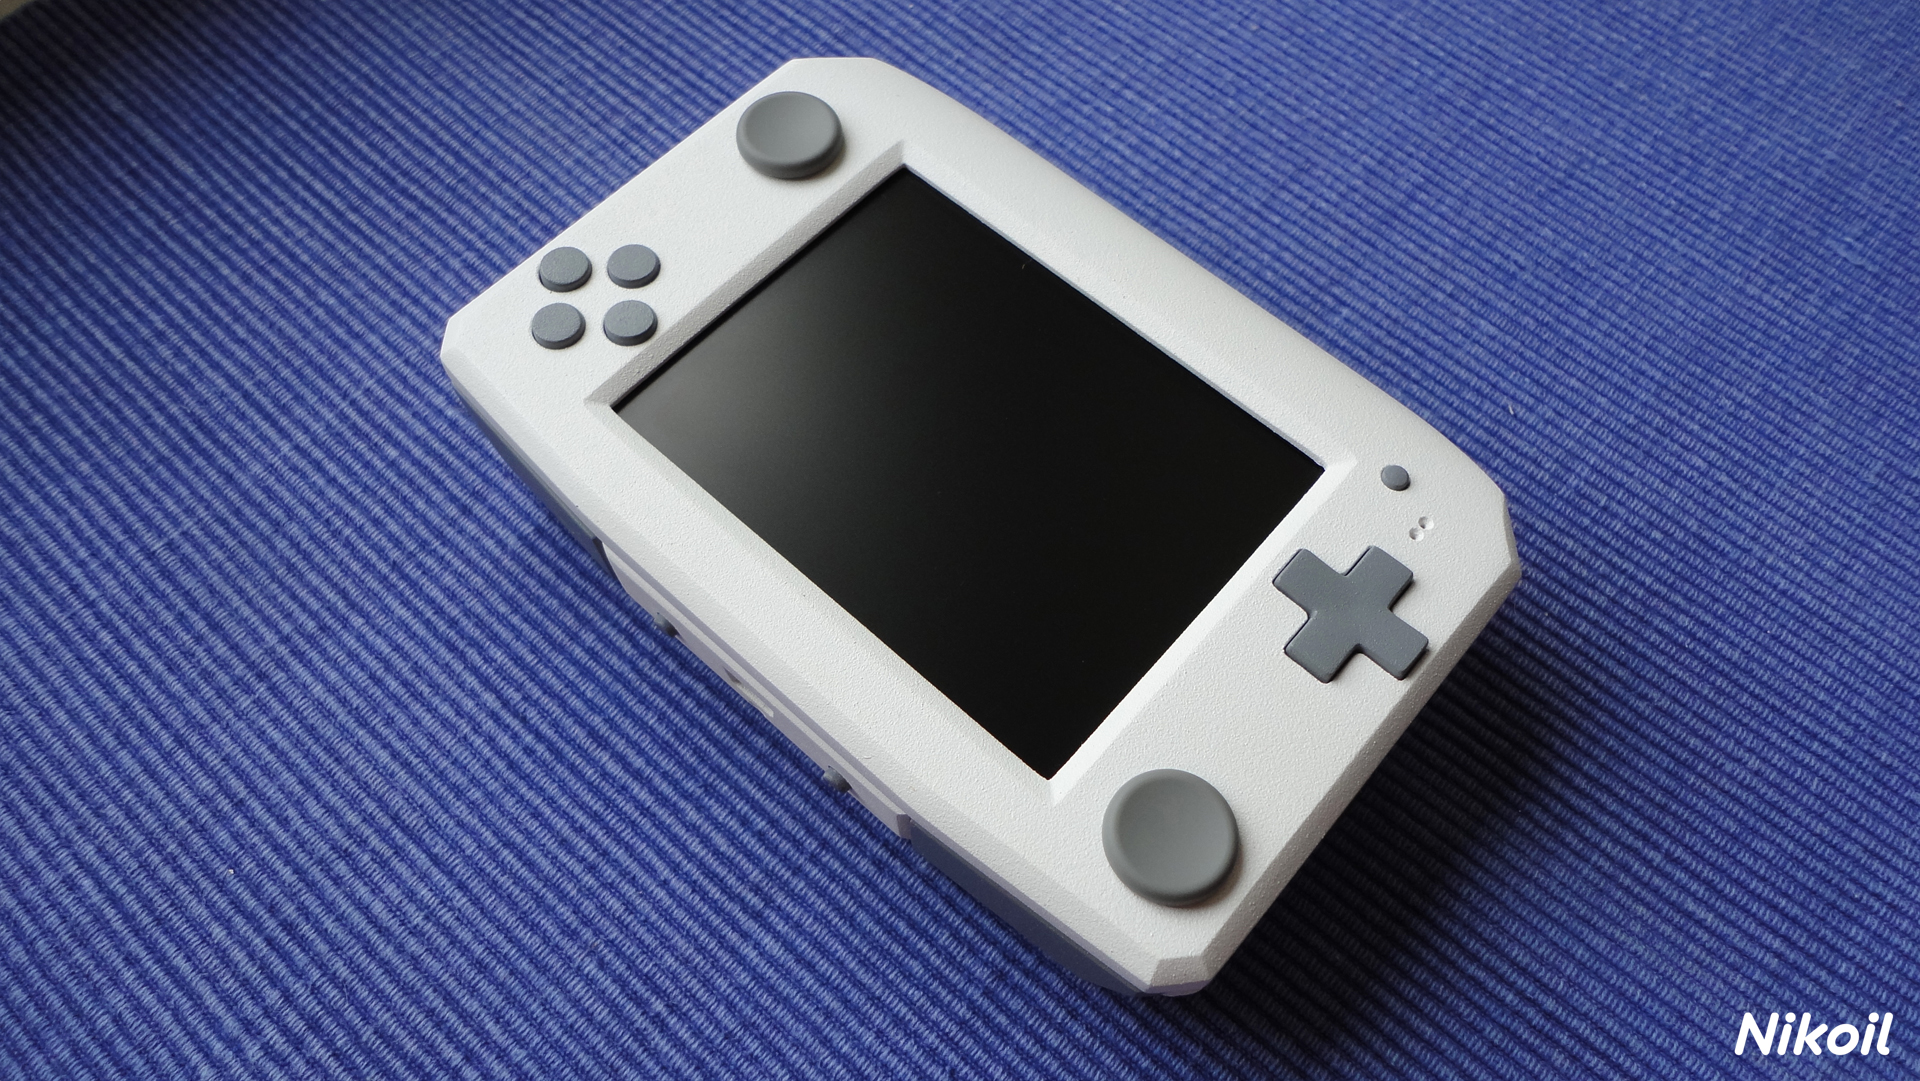
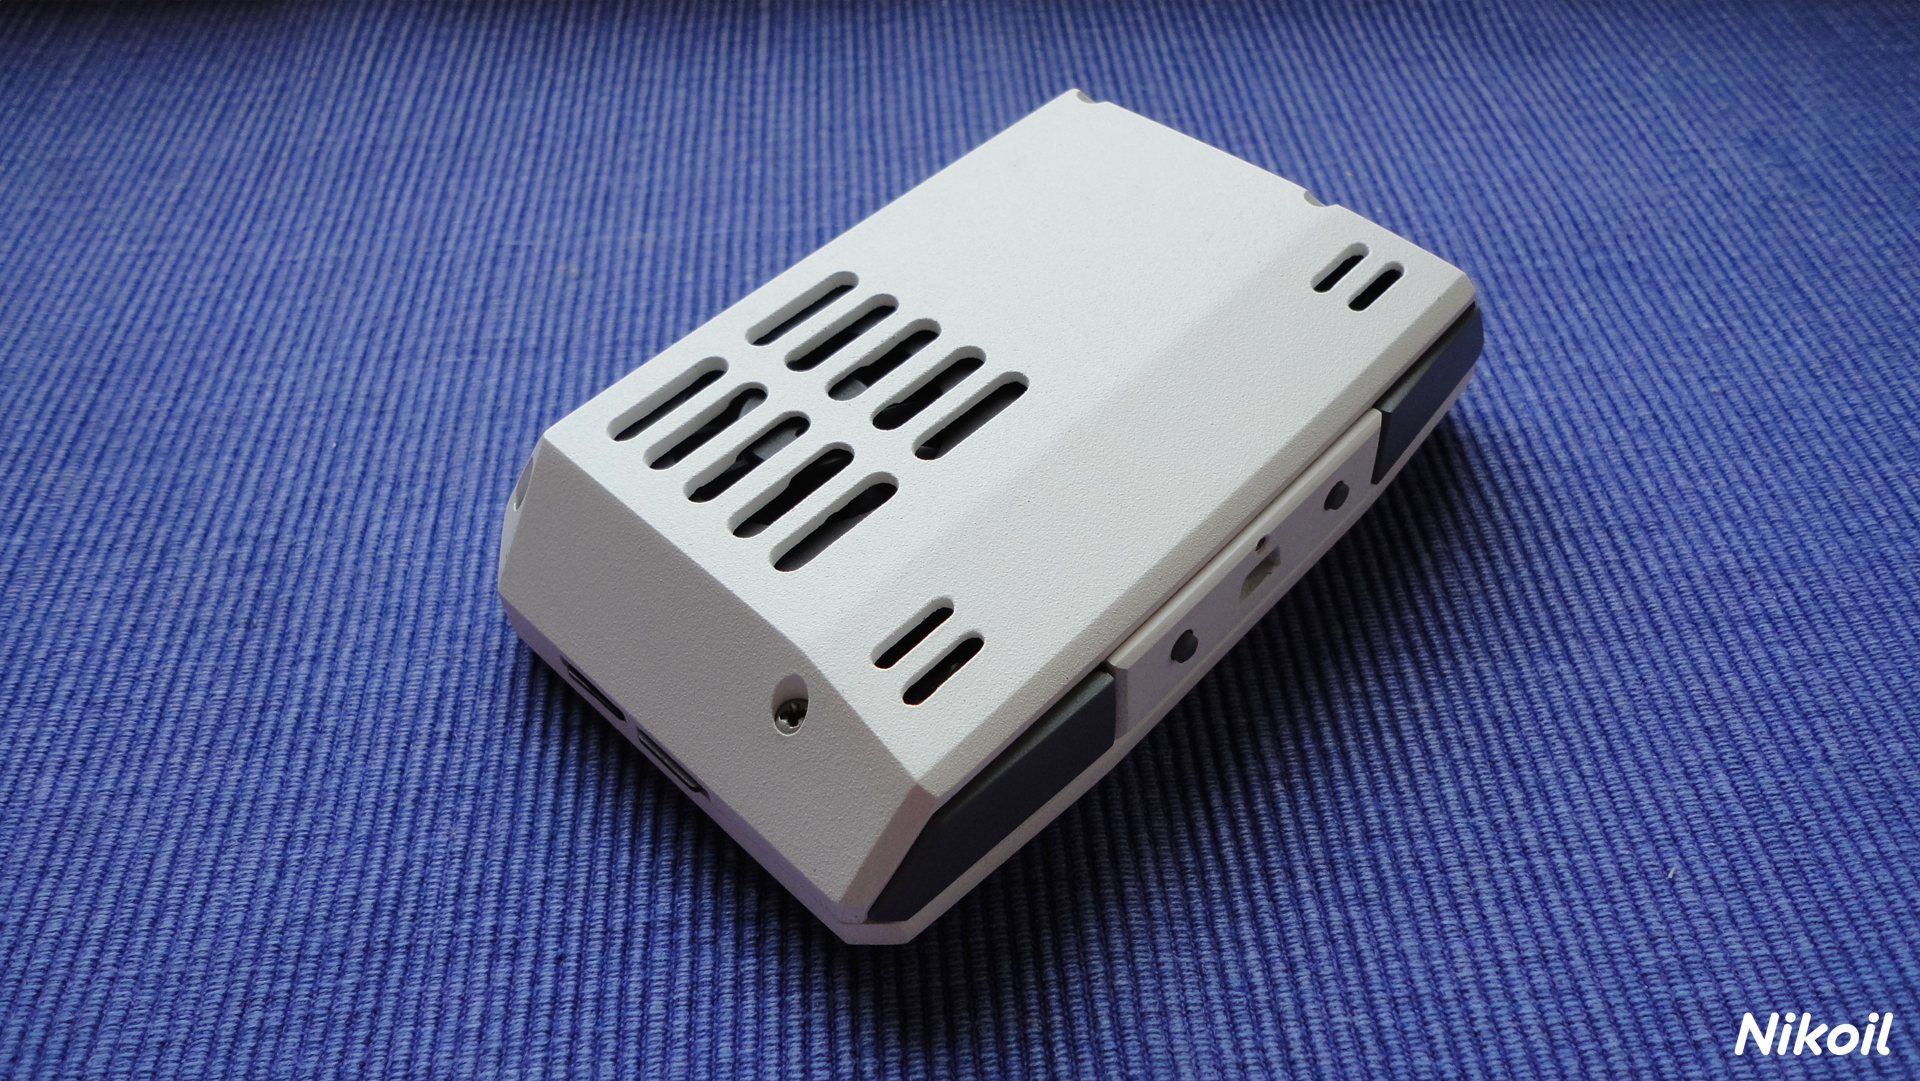

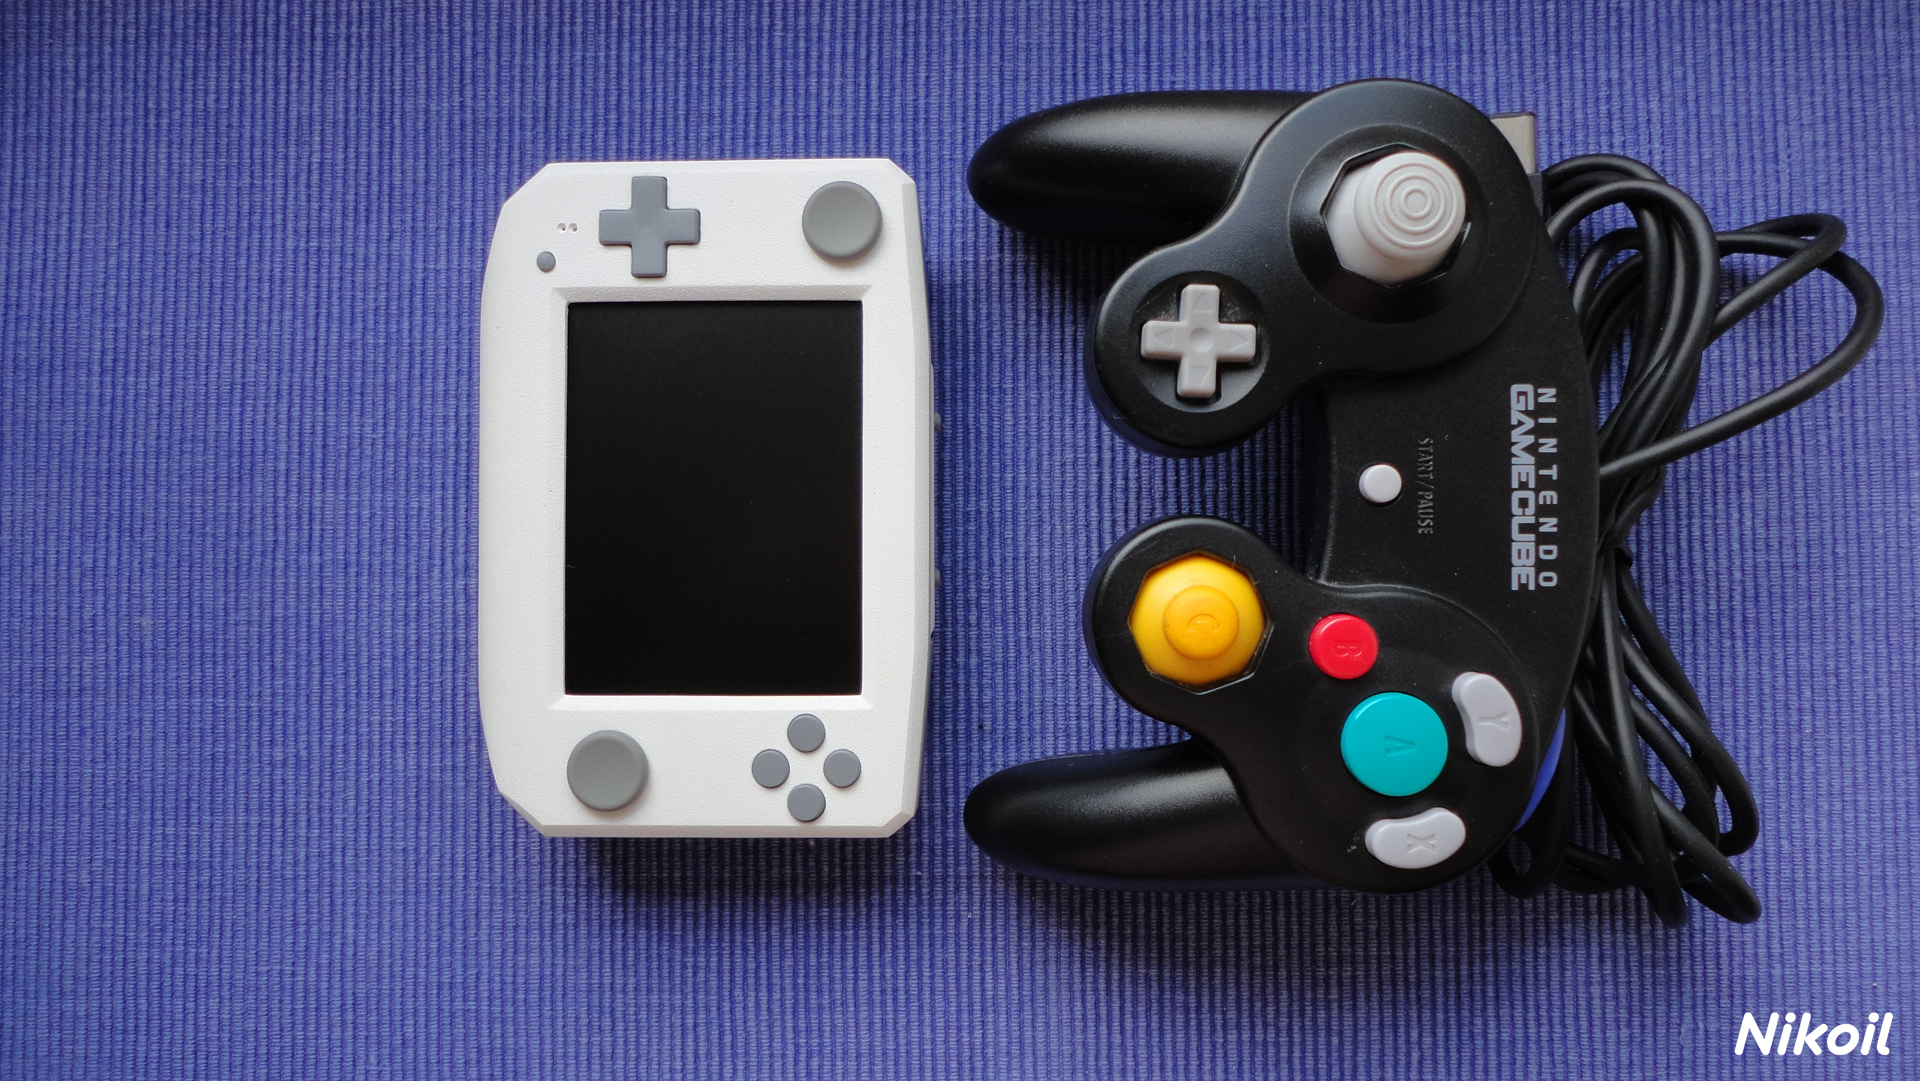

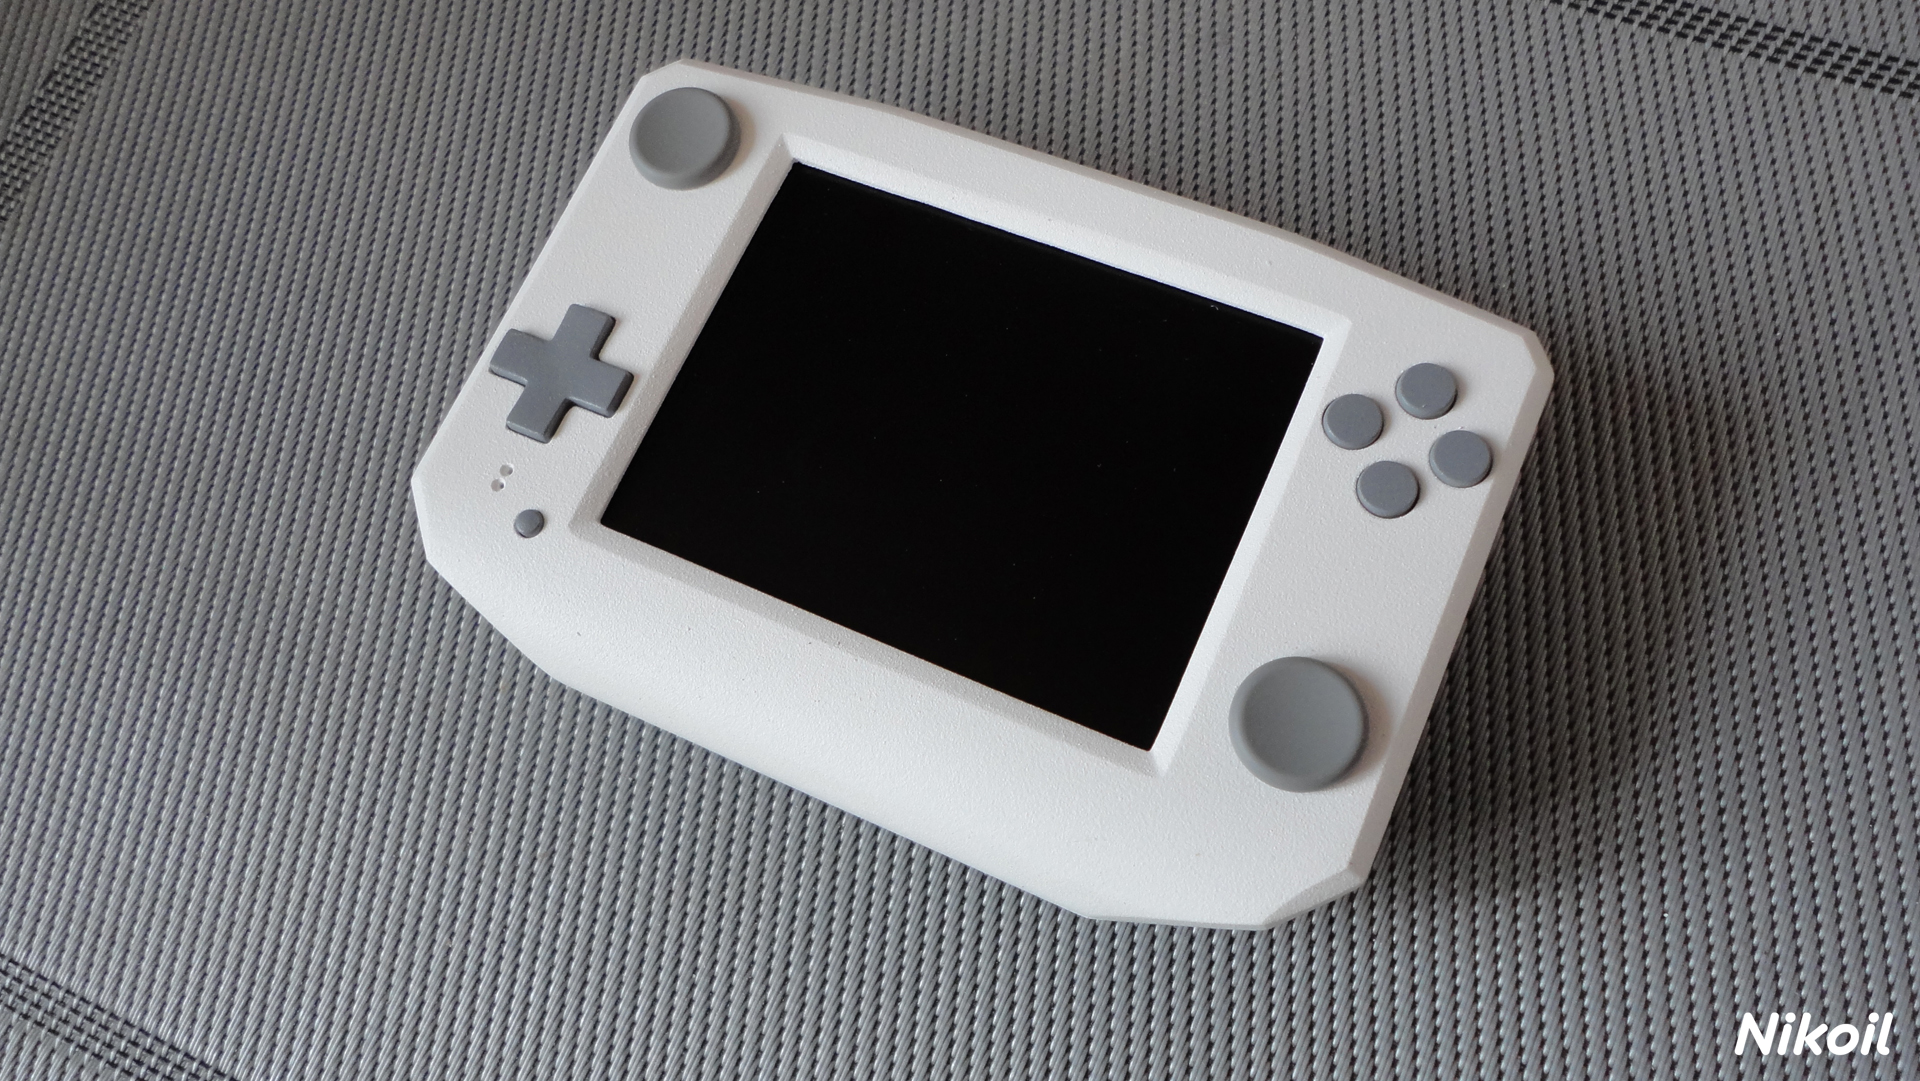
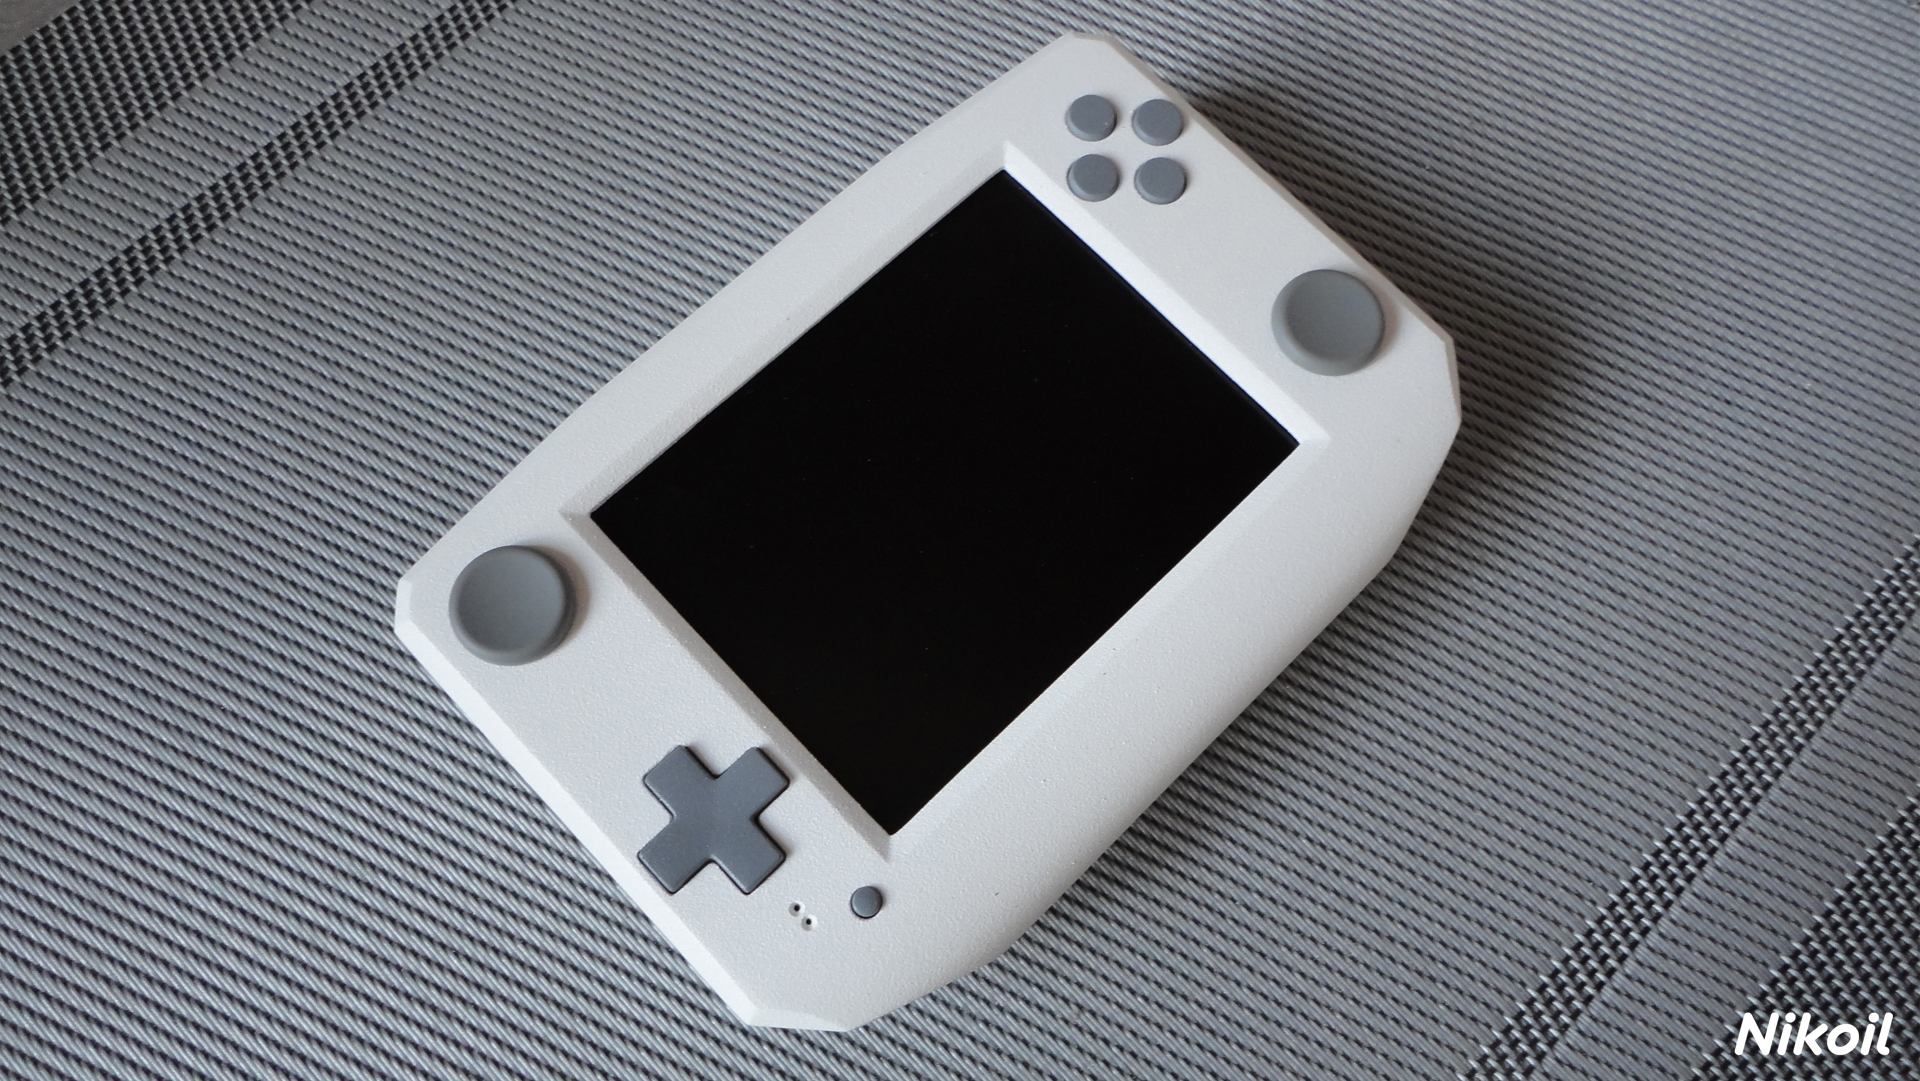
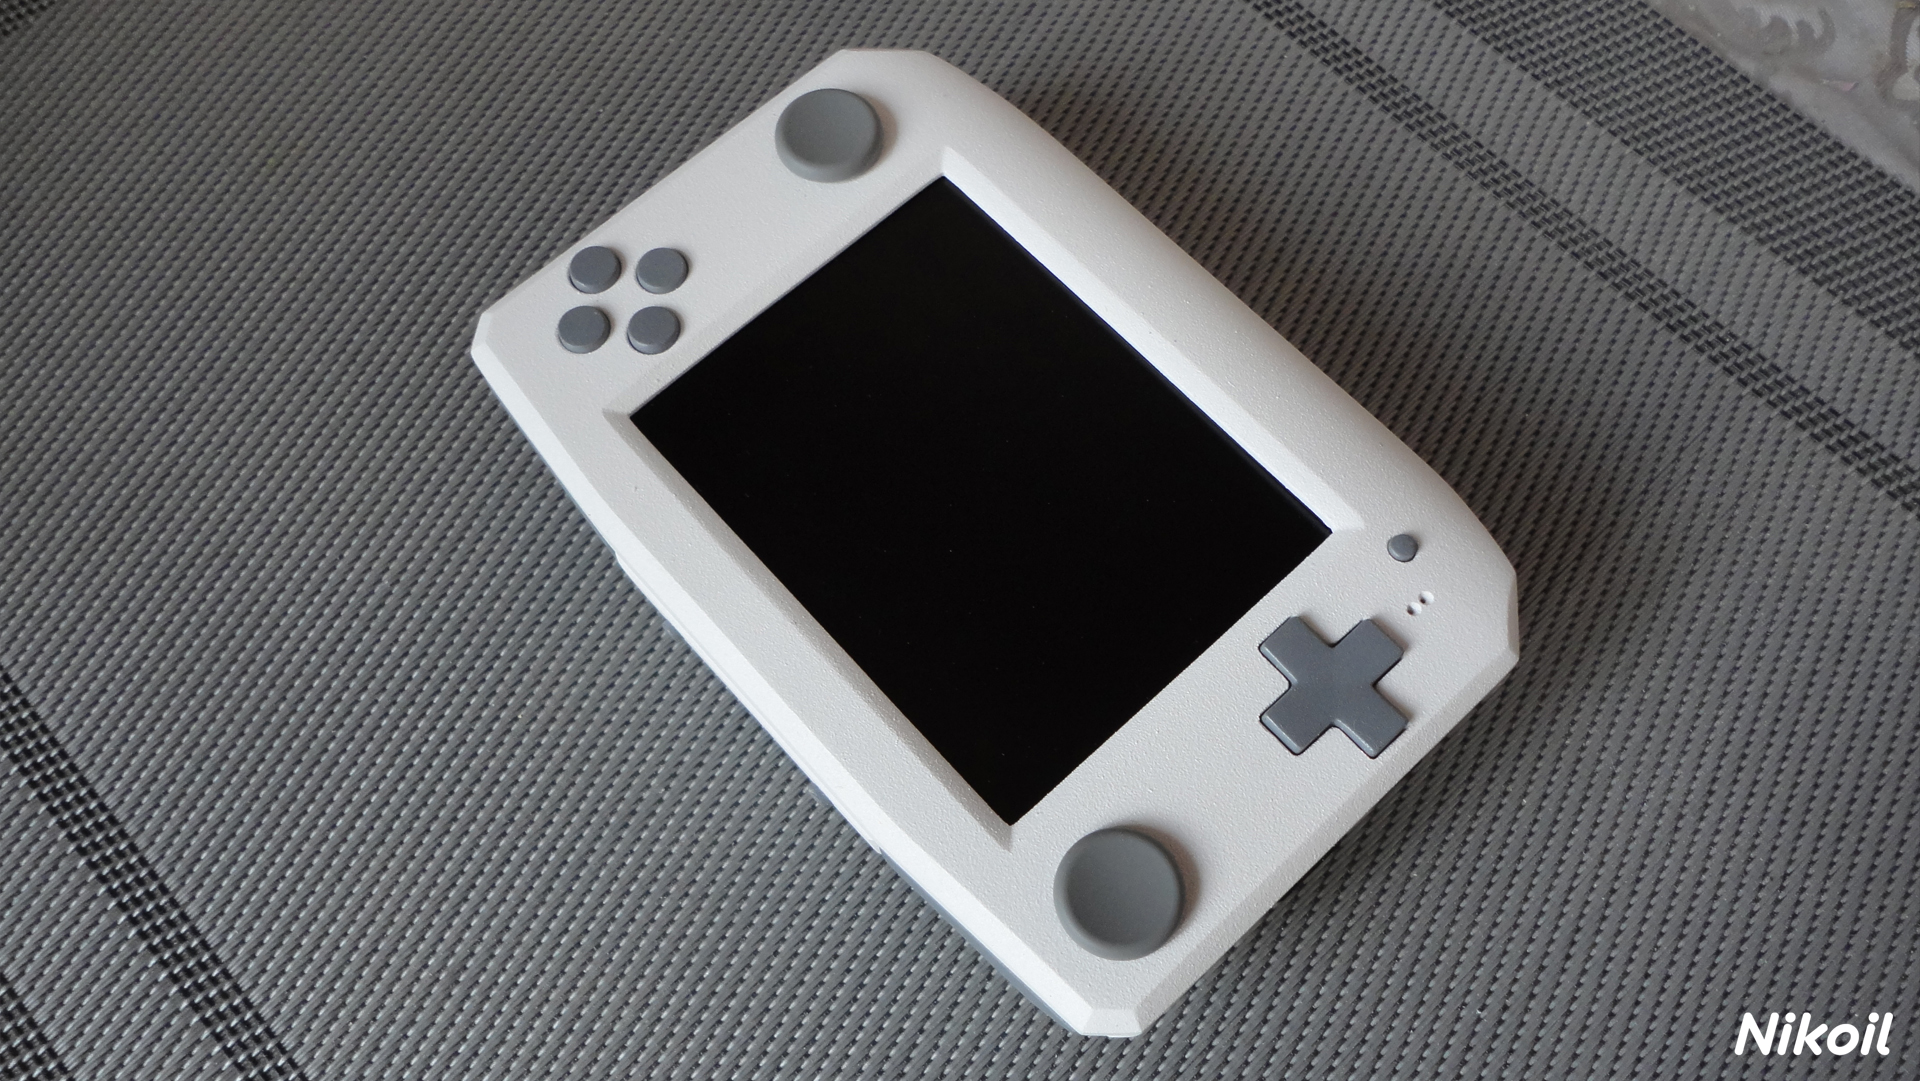
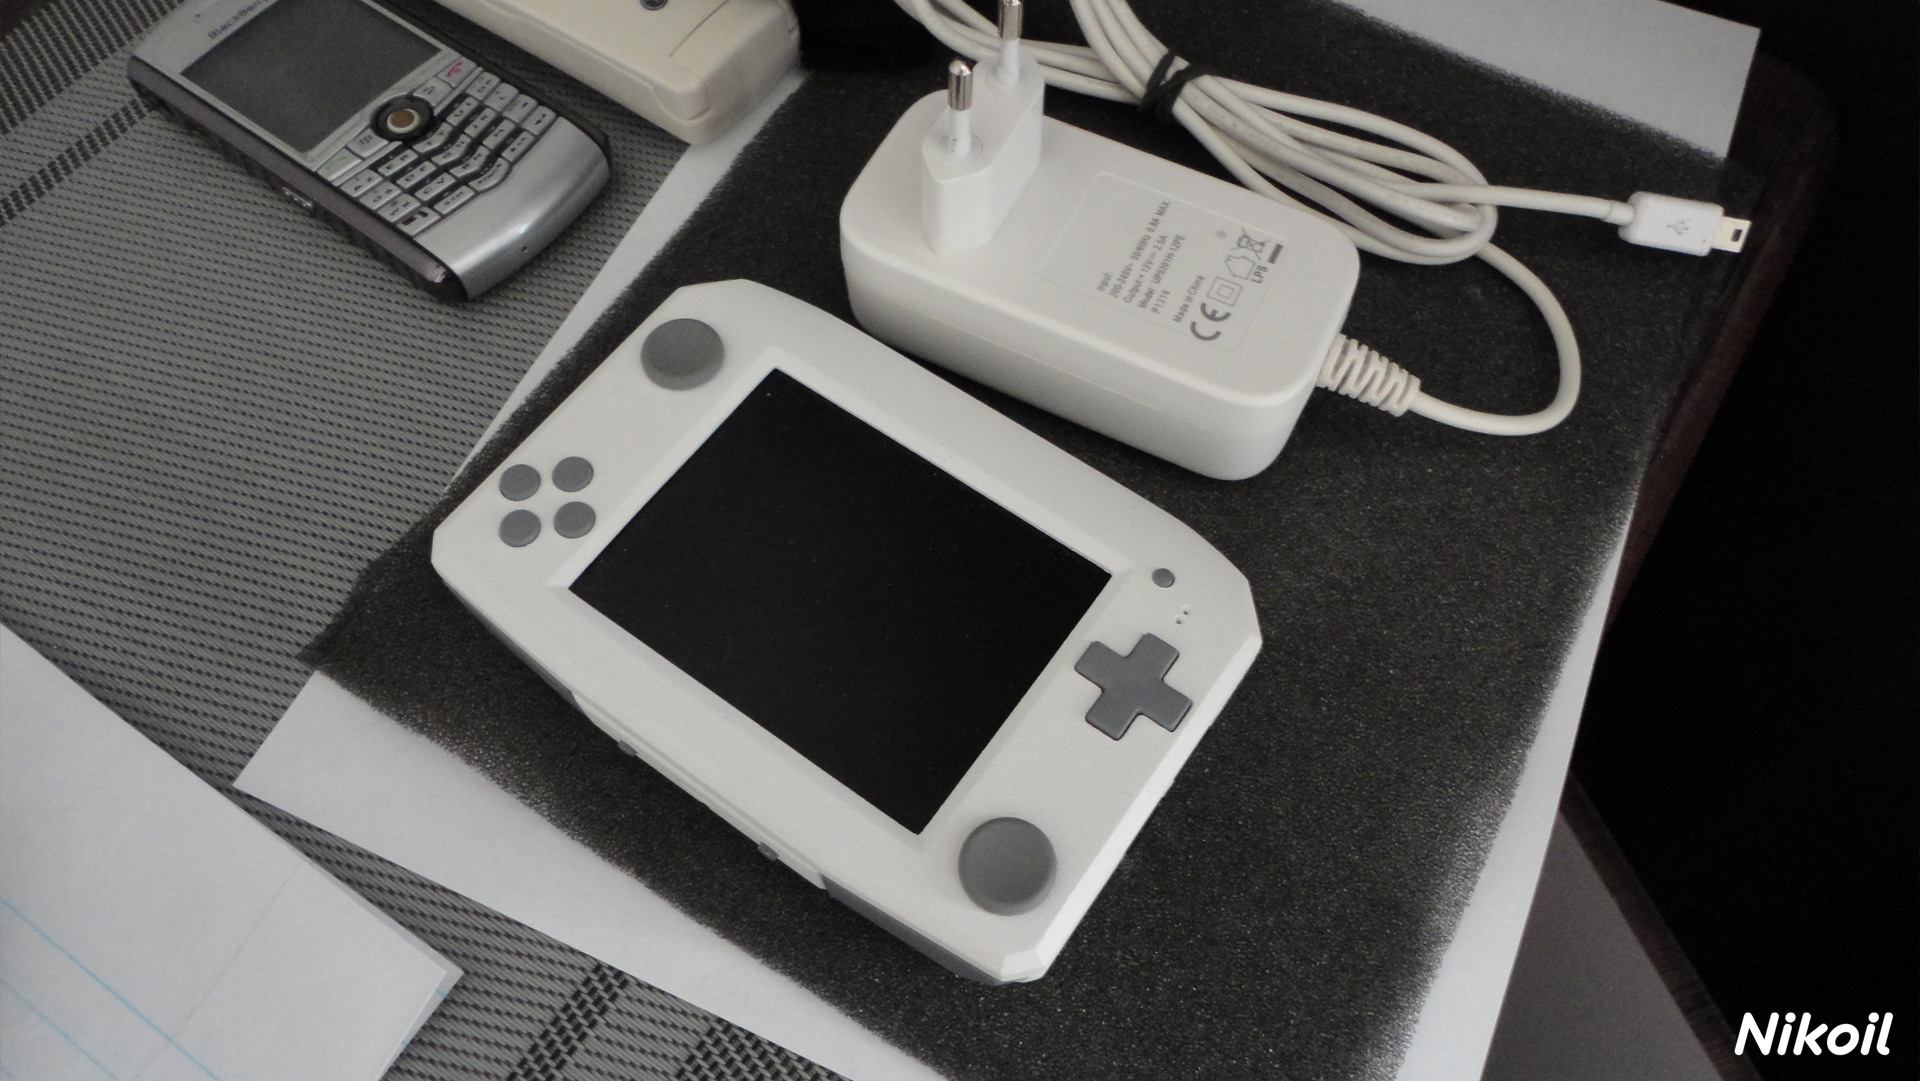
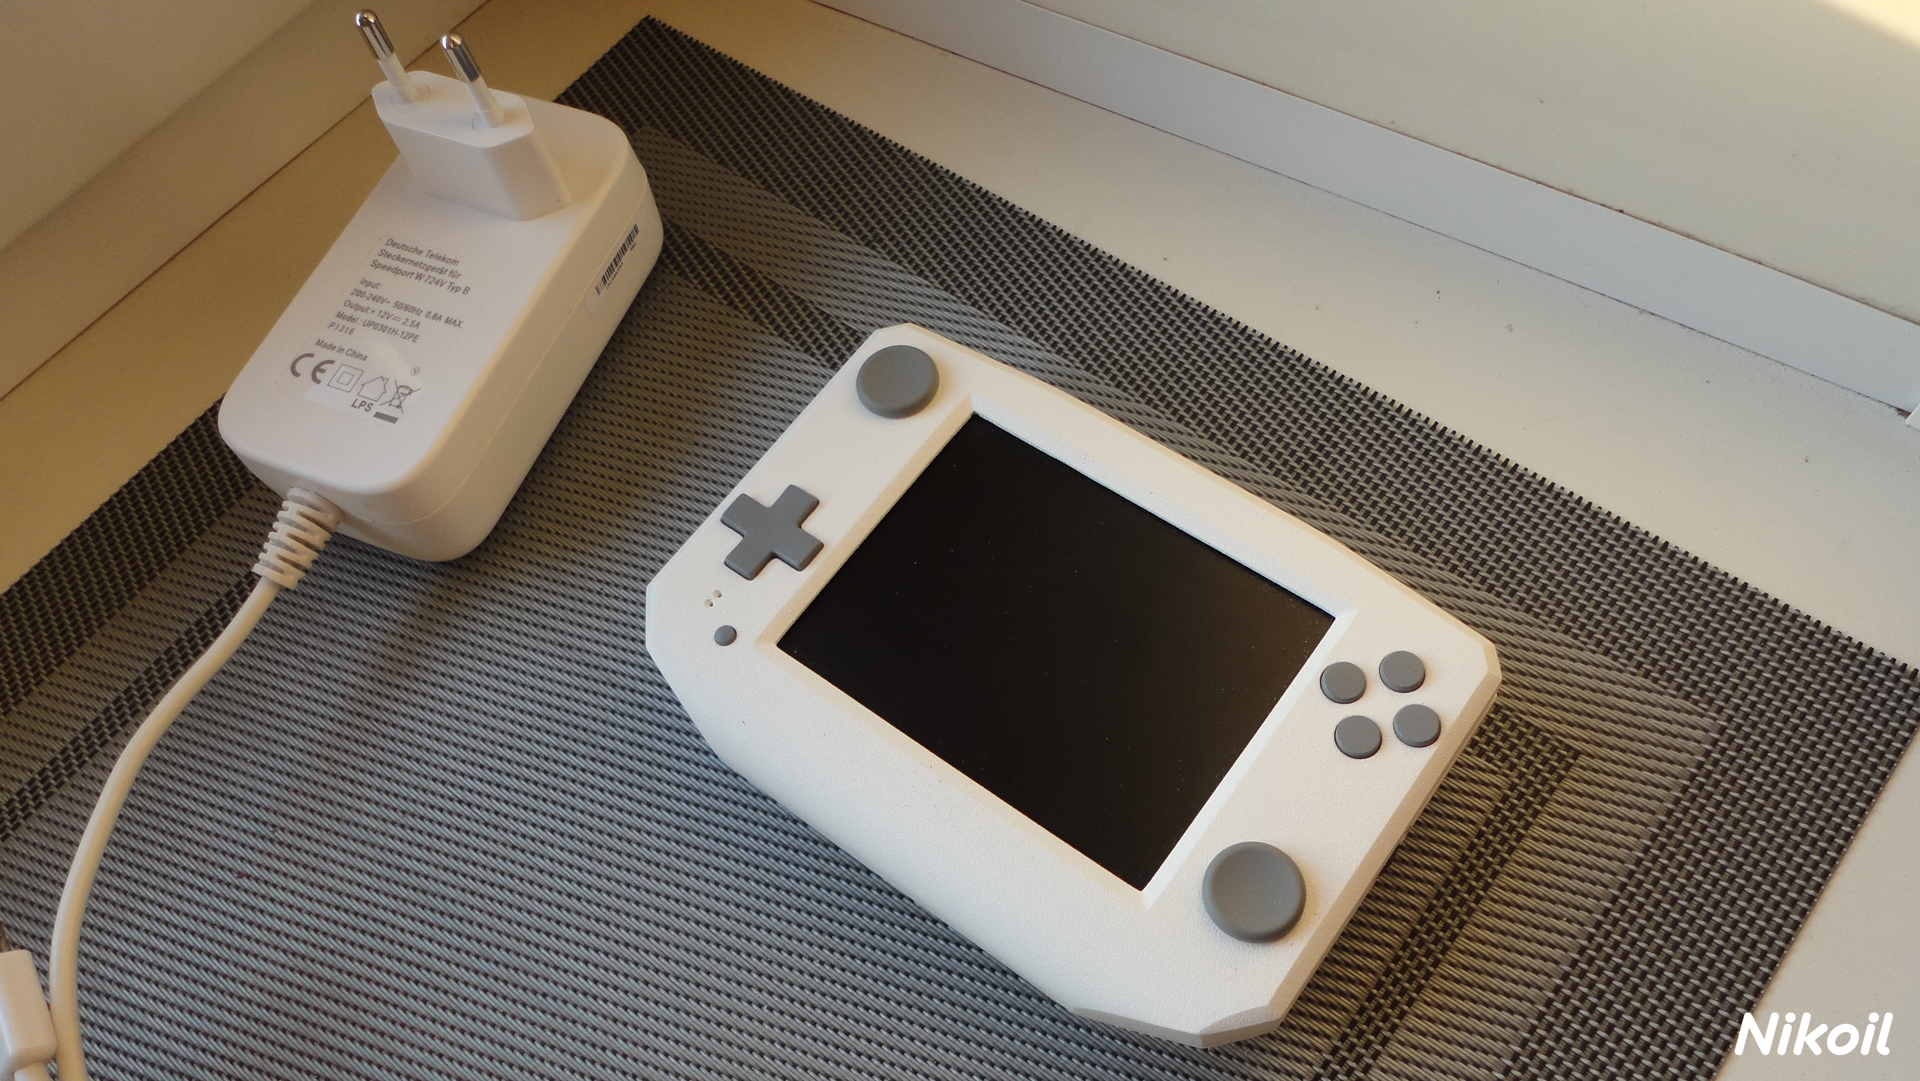
Highlights:
- 3,5 inch lcd
- Wasp Fusion ( wiikey fusion ) with microsd slot
- Sd gecko with microsd slot
- internal memcard
- volume control
- two speaker
- external power supply
About dimension:
- Length - 12,3 cm / 4,8 inch
- Depth - 8,5 cm / 3,3 inch
- Height - 2,8cm (3 cm with buttons) / 1,1 inch
Last edited:
Similar threads
- Replies
- 0
- Views
- 5K
- Replies
- 0
- Views
- 1K